The original Japanese version is available here.
So, since we were able to send emails last time, this time I would like to write about the final chapter of sendmail, receiving emails through sendmail, blocking fake emails through DMARC, and connecting to mail clients through IMAP, in that order. First, in order to receive emails through the sendmail on the server dhcp, you need to adjust the settings of your ISP router. For IPv4, you need to transfer the tcp port 25 and 587 of your ISP router’s IPv4 public address to dhcp’s address of 192.168.0.250’s tcp port 25 and 587. To find your ISP router’s IPv4 public address, you can use various websites (such as searching for “myip”) or retrieve it using the curl command. This is how it works. The IPv4 address obtained from the browser on your windows PC usually matches the typical IPv4 address because PAT (Port Address Translation) technology is often normally. Therefore, all devices connected to the internet through the same ISP router in your home typically use the same IPv4 address. The main reason for having to do this is because of the depletion of IPv4 addresses. For example, there are 64K ports available for use as tcp ports. So, by managing the source port used in the ISP router, you can share one IPv4 address with more than 65,000 devices.
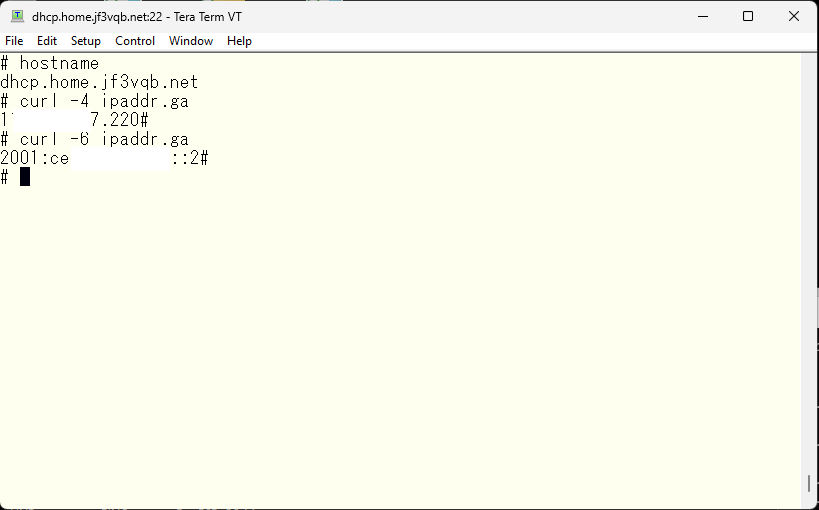
On the other hand, even public addresses are used inside the ISP router for IPv6 addresses. Originally, IPv6 addresses were created to escape from the exhaustion of IPv4 addresses, so it became possible to obtain a sufficient address space without using makeshift methods like PAT. While IPv4 addresses have a length of 32 bits, IPv6 addresses have a length of 128 bits. The address length is only four times as long, but the number of addresses can be defined as two to the 96th power [128-32], which is almost infinite. Therefore, concepts like IPv4 private addresses created due to a shortage of addresses do not exist in IPv6 in the first place. As a result, the addresses obtained by using “ifconfig” without using “curl” and others, are public addresses for IPv6. That’s about it.
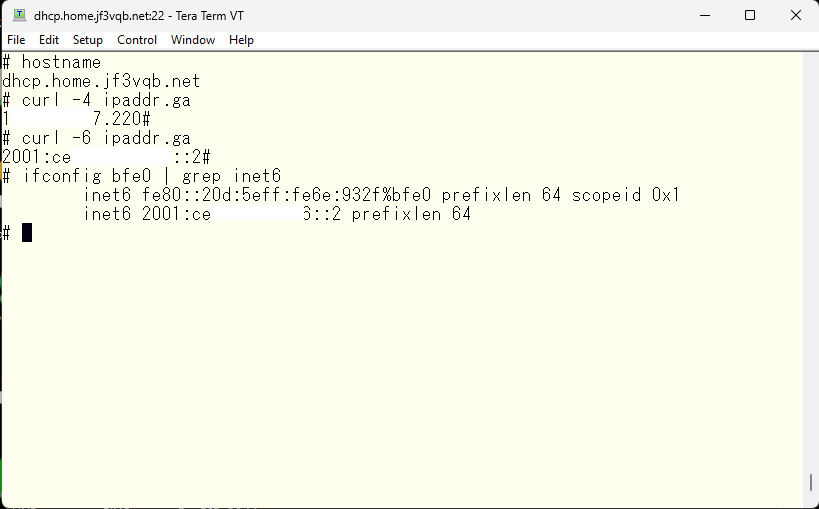
If you specify a physical interface in ifconfig, the IPv6 address obtained will be a link-local address starting with fe80. This address can only be used within the same network segment that the interface is connected to. Another address starting with 2001 (in my case, using my ISP) will be the public address. Client devices such as Windows also have a public address called a temporary IPv6 address, and connections are usually made from this address, hiding the original IPv6 address. How luxurious it is! In the case of the server dhcp, it may also be used as a server and the automatically assigned IPv6 address is long, so it is manually assigned to be shorter. Incidentally, the prefixlen of the IPv6 address offered by my ISP is 64, which is equivalent to the IPv4 subnet mask. The prefixlen is 64 bits, meaning that it assigns half the address space of 128 bits to one person, and within that, you can use addresses freely. This means that one person can use the address space of 2^32 times the entire IPv4 address space, so you can see that there’s no need for a makeshift solution like PAT. 🙂
Okay, getting off track there, but these IPv4 and IPv6 addresses also need to be registered as MX records with external official DNS, just like internal DNS. Emails will be delivered based on the setting of these MX records. I have registered the MX records with the official DNS, like this.
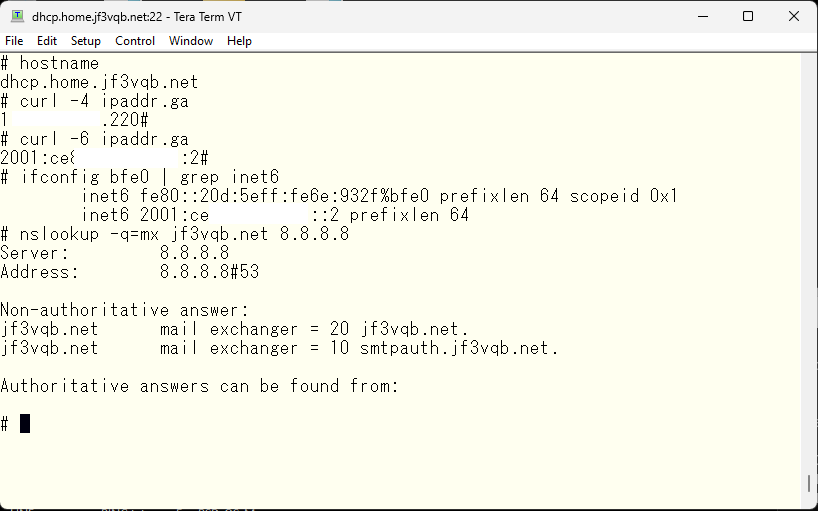
Initially, the MX record for jf3vqb.net was registered with a priority of 10 and was the only one. I added a new record for smtpauth.jf3vqb.net with a priority of 10 and changed the priority of jf3vqb.net to 20. With this change, mail servers around the world will first try to connect to smtpauth.jf3vqb.net. If that fails, they will try to connect to jf3vqb.net. Therefore, smtpauth.jf3vqb.net becomes the primary SMTP server and the jf3vqb.net provided by the ISP is used as a secondary or backup server. The addresses are as follows. The information obtained from a query to google DNS is what general mail servers get, while the other is what clients within the home network get. The IPv6 address is the same, but the IPv4 address is different.
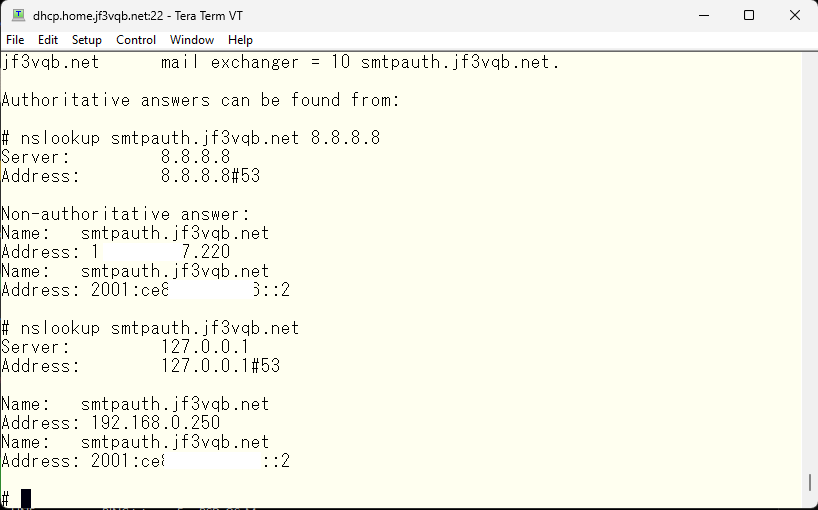
The machine name smtpauth.jf3vqb.net can be used both in the home network and on the internet, and the different addresses are for the IMAP client connection to be tested later. By making it accessible through the machine name smtpauth.jf3vqb.net, network equipment will only understand IP addresses, but DNS will provide the appropriate IP address depending on where it is currently connected. Already, it is assumed that IPv4 port forwarding in the ISP router and IPv6 pass-through have already been set up. We will try connecting to the port from a server on the internet that is hosting to see if it can connect.
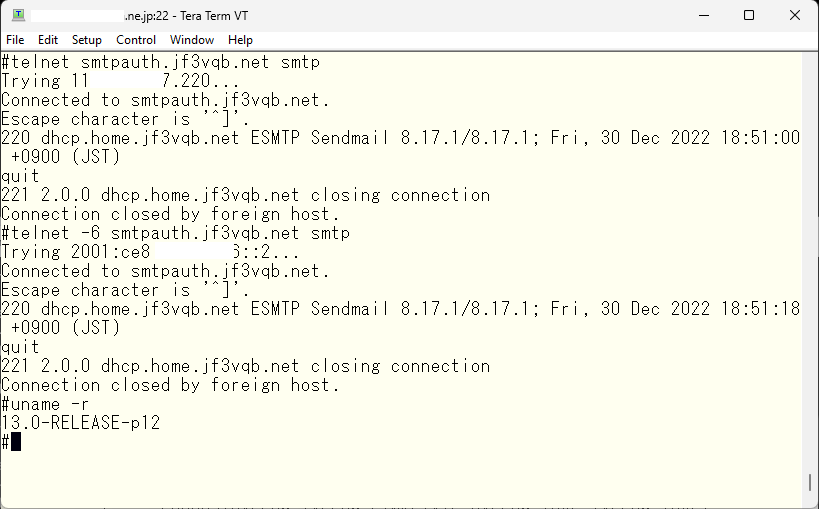
Both IPv4 and IPv6 have the familiar name of the server dhcp. By the way, the server I connected as xxxx.xxx.ne.jp:22 is jf3vqb.net’s SMTP server, which is the regular SMTP server that handles sending and receiving email. Therefore, the SMTP port is not blocked. By the way, the OS is FreeBSD 13.0. Now, when email is sent from outside, it is already connected to the sendmail on the server dhcp. Let’s take a look at the email log.
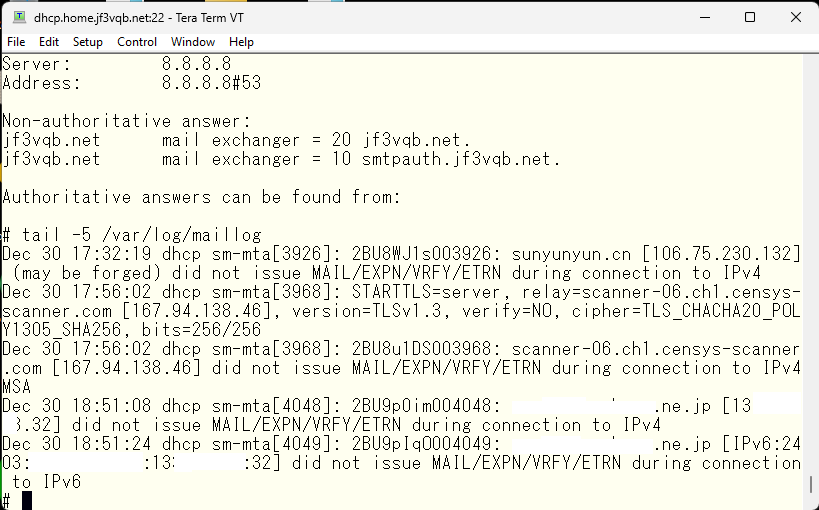
The last two are tests of IPv4 and IPv6 connections from the server I’m renting. In addition, many scanners are circulating. I don’t like connections from .cn 🙂 If you don’t understand what you’re doing when changing the settings on your ISP router, I recommend not doing anything, and you will understand the reason. I’d like to try sending an email from gmail.com as a test. Already, the MX record priority for the server dhcp is the highest, so the email should be delivered directly. And it has arrived.
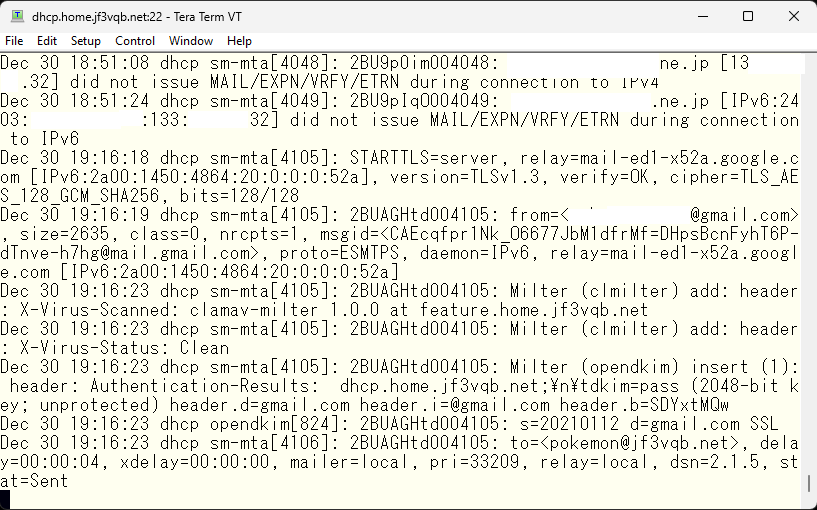
The email itself looks like this.
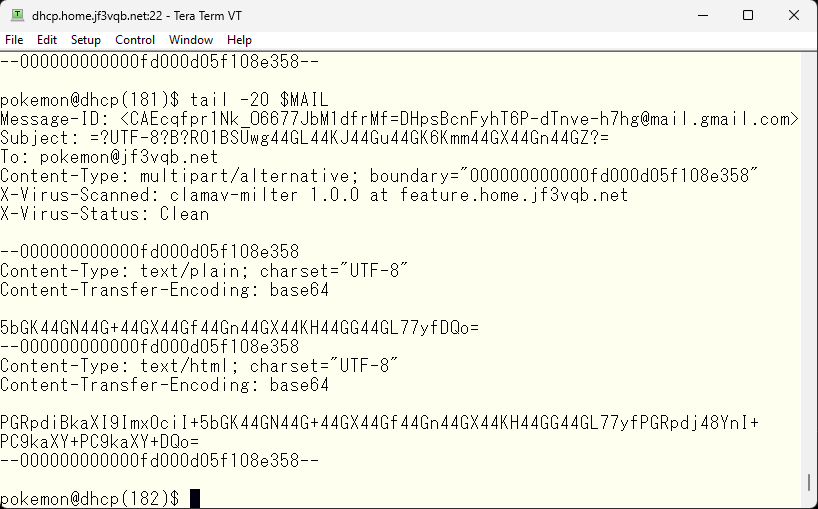
Um? What did I write? Here it is 🙂
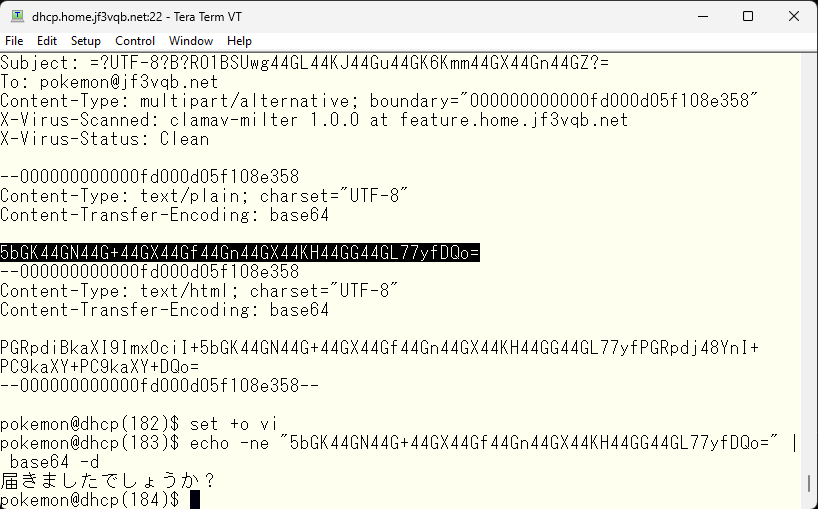
The text is encoded in base64 with UTF-8 character code. So, by following the reverse steps, you can see what the original was. If you decode the string in base64, tera term can understand UTF-8. This confirmed that the email can be received. Next, I want to try DMARC to prevent fake emails. For software that can be used as DMARC, I would like to use opendmarc. I can also think of other things like Amavisd SPAM filter, but it is more of an image as a SPAM filter, so I want to use opendmarc so that I can better understand the processing of DMARC. I will compile it with one ‘make’ from the ports directory.
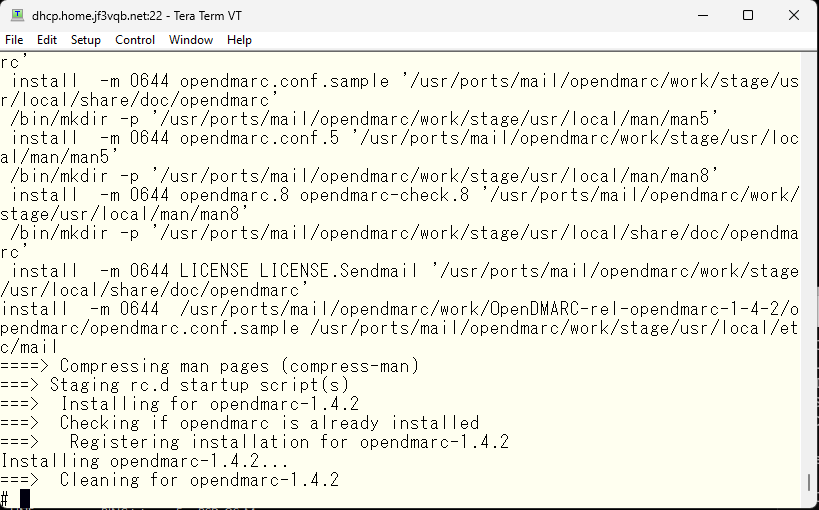
No messages were shown during the installation process. The configuration file is located in /usr/local/etc/mail, similar to opendkim. After removing comment lines and blank lines, it was empty. So I will refer to the man pages for opendmarc and look at the online documentation. It just needs to check the SPF information and DKIM information and if there’s a problem, It just needs to give instructions to control sendmail using the MILTER interface according to the DNS instructions, so perhaps detailed documentation is not necessary. Let’s get started now.
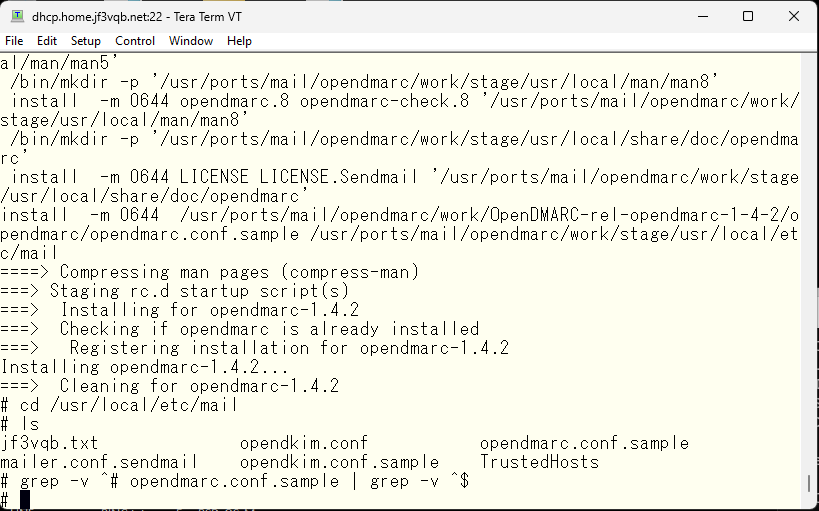
This is the state immediately after installation. There is only the opendmarc.conf.sample file that was mentioned earlier. We will copy it to opendmarc.conf and edit it. First, we will change it based on the comments in the file. We will specify if it really needs to be isolated when it is caught by the DMARC check and specified in DNS. Of course, we want it to be isolated 🙂 That’s the purpose of DMARC.
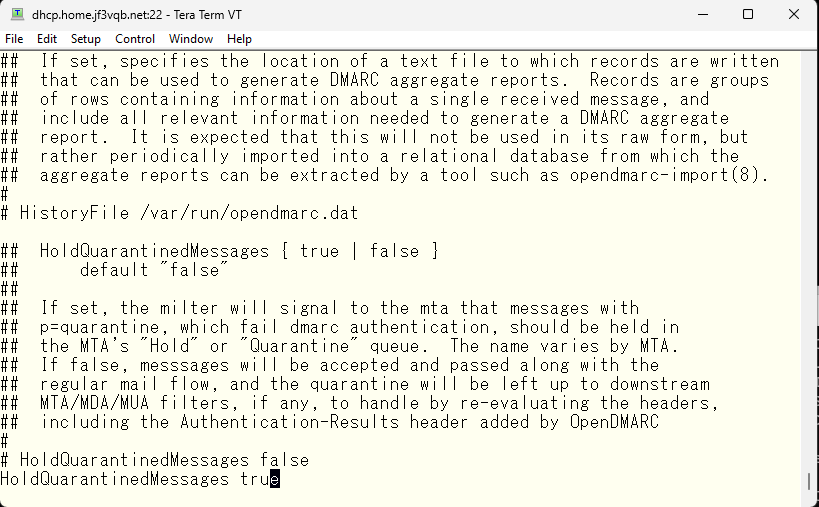
Similarly, specify whether to really reject emails that are specified in DNS to be rejected. Of course, I want it to be done so.
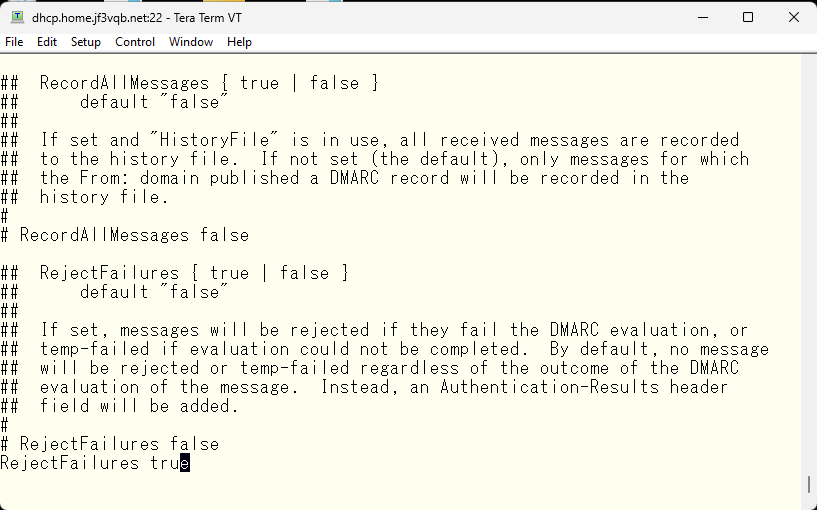
Please reject any suspicious emails, such as those with multiple addresses with different domains in the From field.
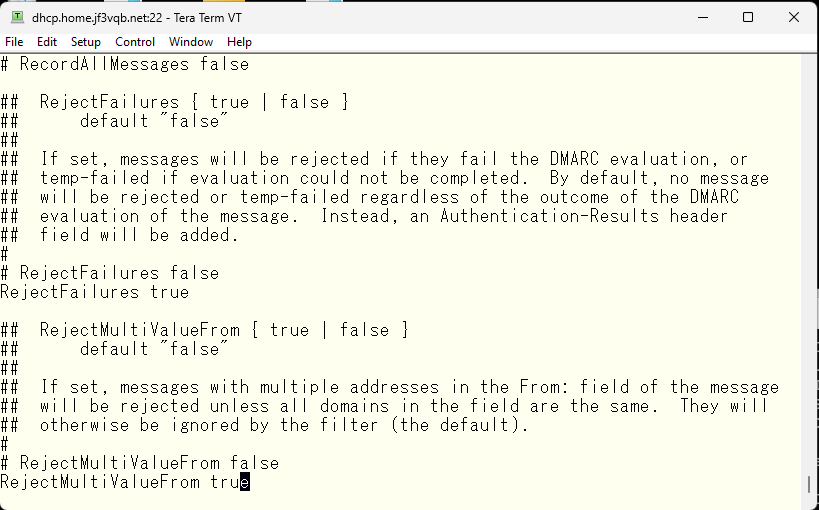
Should emails with unusual message formats that are not defined in RFC5322 be rejected? Yes, please.
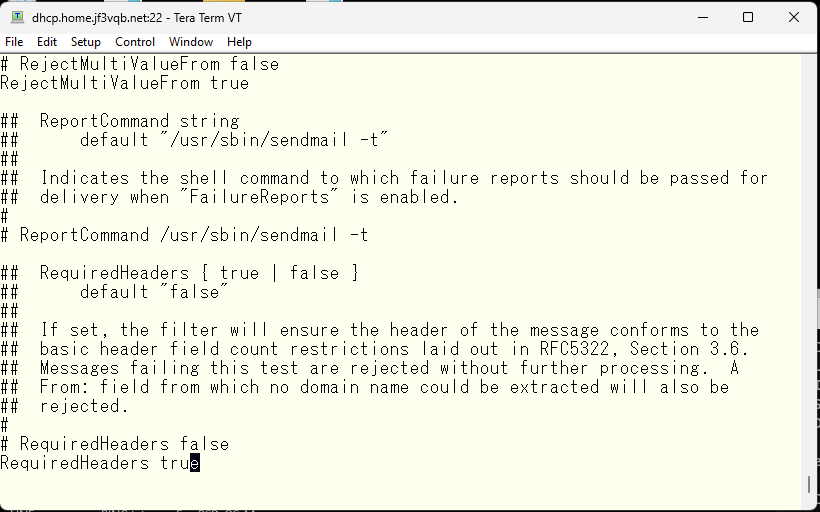
Do you trust the SPF check headers added by other sites? No 🙂
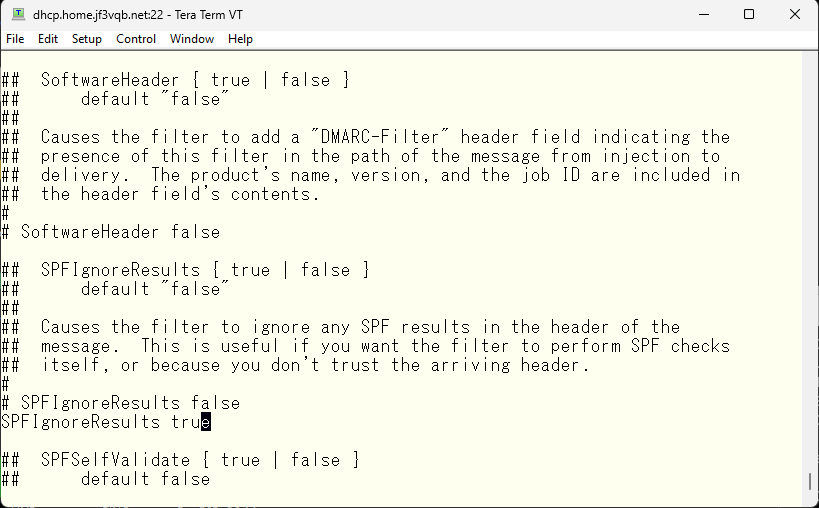
So, do you perform the SPF check yourself? Of course, we do.
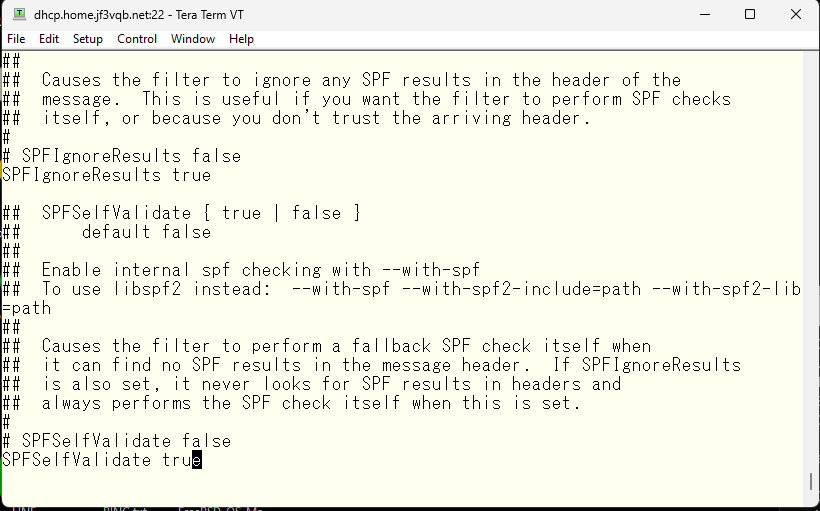
Do you trust syslog? Yes 🙂
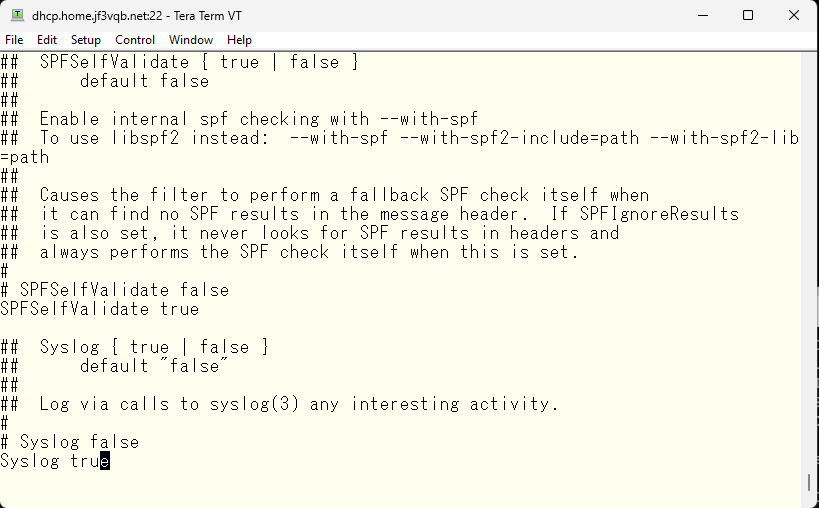
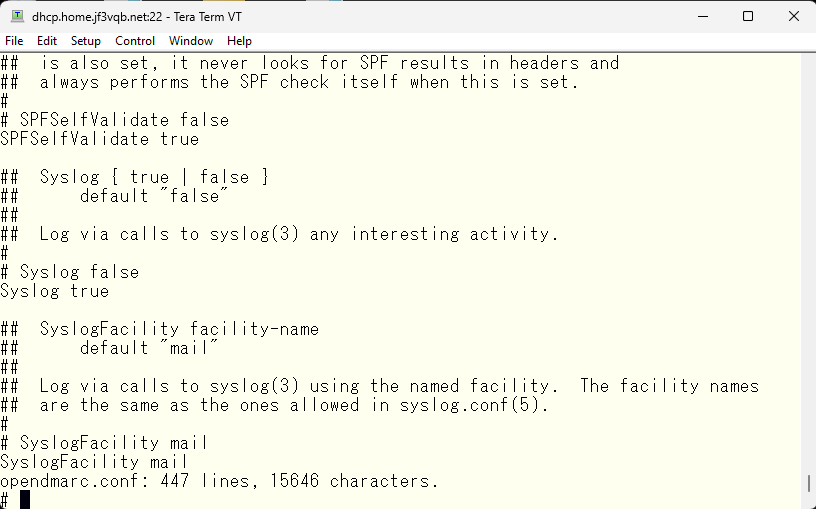
The facility for syslog is fine with the default of mail. This seems to be the default.
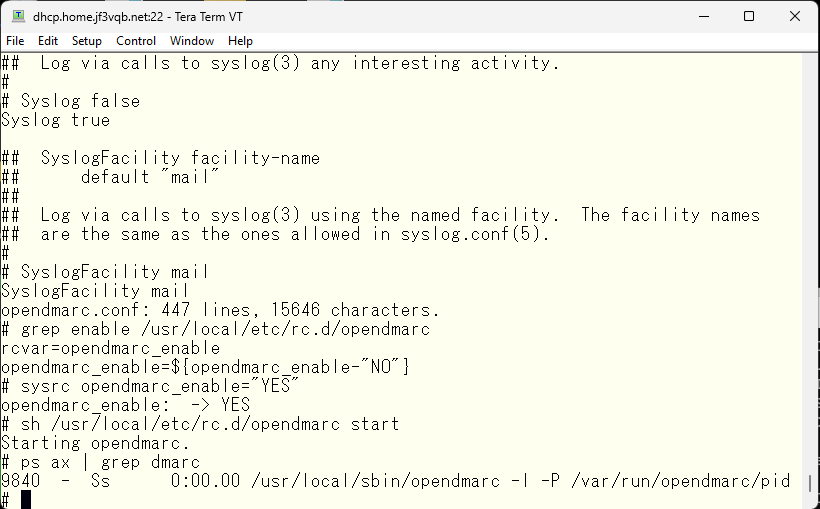
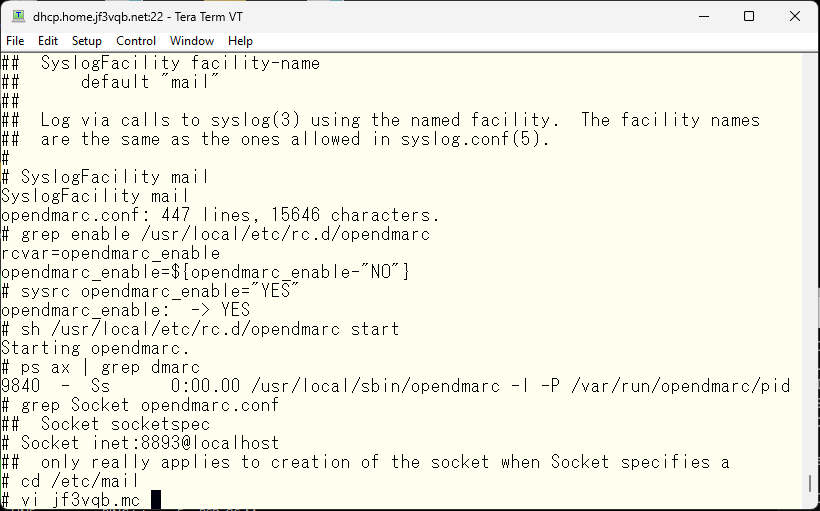
Let’s start it right away. Check the startup file, add any necessary variables to /etc/rc.conf, and run the startup script. If opendmarc is running like this, it’s good to go.
So, how do you use DMARC from sendmail? During the editing of the opendmarc.conf file, the topic of the MILTER interface will come up. So, let’s check the specifications of the socket interface and add the MILTER interface setting. Edit the original configuration file for sendmail.
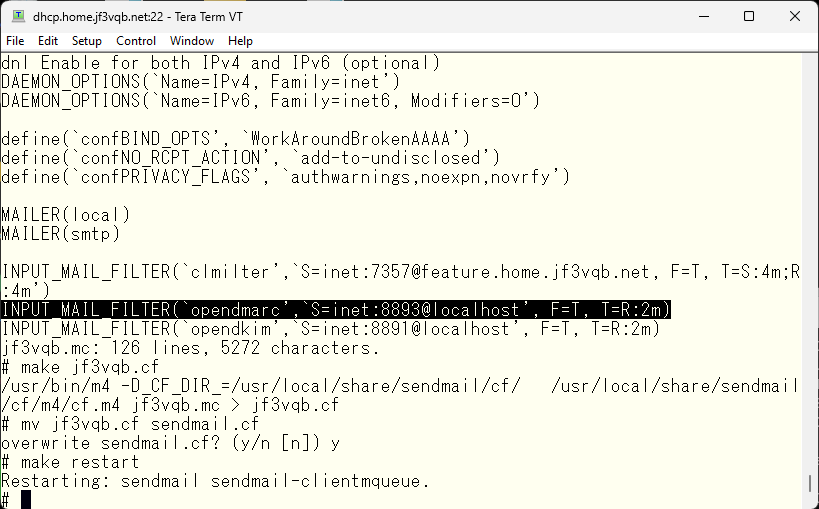
And, add it similarly to the configuration of other MILTERs, create a sendmail.cf file, and restart it.
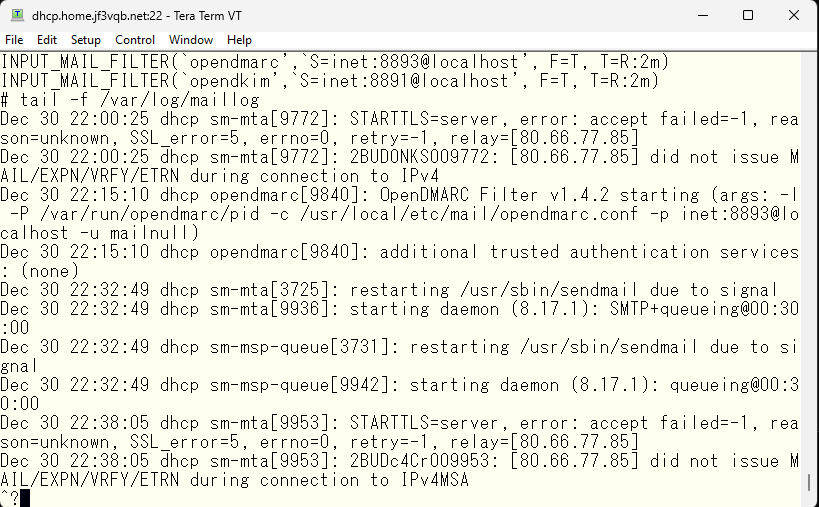
Let’s test it by sending an email and see how it works. By the way, I’ve been scanned while writing this article, so please be careful. Just opened the port just before 🙁 🙁
Getting back to the topic, let’s send an email from gmail.com. The message has increased, so I’ll introduce it in two pages.
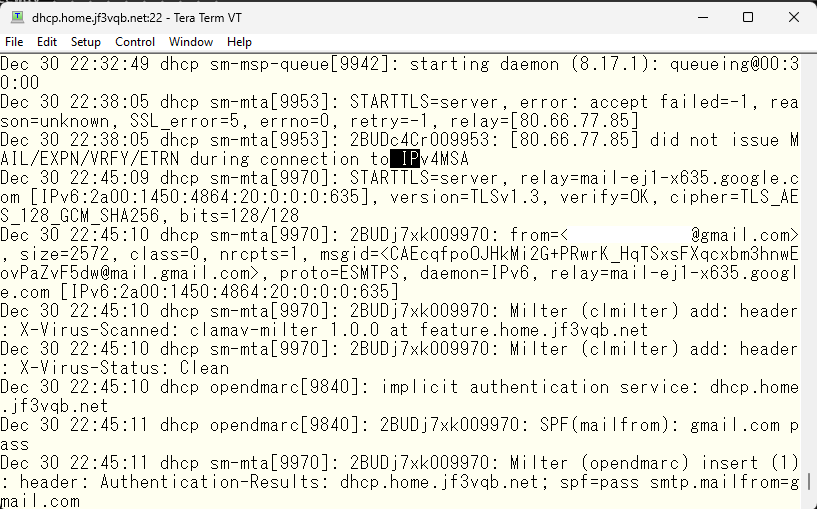
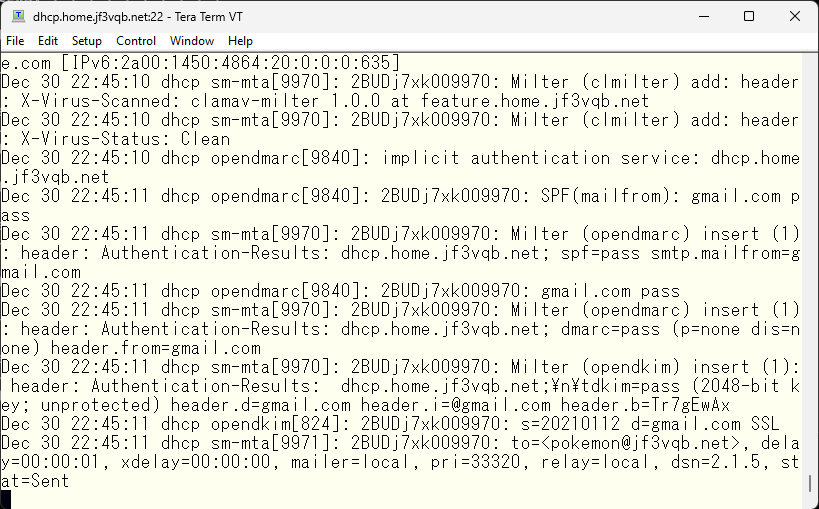
It seems like the connection was made using IPv6. The results of the SPF and DKIM checks from gmail.com were carefully checked and DMARC passed. In the last line, it is stated that it was relayed to the local mailer and the status is “sent”. It looks like there is no problem. Now let’s try sending a fake email using telnet. We’ll take a random DKIM signature from somewhere and try it. Here is how it looks like. This is also a bit long, so it’s on two screen shots. By the way, this test was done from a FreeBSD in Azure US that has nothing related to the jf3vqb.net domain.
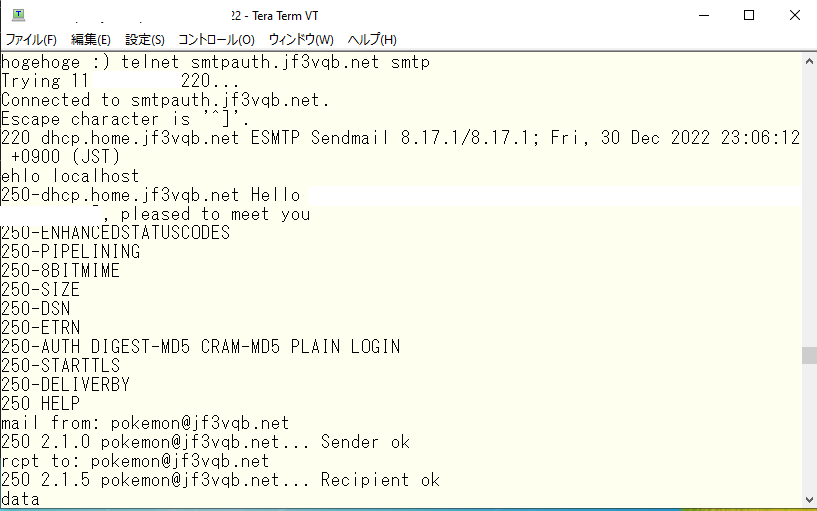
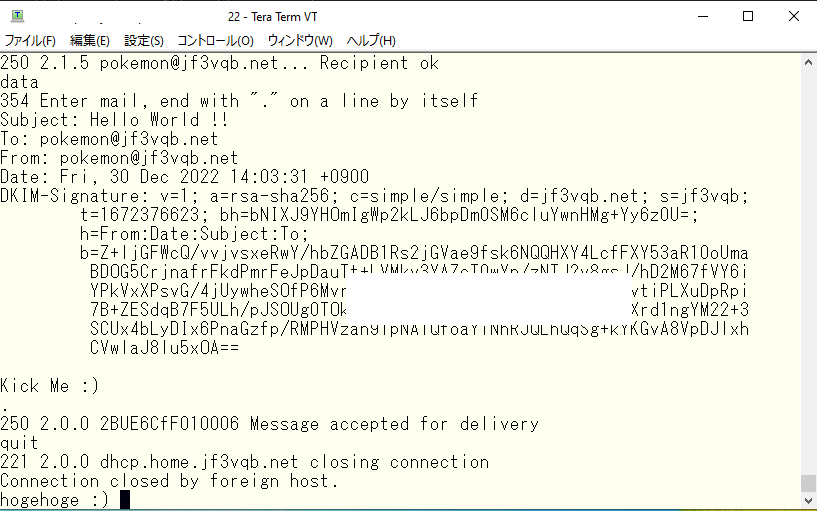
It appears that the delivery was successful. What does the log look like on the server dhcp?
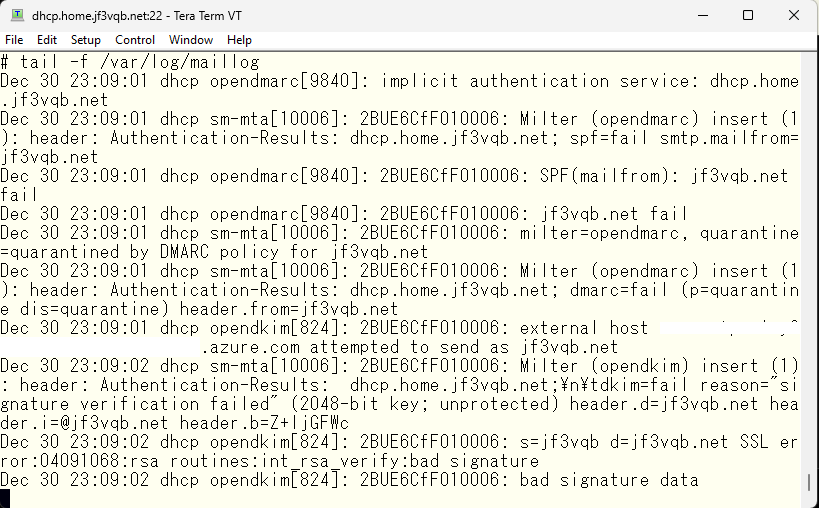
Both SPF and DKIM show as fail, so based on the DMARC DNS setting of the jf3vqb.net site, it has been quarantined. Let’s check if it really was quarantined. The last email is a test email from gmail.com sent before the fake email.
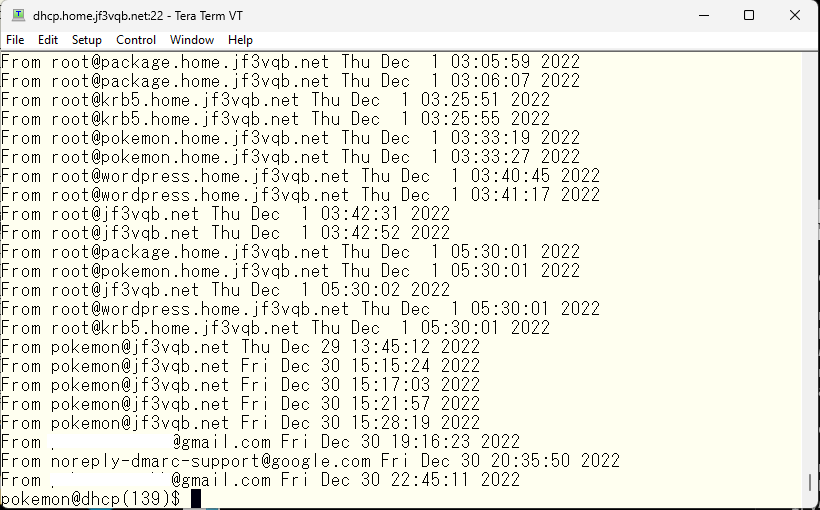
So, what happened is that it was isolated here.
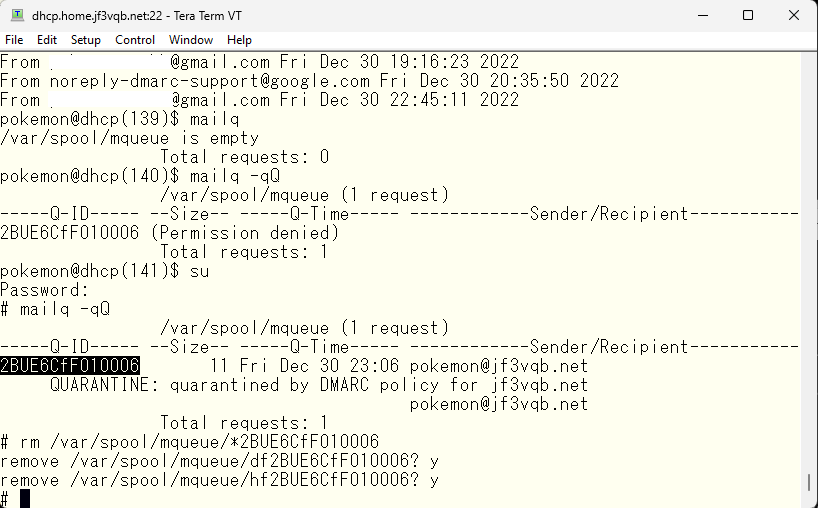
As you can see, the email is quarantined here. The emails that have accumulated here are either ClamAV-quarantined emails or emails that were caught by DMARC in the case of the server dhcp. Don’t bring them to your Windows PC to check their contents, as you will get infected :).
I had wanted to install IMAP and use a mail client to send and receive mail, but I have asked from my wife for a housecleaning, so it’s uncertain whether I can finish it by end of this year. Just in case, have a happy new year everyone !!
Even though the new year has not started yet, I have some free time now, so let’s move on a little bit. Looking at the email logs on the server dhcp, there are some emails that DMARC check failed.
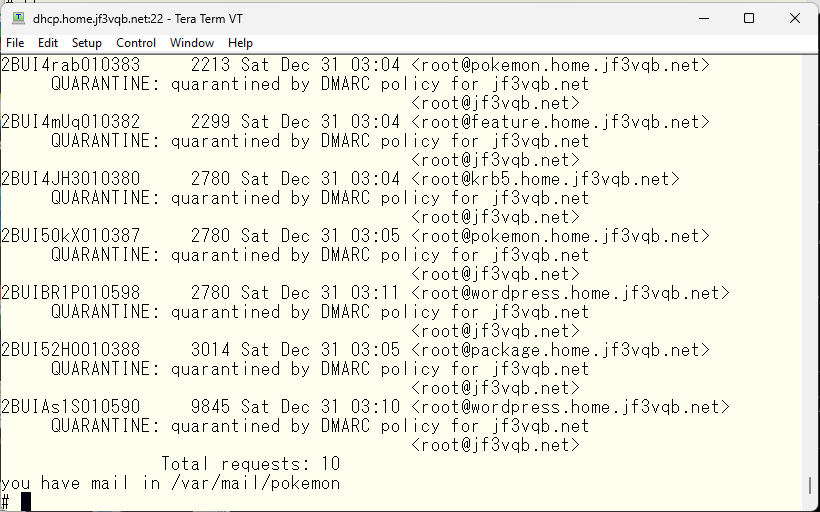
Our FreeBSD colleague’s emails got blocked. Let’s create a whitelist. It will be exactly the same as the opendkim file, so we’ll just specify we used in the opendkim directly.
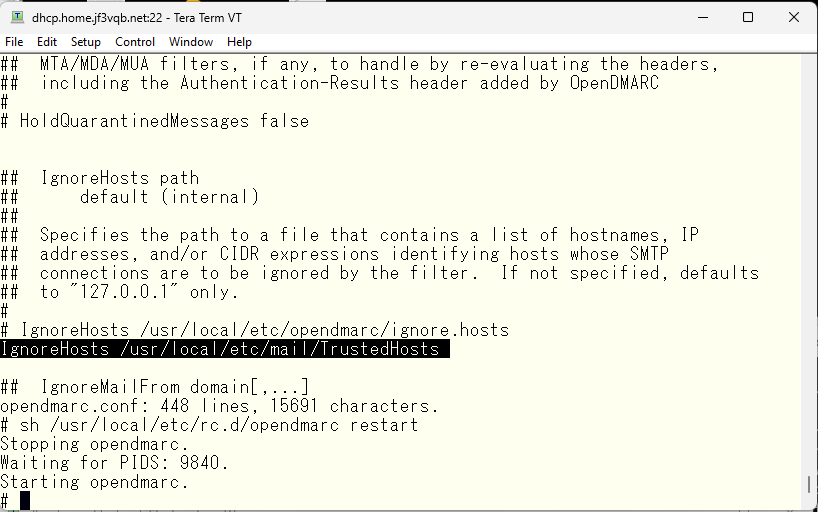
This should not be blocked now. We will make changes as needed. Now let’s make IMAP usable. Let’s check the ports tree. There seem to be several options, but cyrus-imapd looks popular, so we will install the newest one.
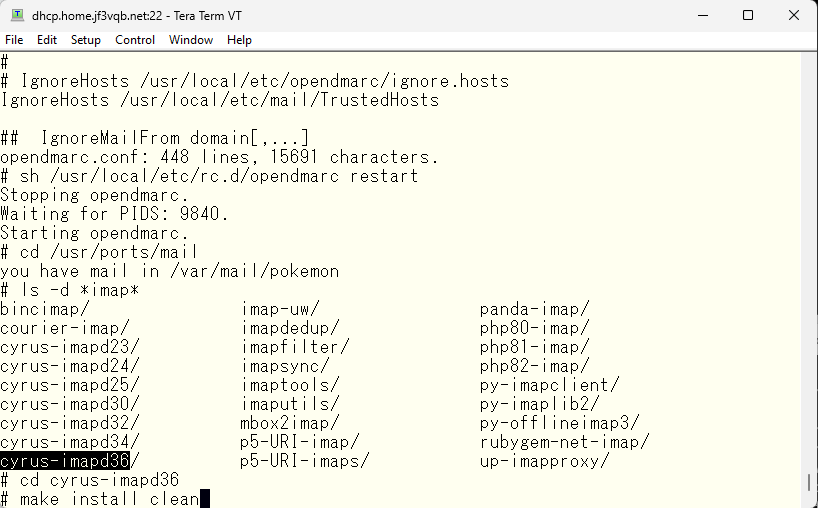
Let’s make it in one go 🙂
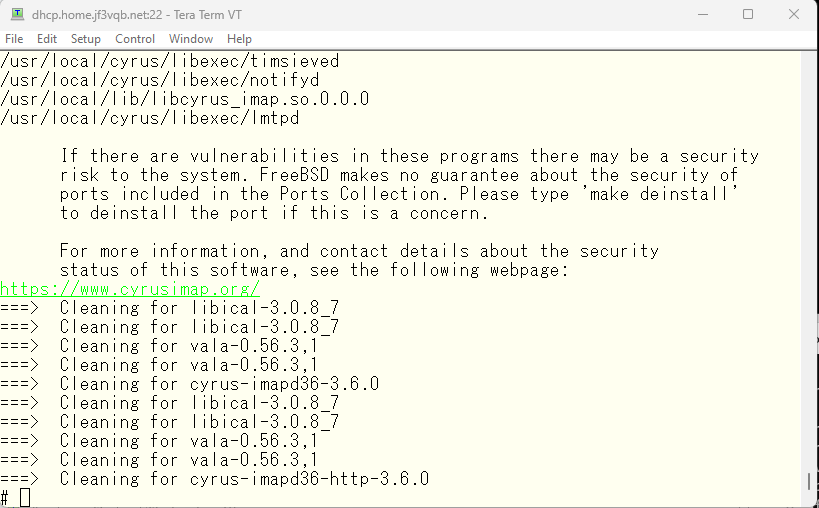
Let’s check the message displayed during the installation. It should be located at just upper. Let’s scroll up. The configuration also seems to be easy. It says “just change the imapd.conf and run mkimap”.
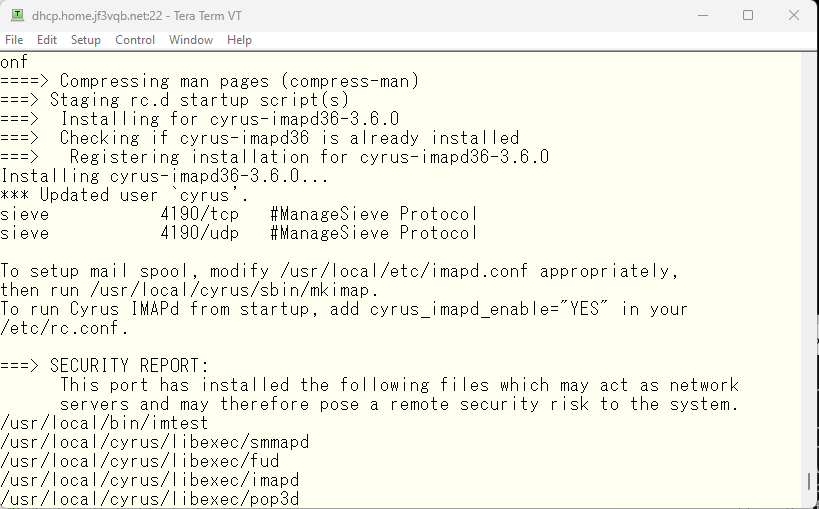
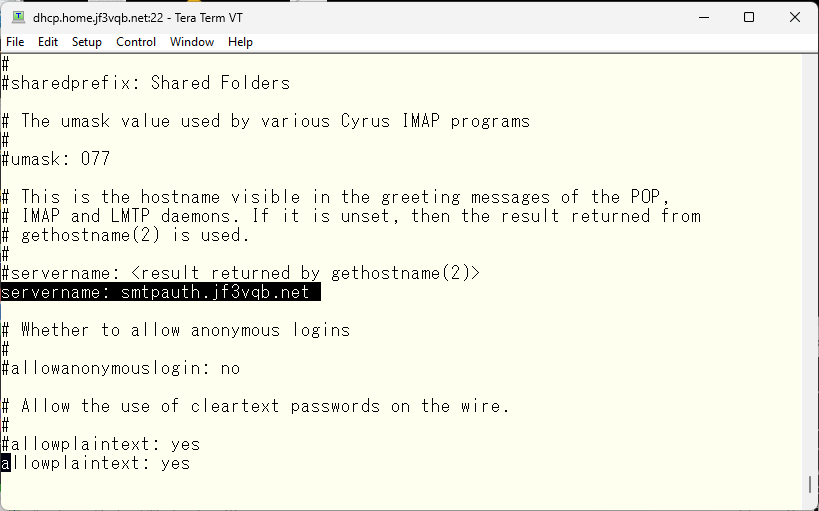
Now let’s modify the imapd.conf file step by step. We’ll use the UNIX style separator ‘/’.
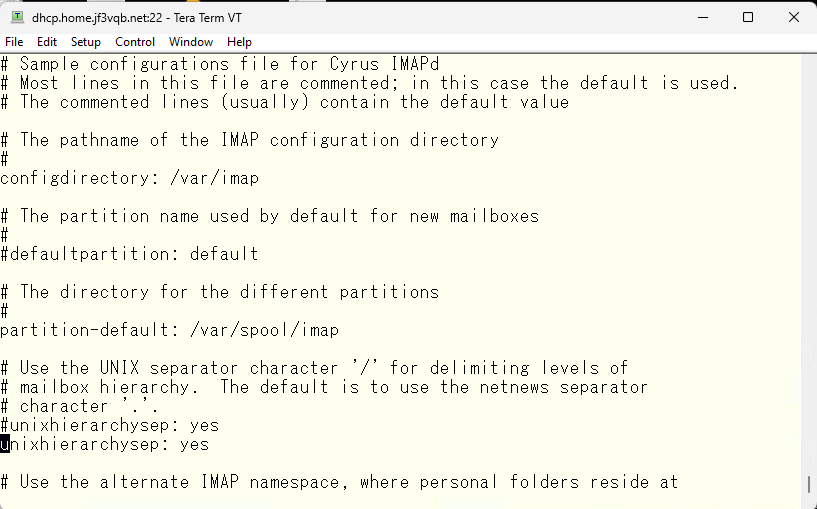
We will use smtpauth, which was previously registered in DNS, as the server name. We will encrypt it using TLS, so plain text password is also okay.
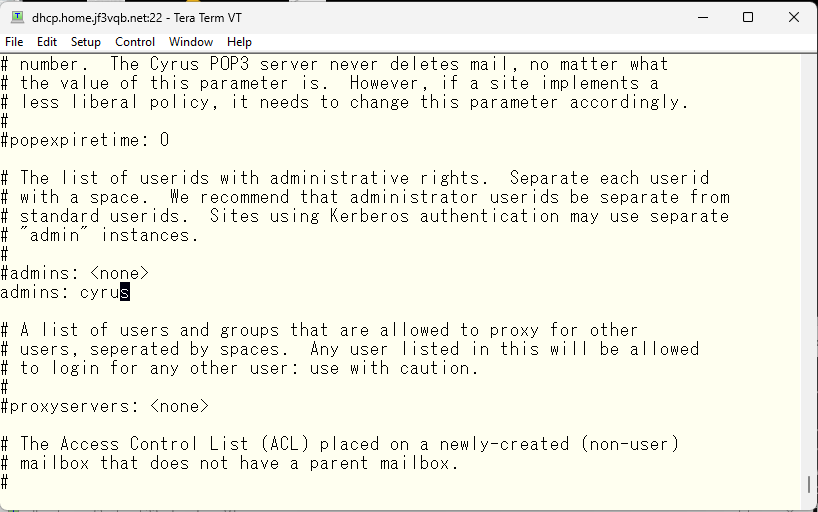
The administrator account will be named “cyrus”.
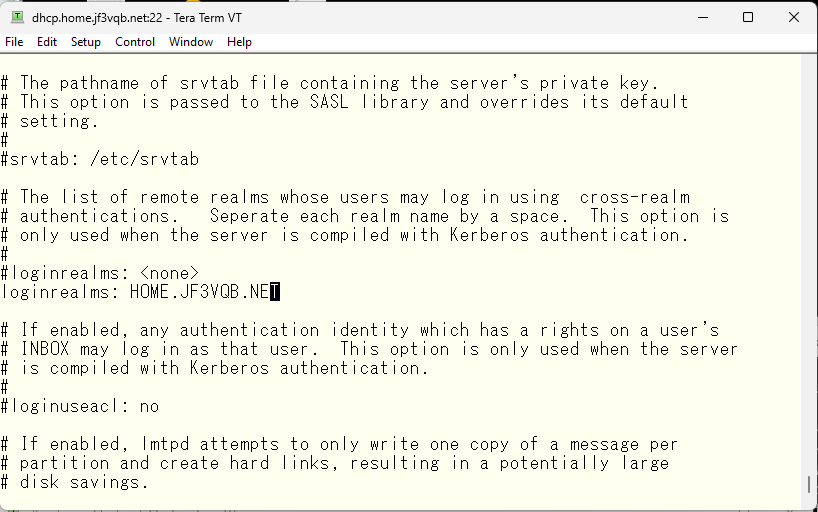
I’ll also set the realm in case we use Kerberos.
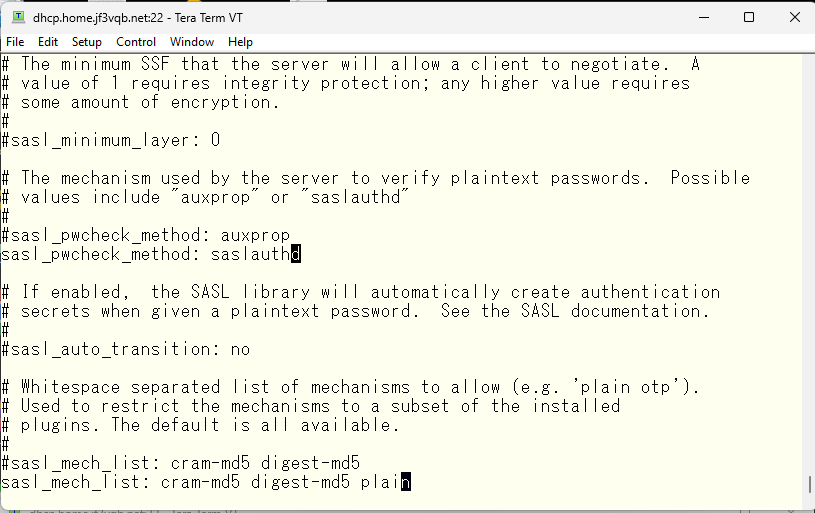
We will use saslauthd, which is used with sendmail, and also enable plain text authentication.
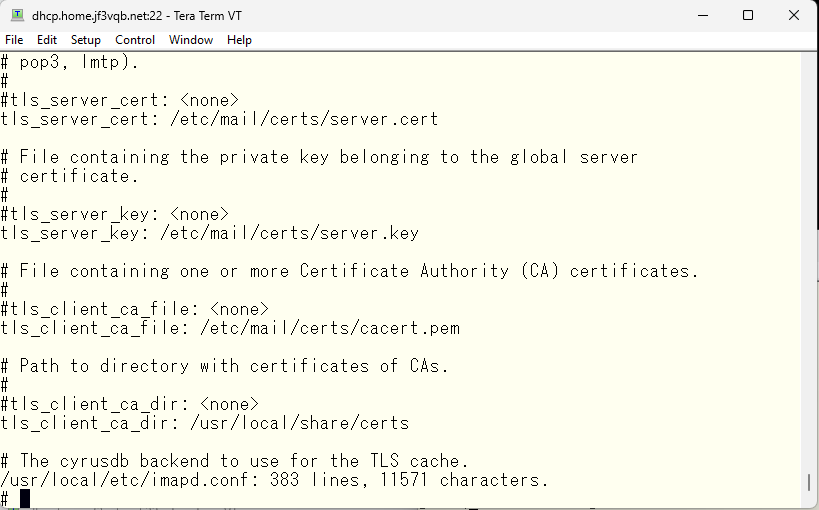
Finally, specify the TLS certificate. Although it appeared with the name ‘dhcp’ in sendmail, I’d like it to appear with the name ‘smtpauth’ in imap, so I’ll create the certificate with the name ‘smtpauth’. For now, I’ll specify them as ‘server.*’. The root certificate is common with sendmail, so I’ll specify the directory that contains the root certificate created by ‘ca_root_nss’ as the directory for the CA file.
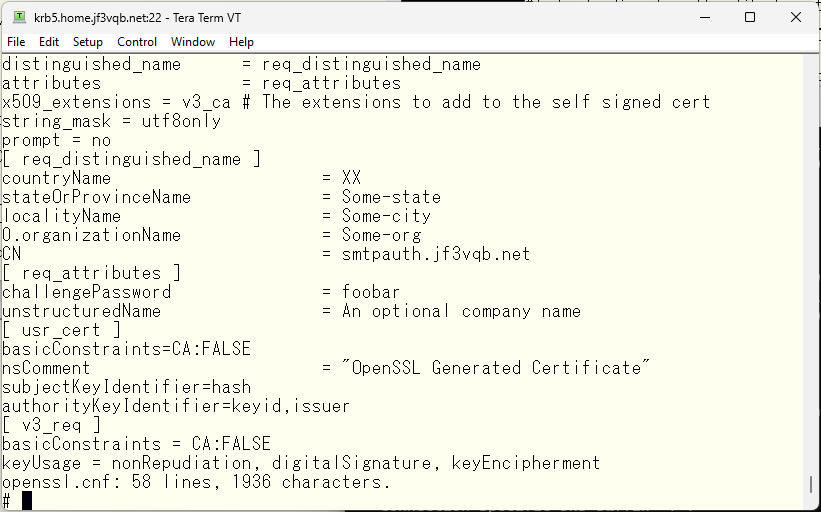
Next, create the certificate for smtpauth. The certification authority was created on the server krb5. First, edit the openssl.cnf file and change the machine name to smtpauth
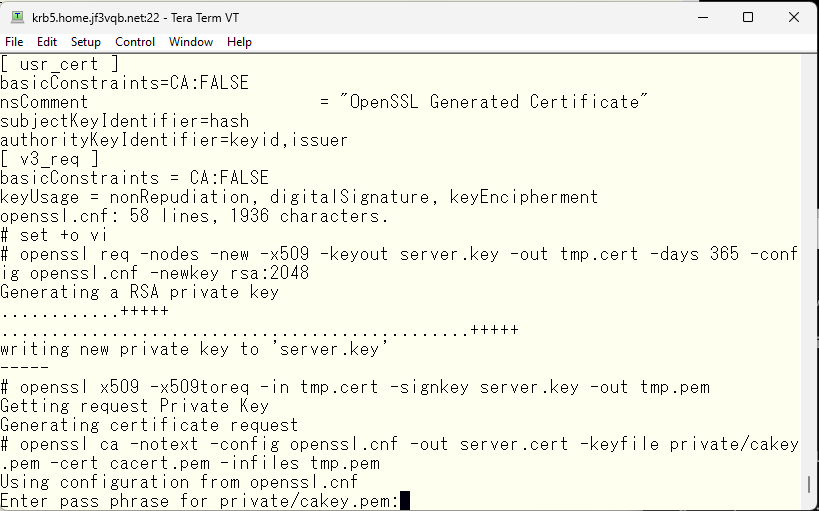
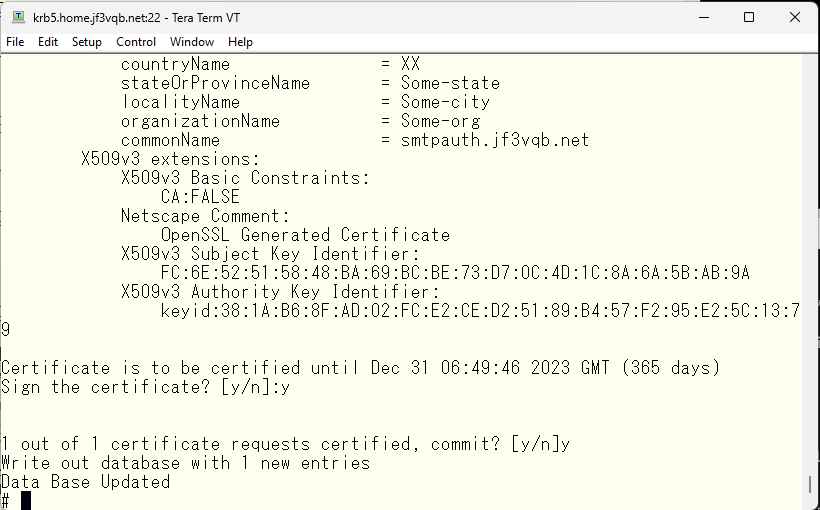
Then, create the certificate for smtpauth and sign it with the self-signed certification authority.
Proceed once you’ve confirmed that the host name is correct.
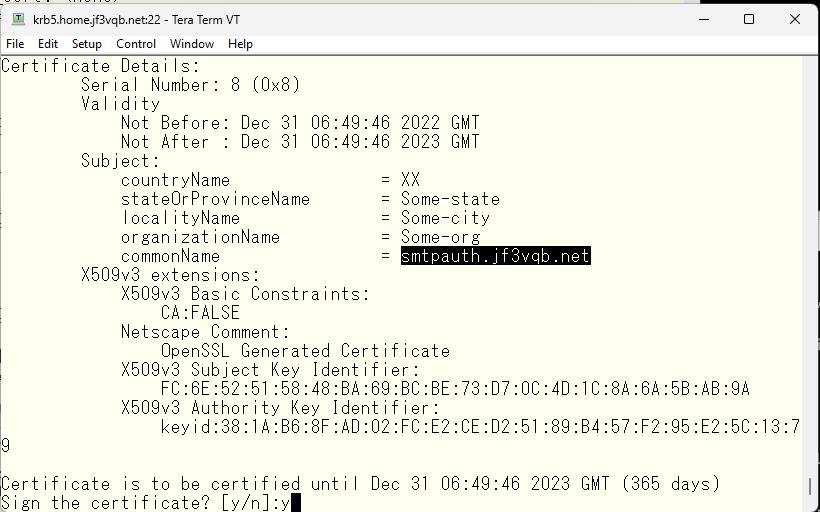
Completed!
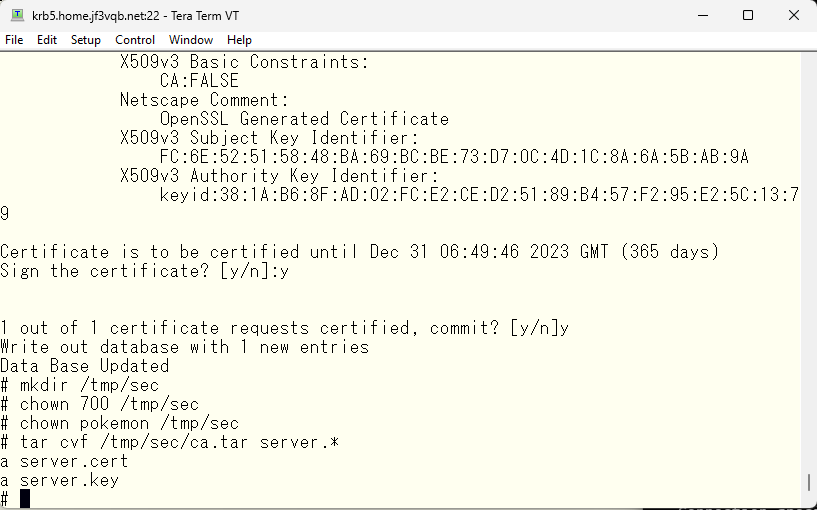
Prepare to bring the files to the server dhcp while being mindful of security.
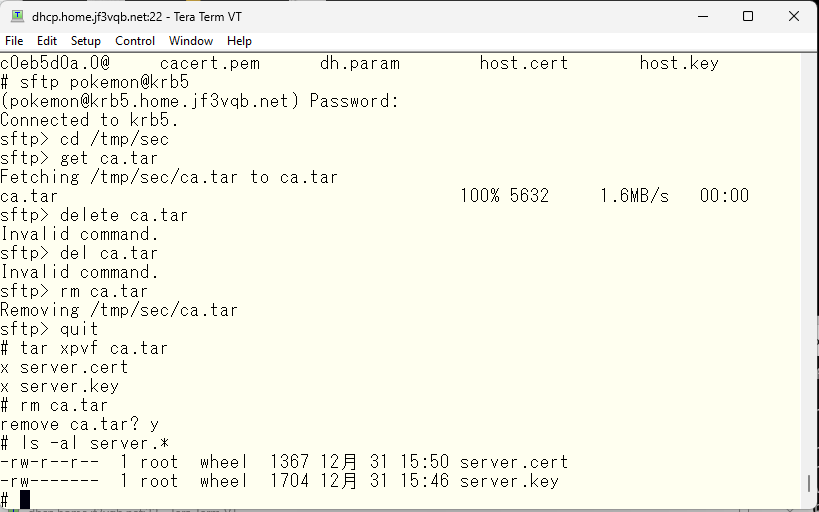
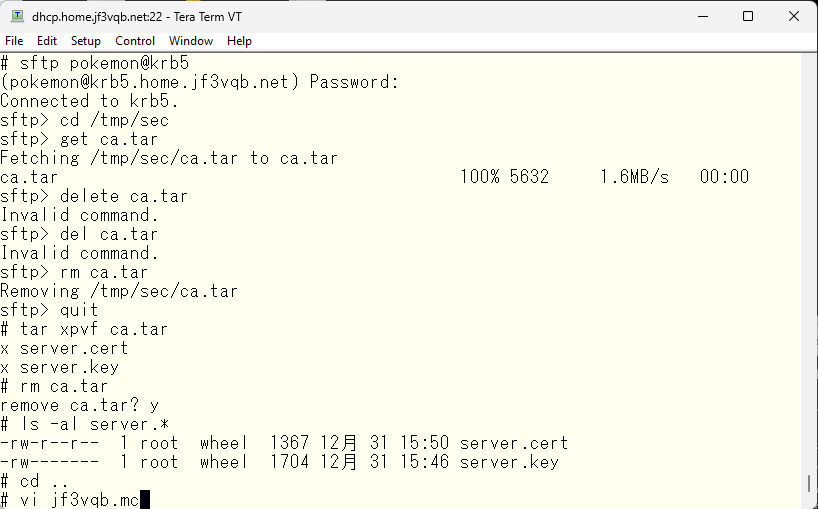
Bring it to the server dhcp.
First, we will replace the server certificate with the one we just brought, so that sendmail also responds as smtpauth when it operates as a server. We will edit the original file of sendmail.cf.
Replace the server certificate with the one that was just copied and rebuild the sendmail.cf, then restart sendmail.
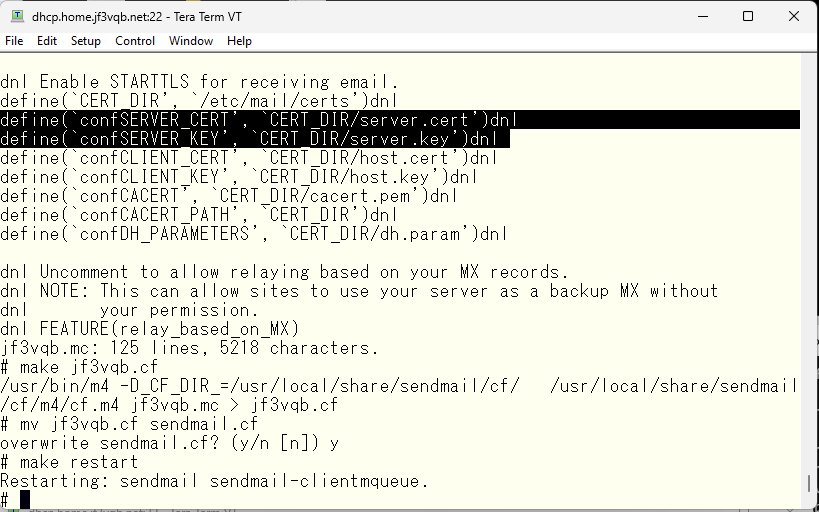
Check the logs for any errors. We are still under attack 🙁
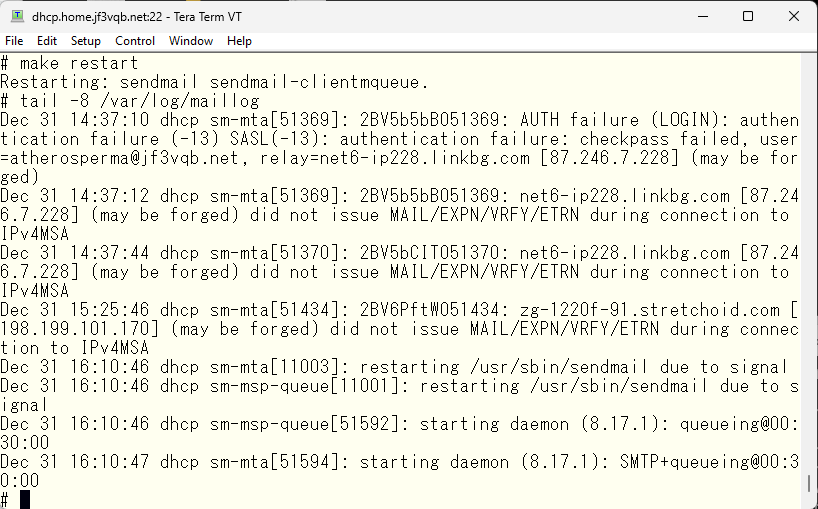
Now, let’s start the imapd. According to the manual, the imapd is supposed to fork from the master process. It seems to work like an inetd dedicated to imapd and ipopd etc.
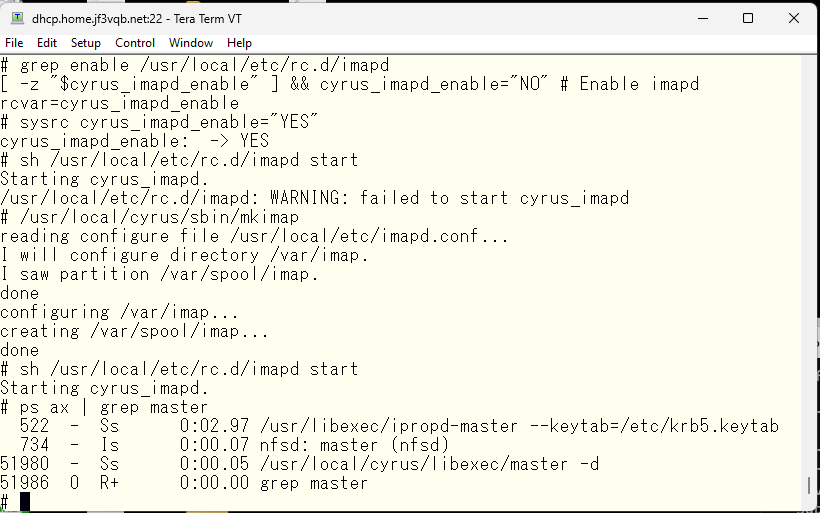
We can see that the ports related to pop3 and imap are open
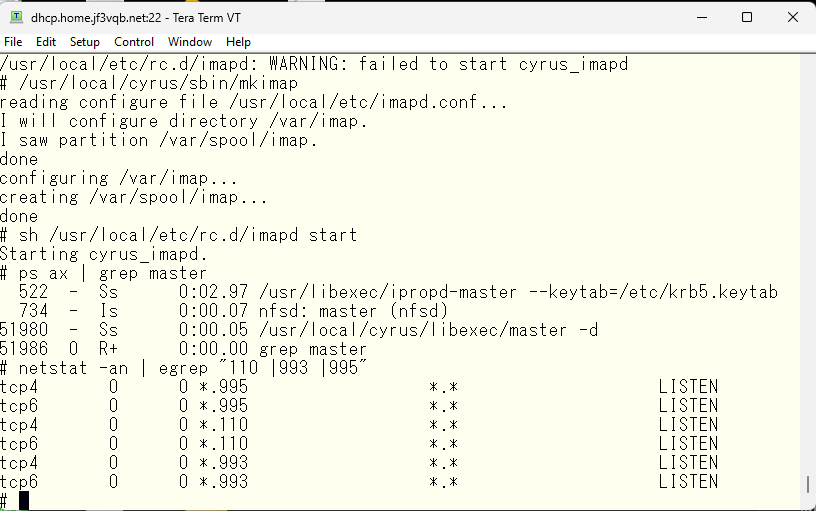
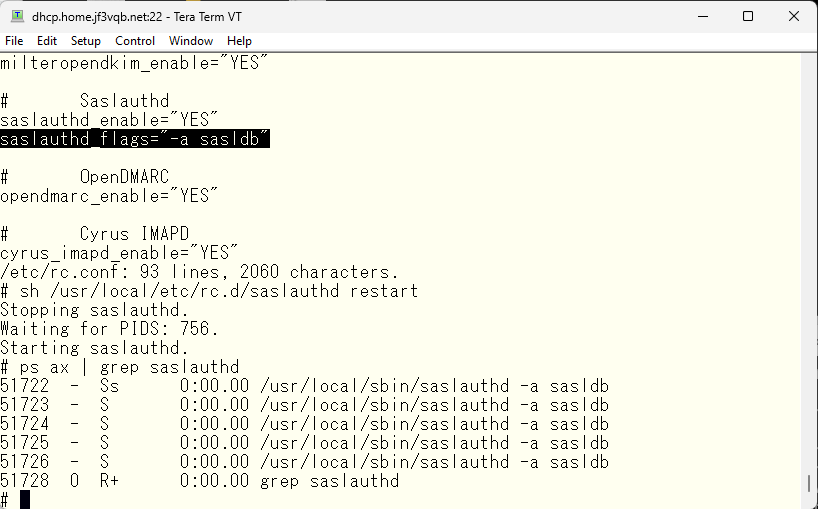
Now I have a thought. When I originally wanted to use the SMTP auth in sendmail, I thought of using the password of the user created in the OS. But considering that I have been attacked so much, I realized that it would be better to have a complex password. I would like to use saslauthd as it is, but I want to change the password database from PAM to SASLDB. That way, login can be done with a relatively simple password that is usually used, and the password stored in the email client can be a password with maximum complexity. To achieve this, I will make changes everywhere. First, I will change the startup option of saslauthd from pam to sasldb.
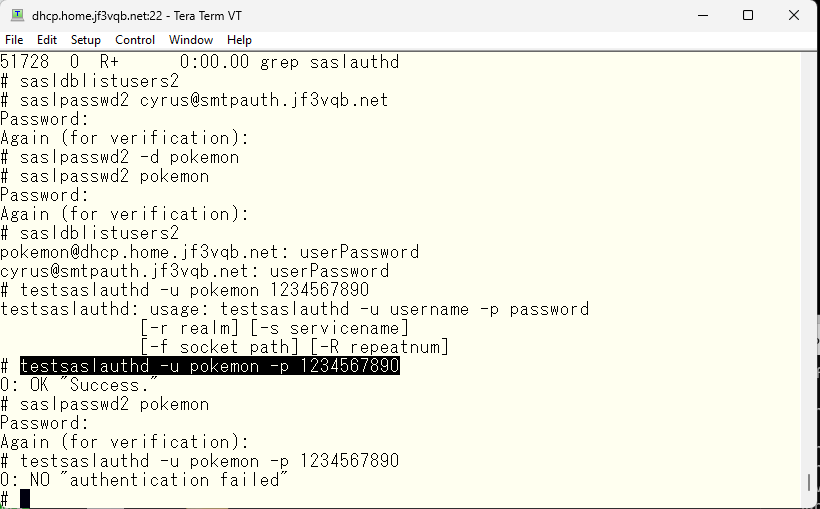
I will create a user and perform a functional check. First, the “cyrus” user is the administrator account defined in the imapd.conf. The “pokemon” is my account. I will create it with a simple password and perform a functional check, and once confirmed, I will replace it with a complex password. Authentication should pass through saslauthd even if the string changes.
Before proceeding, I would like to make the logs easier to read. According to the manual, it should be output with the syslog facility local6, so I will configure it to output to a separate file.
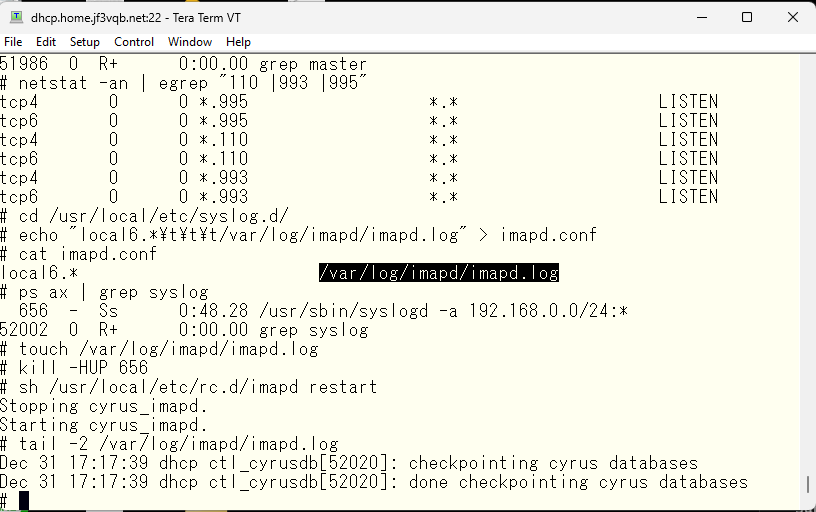
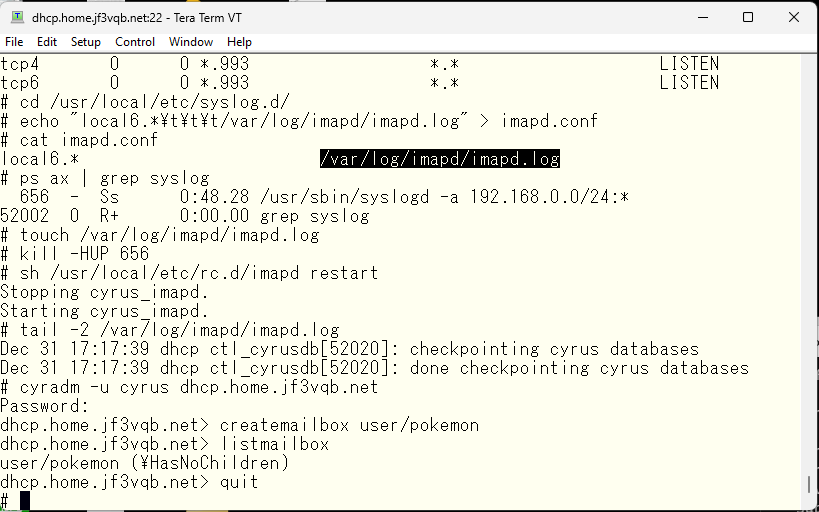
It has become easier to see 🙂 According to the manual, it is necessary to spool to an IMAP-specific mail store. I will create a mailbox for the pokemon user created earlier.
Modify the original sendmail files to ensure that emails are delivered to the imap-specific storage. Configure sendmail according to the manual.
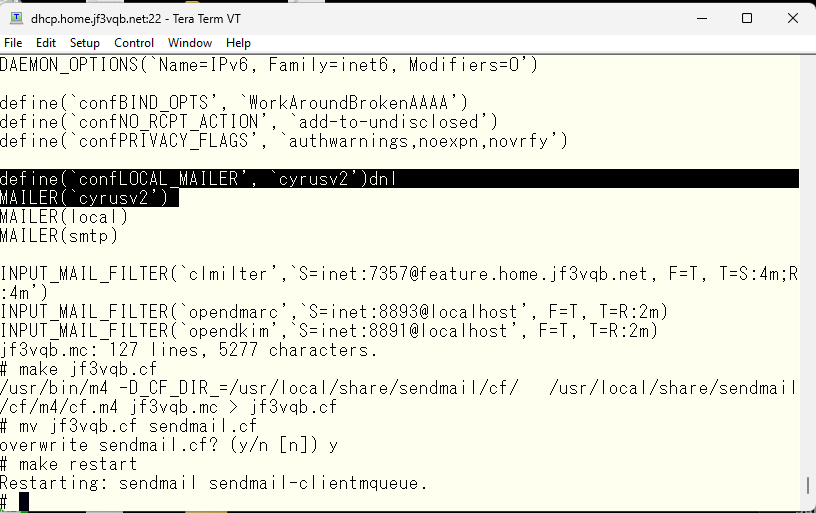
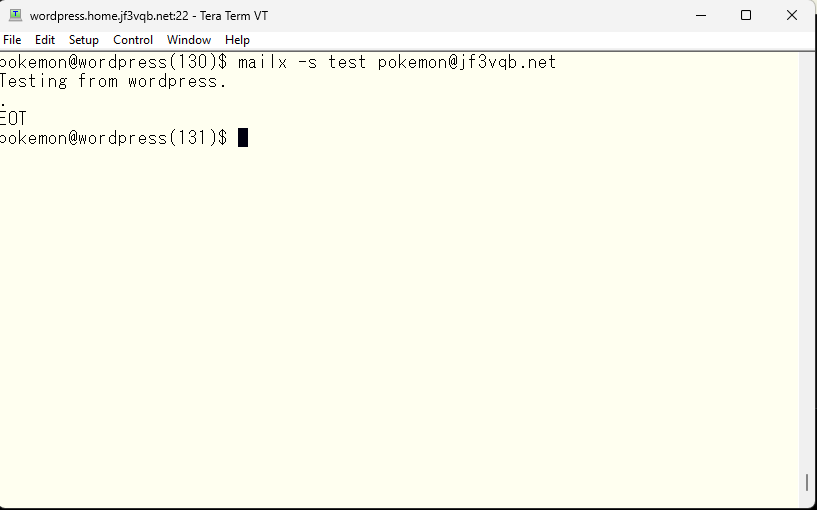
Now I will send a test email from the server wordpress.
Let’s take a look at the email log on the server dhcp.
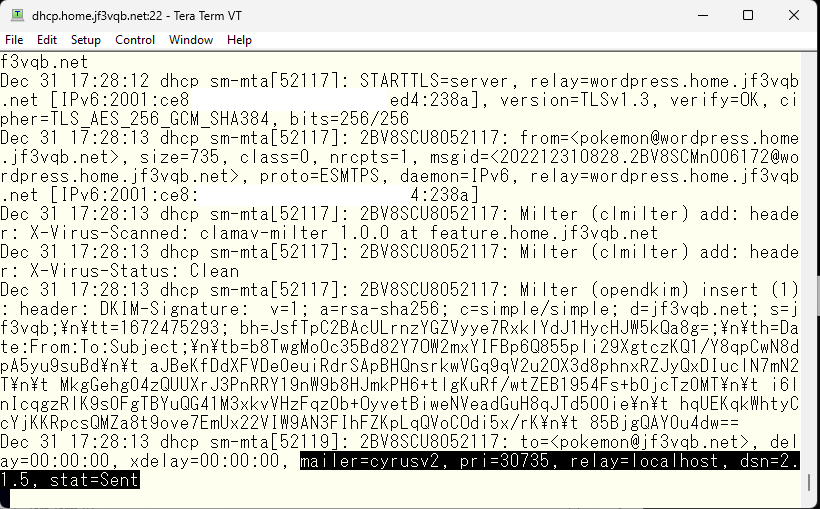
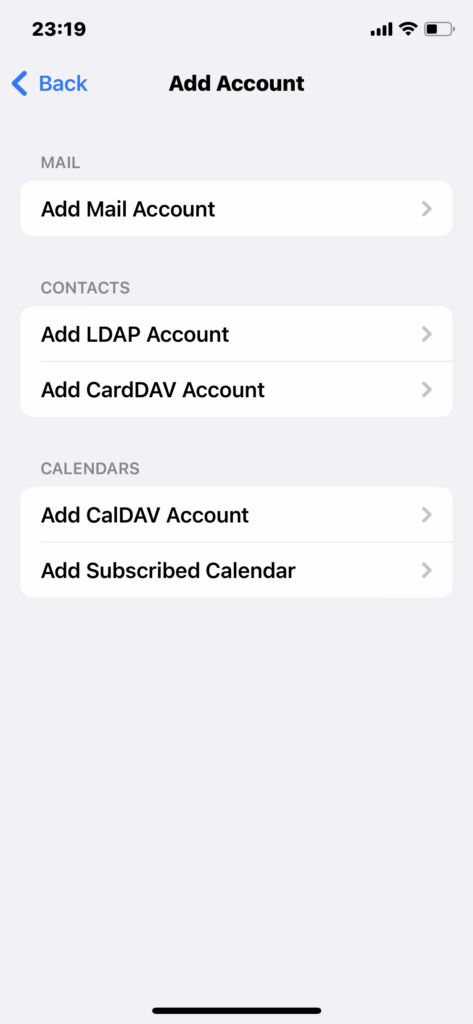
Next, I’ll check the status of the newly created cyrus2 mailer, which should be ‘sent’. I should be able to receive the test email I just sent by connecting to the IMAP client. Before that, I will add a rule to the ISP router to make sure the IMAP connection can be made both inside the home network and on the internet using the same smtpauth.jf3vqb.net machine name, which is the original goal. This time, port 993 will be added to the router like port 25 or 587. Pop3 is outside the scope, meaning it won’t be used. I can also modify /usr/local/etc/cyrus.conf to prevent pop from starting. Now, I would like to use my iPhone as the IMAP client. I’ll open the settings for email and add an account. Of course, I will choose ‘Other’ as the option at the bottom.
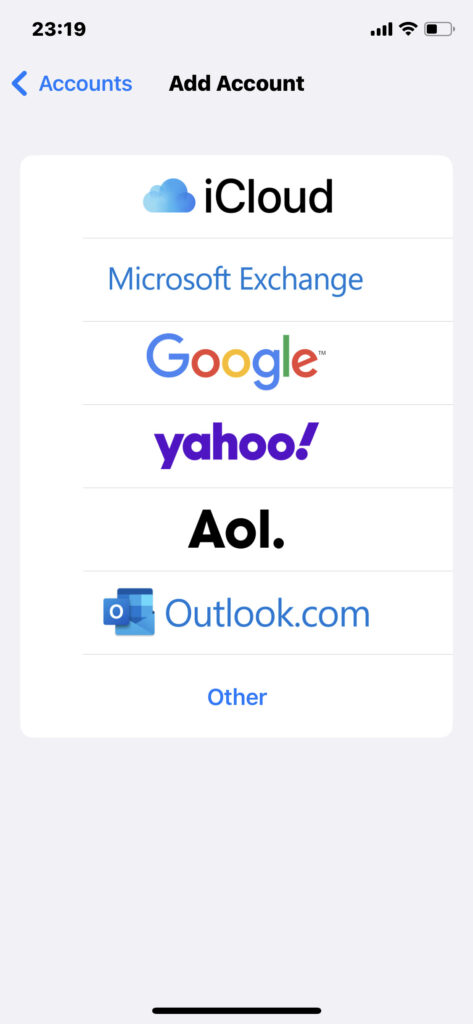
Since address books and calendars are outside the scope this time, we will select “Add Mail Account.
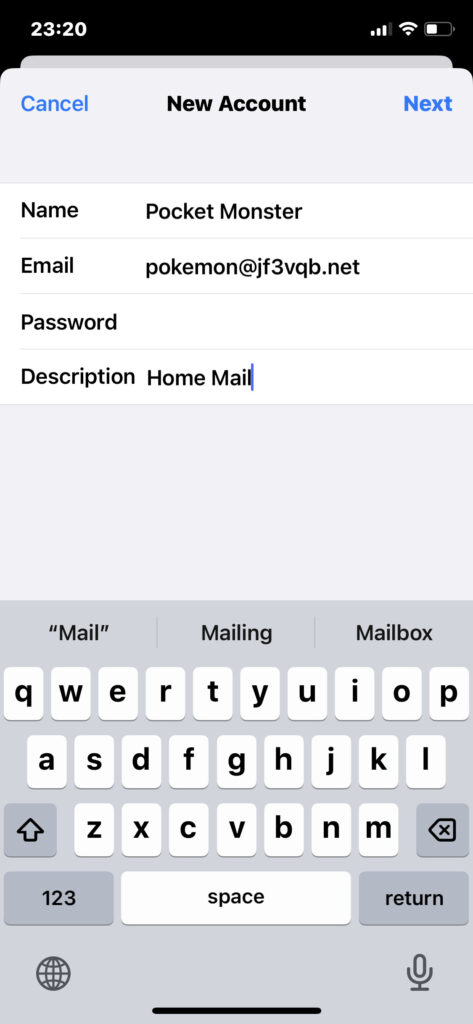
The password specified here may appear blank in the screenshot, but it is the complex password for the pokemon user created in SASLDB. I see like “***********”as same as other passwords.
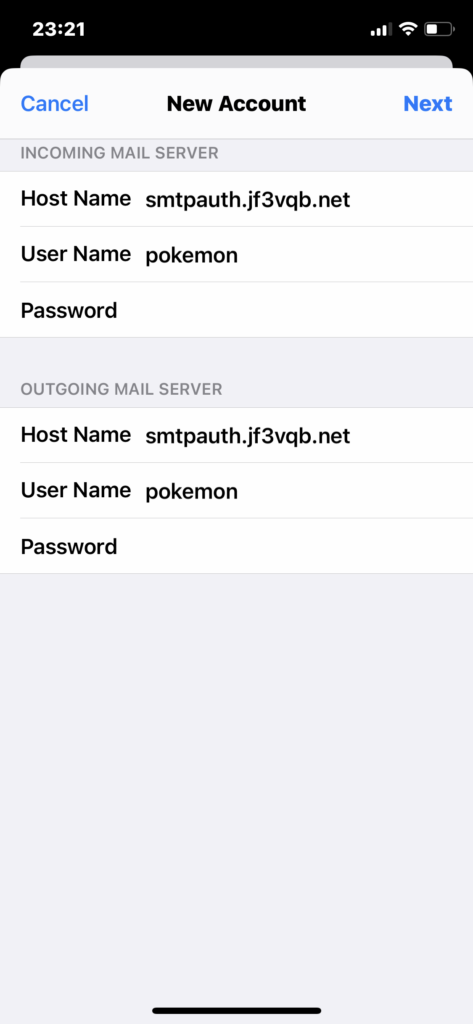
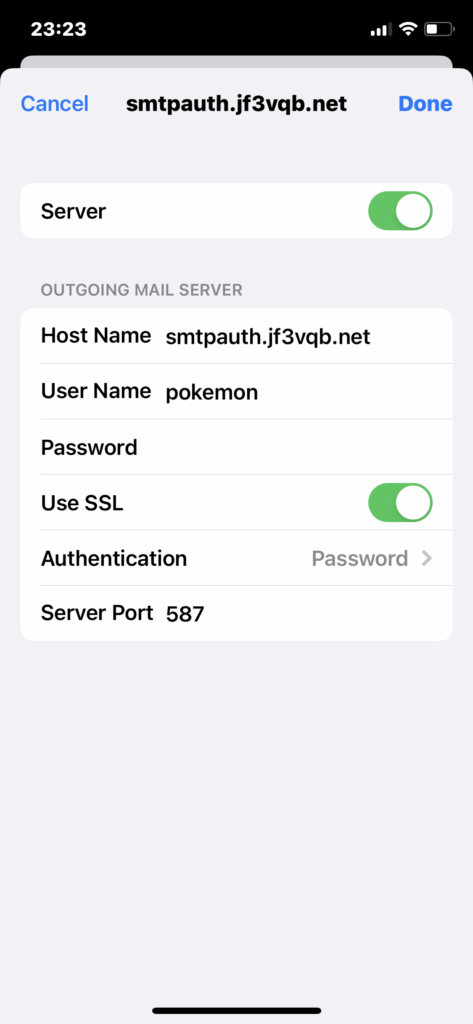
We use smtpauth.jf3vqb.netBoth server for both the sending and receiving server names. The username and password for the outgoing mail server are labeled as “Option,” but since SMTP AUTH is being used, it’s not an option. Enter the same username and password. Of course I see like “***********” in both password fields.
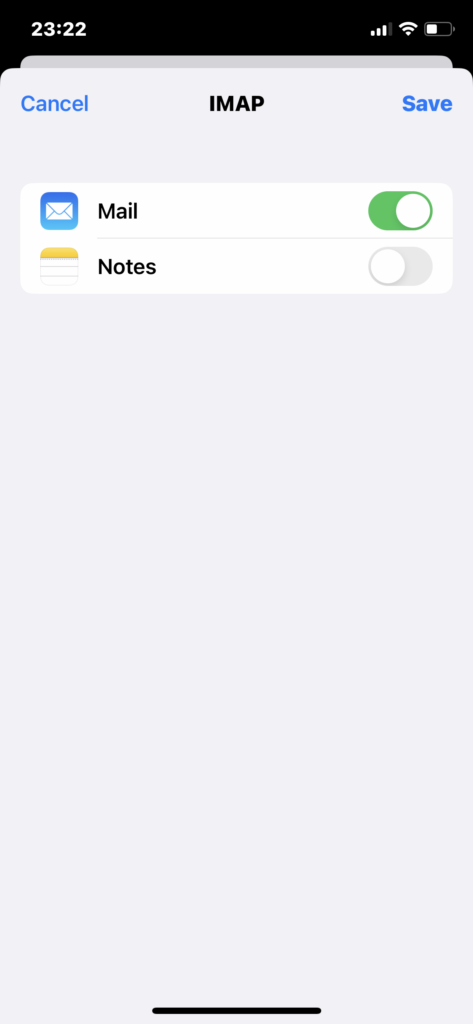
After waiting for a while, you will be informed that all items have checkmarks and only emails can be used. If this does not happen, it is likely that the password is incorrect. Optionally you can enable “Notes”. Finally, save and finish.
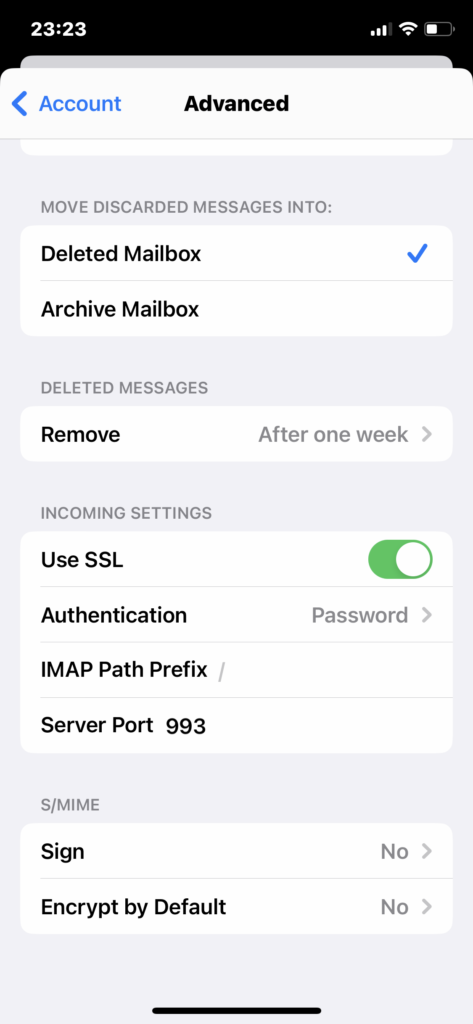
Check if SSL is set to be used with IMAP.
Check if SMTP is also set to use SSL.
With this, the setup should be complete. I will now open the mail client. After opening, it’s checking for new mail. Looking at the logs, there seems to be a problem with the certificate.
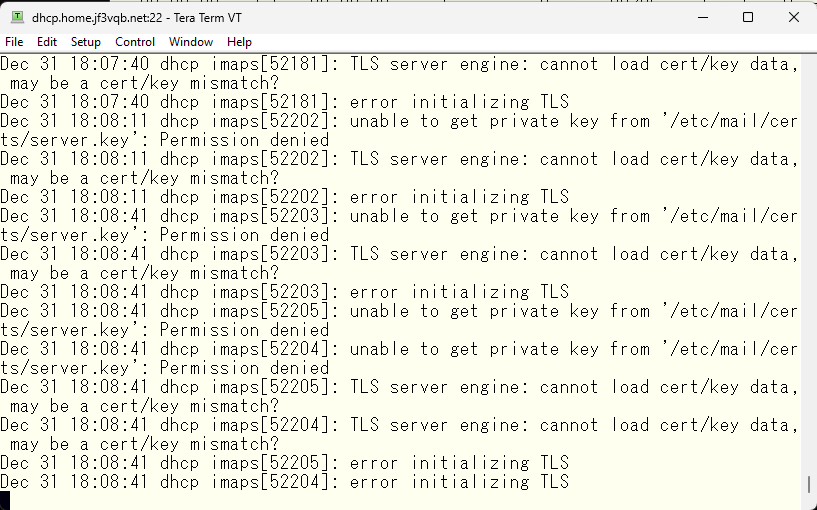
After checking email log, I found that the certificate can only be accessed by root, but the IMAP process was running as the “cyrus” user. This means that the certificate I created earlier cannot be loaded. So, I’ll take some measures now.
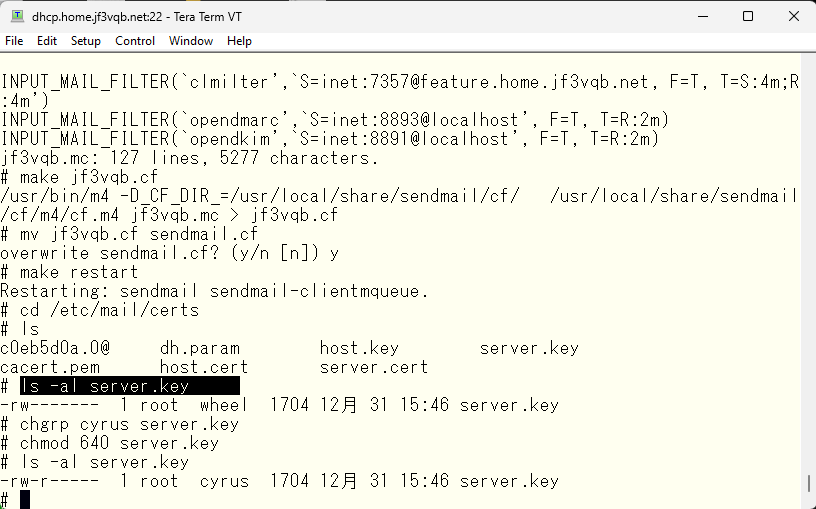
So, how’s it going now?
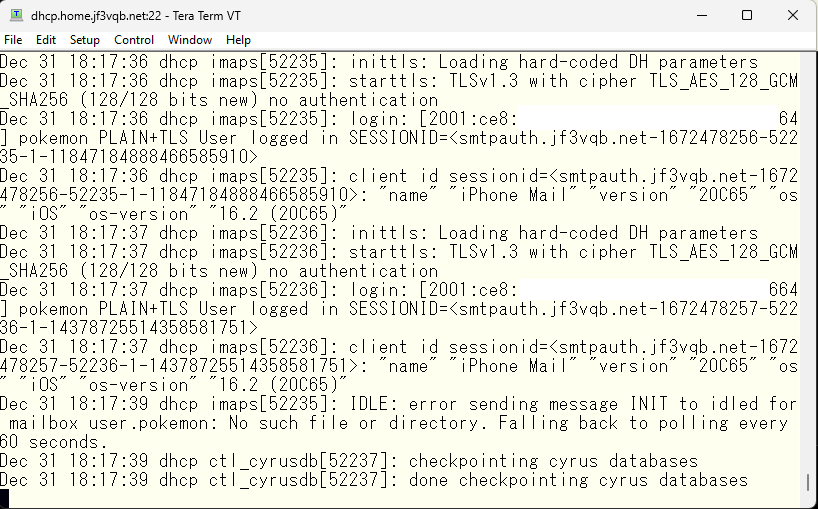
Everything looks OK except for one error. I remember the string “idled” and I think I’ve seen it in cyrus.conf.
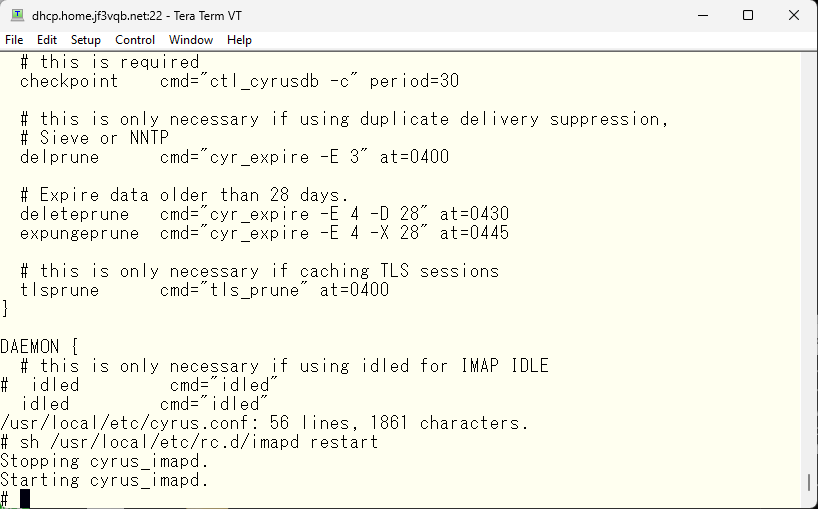
Now, I’ll keep an eye on it for a while. Next, I’ll perform a sending test. I’ll send a test email from my iPhone to gmail.com
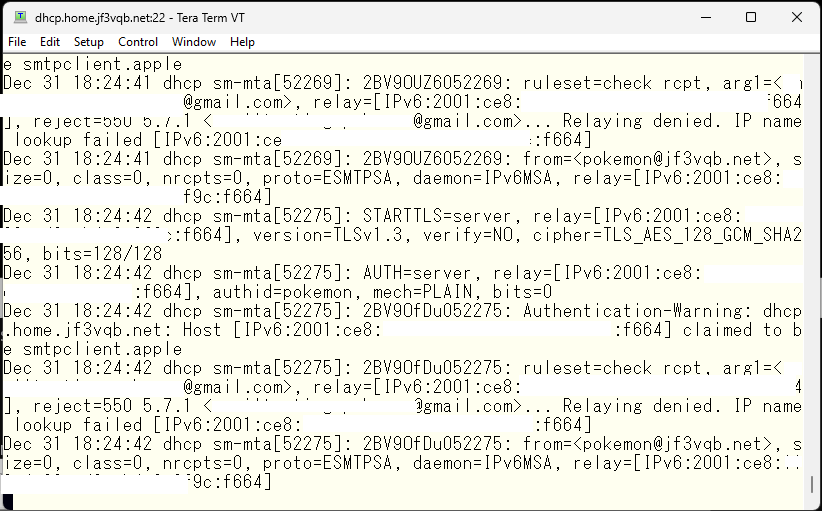
The email is being denied relay while being authenticated by the pokemon user over TLS encryption but it remains stuck in the Outbox of the iPhone email. Upon checking the sendmail README, it seems that specifying a trusted authentication method is necessary.
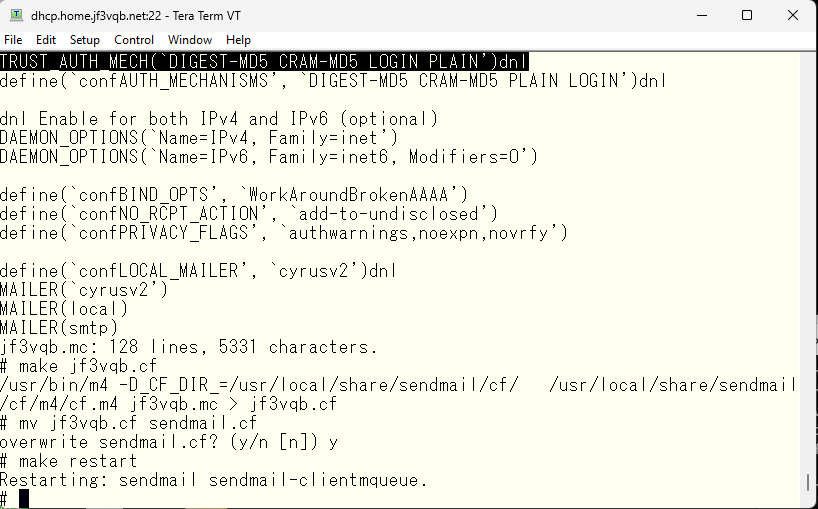
So, how’s it going now?
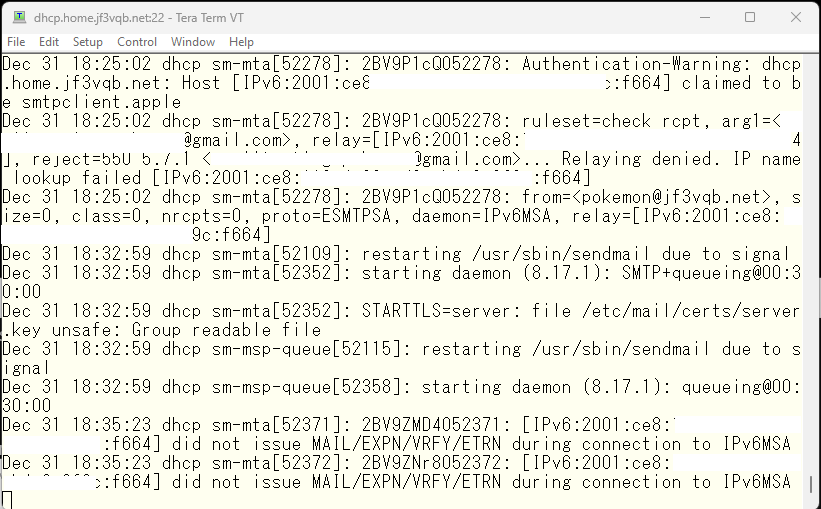
Now sendmail is angry. 🙁 I’ll copy the certificate and make it into a separate file and give different permission.
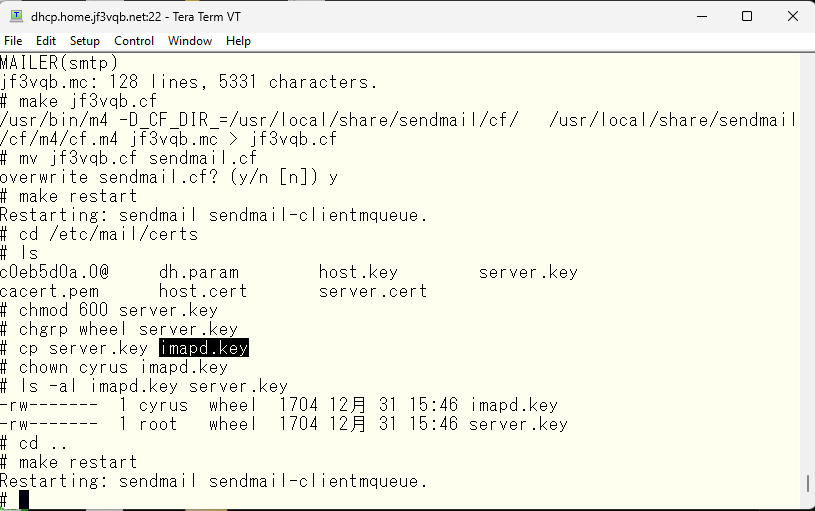
This should calm down sendmail. Next, we change the certificate filename in imapd.conf and restart. If you don’t want to use the same file by copying, you can also change the owner of server.key to cyrus. As sendmail reads with root privileges, both sendmail and imap should be happy now.
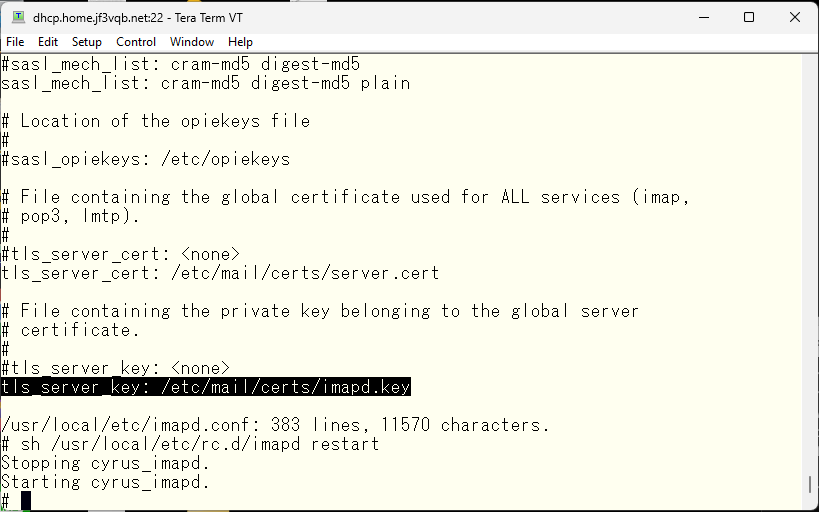
With this, everyone should be happy now. Let’s do another test of sending and receiving with the iPhone.
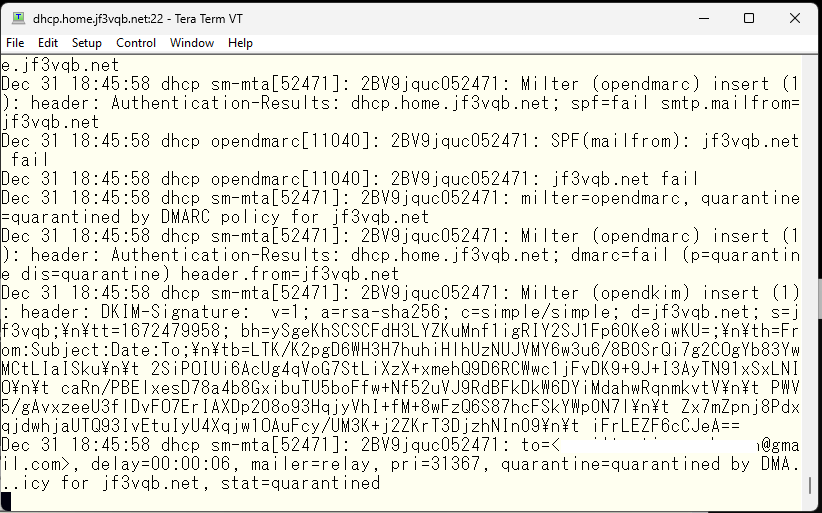
The sendmail is working now but DMARC is angry. I’ll take a look at opendmarc.conf. There it is, authenticated clients can be ignored.
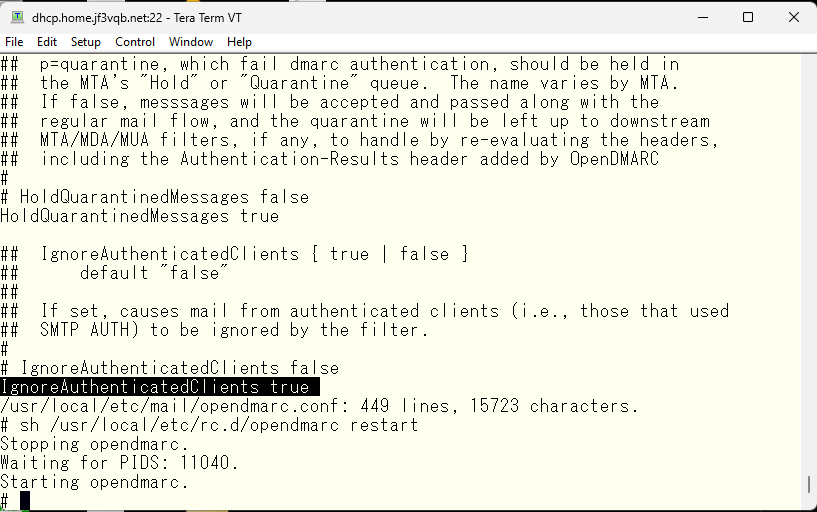
So, how’s it going now?
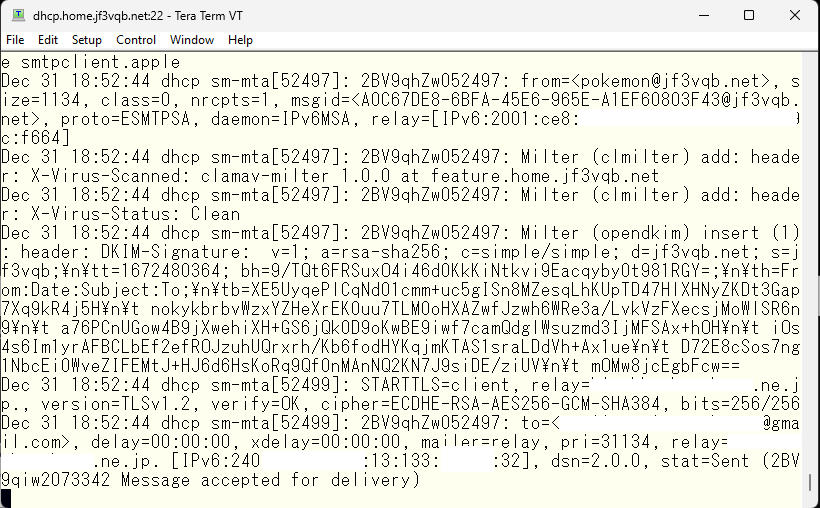
Finally it passed. It’s showing stat=Sent with mailer=relay. This is the header information of the email that arrived at gmail.com.
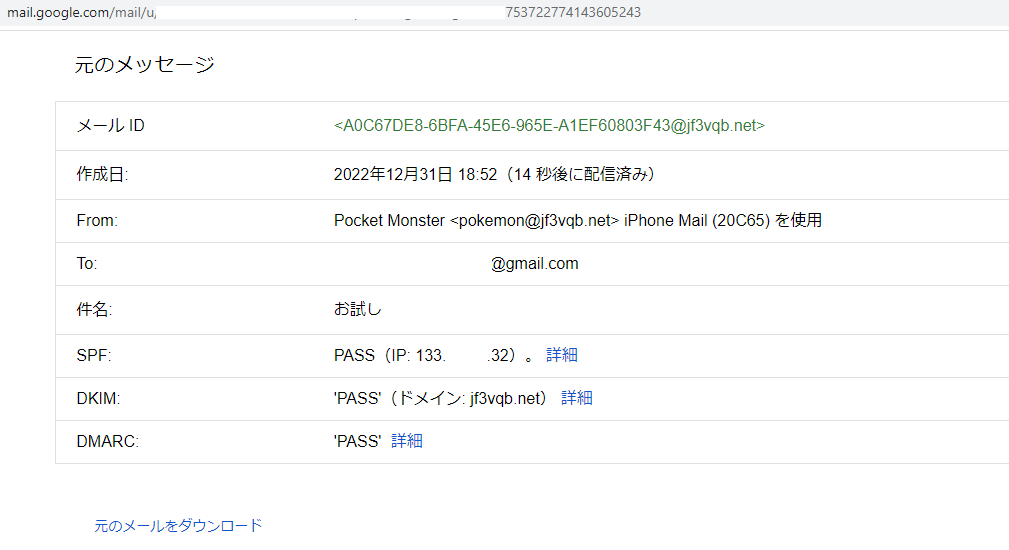
All are OK now 🙂 The final test is to try sending and receiving emails with the iPhone when the WiFi is turned off and directly connected to the internet.
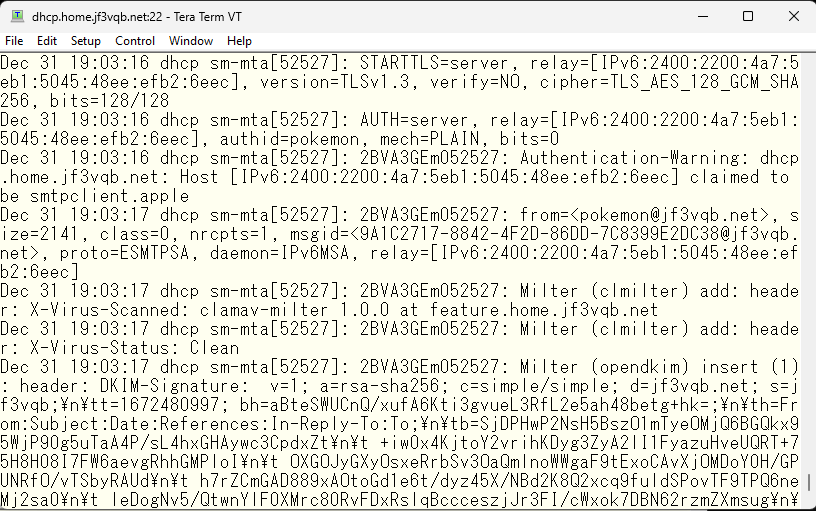
The connection from the IPv6 address of SoftBank has been confirmed, encrypted with STARTTLS, authenticated through the user ID “pokemon” and able to reply to gmail.com 🙂 This concludes the discussion on sendmail. Although it turned into a long series split into eight parts, I hope it was helpful. Please be careful when directly receiving packets from the Internet to your home server. Pay close attention to the settings of your ISP router. Also, be careful when using passwords such as 1234567890 for SASLDB as your server may easily become a stepping stone server and cause trouble to others. I will also try using it for a while and update the page if there are any issues. However, it is a test account and I plan to restore the settings soon. But, I may use it if it is comfortable 🙂
Wishing you a happy new year.
Advertisement below

