The original Japanese version is available here.
Now, let’s use VMware ESXi to create an experimental environment. Looking at the patches provided by VMware for ESXi, they offer patches for versions V3.1.2 and later. Checking the release dates of the latest patches for each version at the time of writing this article,
- V5.5: 2018-09-13
- V6.0: 2020-02-20
- V6.5: 2022-10-06
- V6.7: 2022-10-06
- V7: 2023-01-31
- V8: 2023-02-14
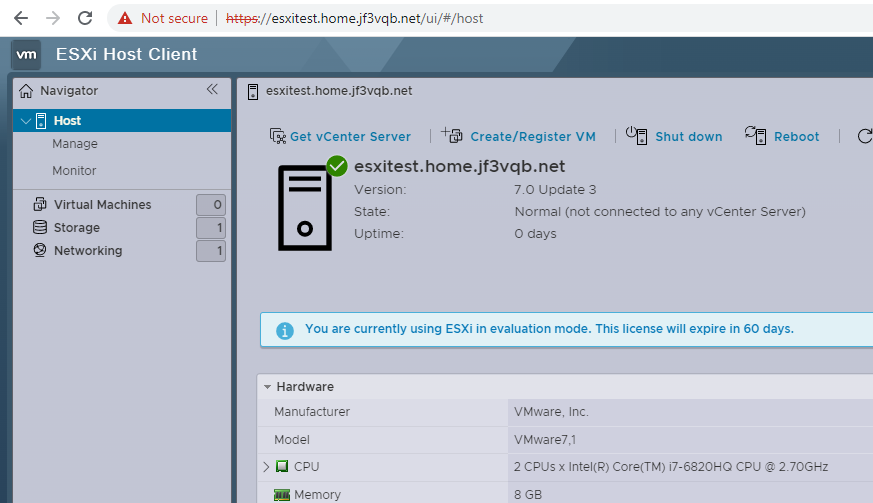
it turns out that V5.5 has already been forgotten, V6.0 is kind of a ‘oh, that existed’ situation, and at worst, we can’t say that the patch has been applied unless it’s V6.5 or V6.7. Ideally, we would like to use V7 or V8. However, as mentioned in the previous article, the newer the software version, the less support for old processors. I tried installing each version on a used D*LL laptop, and I was able to install up to the latest version of V7 without any problems. However, when I tried to install V8, I couldn’t install it as it was, and I had to enter the boot option to support LegacyCPU to install it. Therefore, the best version for the purchased used D*LL PC can be said to be V7. By the way, I bought a Latitude E5570, which has a processor of 4 CPUs x Intel(R) Core(TM) i7-6820HQ CPU @ 2.70GHz. There is no guarantee that this processor will be supported by ESXi in the future, even if we use V7. Well, since it was a used PC with a broken monitor and was very cheap, let’s look for a similar but slightly newer PC 🙂 By the way, we only use the console during installation using USB. Therefore, a PC with a hard-to-use monitor is perfect for ESXi 🙂
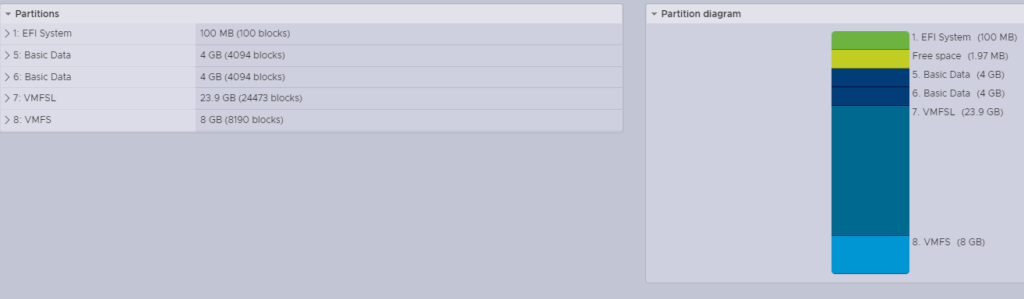
Also, even if you use V7, the usability will depend on how you install it. By the way, people who have used V7 have said that there is too much wasted space on the disk! If you install V7 on a small disk PC in the normal way, no disk space will be created to store virtual machines. Instead, all disk space will be consumed by an area called VMFSL, which apparently stores data specific to each virtual machine. If you install ESXi V7 without considering this, around 128GB will be taken up by this area, rendering machines with only 128GB disks unusable. Even with a 256GB disk, more than half of the disk will be wasted as VMFSL.
Perhaps due to many complaints, starting from V7.0.1c, it is now possible to adjust the size of the VMFSL area. This method will be explained later. As an example of the difference in the size of the VMFSL area depending on the installation method,
- If you install V7.0.0 first: VMFSL will waste about 128GB.
- If you install V7.0.1c first: VMFSL will waste around 128GB.
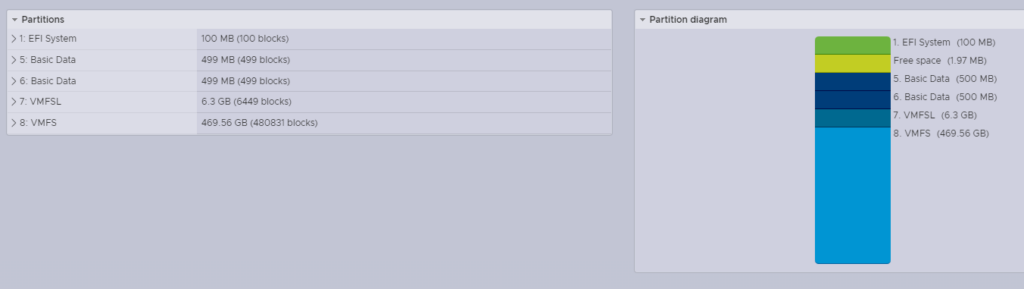
- Installing V7.0.1c with boot options: VMFSL can be reduced to 32GB.
- Installing V6.5 or 6.7 and upgrading to V7.0.1c: VMFSL can be reduced to around 6GB.
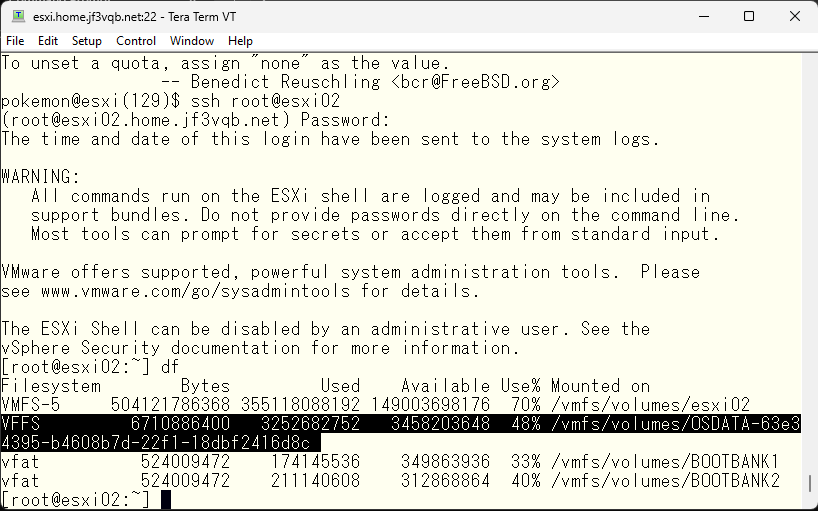
Here is the disk state of ESXi updated to the latest version using the last option. About 10 virtual machines (8 FreeBSD and 2 Windows) are already running on ESXi. It is expected to consume more as the variety of OS increases, but for now, the consumption seems to be at a good level.
If you want to do anything with FreeBSD, Windows, Linux, or MacOS, the third option may be the best for you. If you are like me and only use FreeBSD, the fourth option may be best. Below, I will introduce how to install using the third option.
It all starts with downloading the ISO image from VMware. After creating an account and declaring the use of the product, the installer can be downloaded and a free license can be obtained. Without a license, it becomes an 80-day evaluation license, and after the evaluation period, it will stop working. I have never actually exceeded the evaluation period, so I don’t know exactly what happens, but I don’t think anyone would use it without a license when they can get one.
Next, we will create a bootable USB key from the downloaded ISO image. If you are proficient in Windows, please create a USB key in Windows and start the installation. I created the USB key in FreeBSD. It looks like this.
First, when you plug in the USB key, the OS recognizes it and records a message. In this machine’s case, it was recognized as da0.
Confirm that the device file has been created, create a FAT32 file system, and mount it to the /mnt directory.

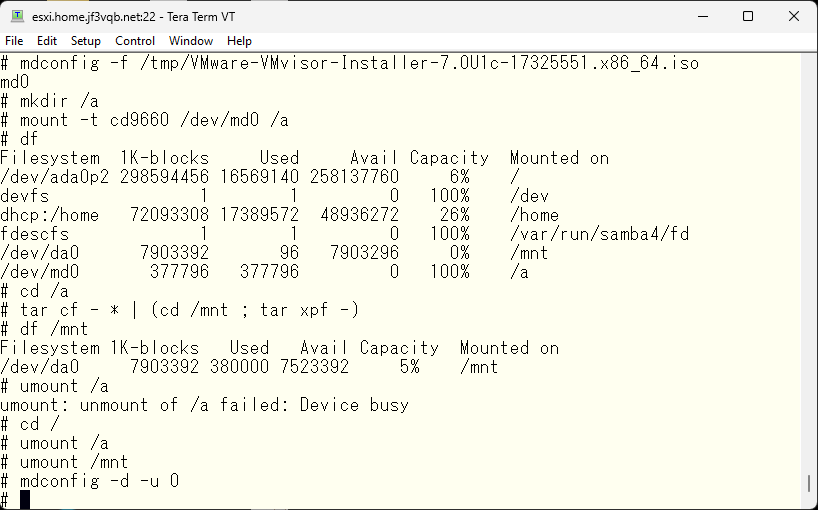
The next step is to prepare for extracting files from the ISO image. The ISO image is mapped to a memory disk and mounted to the /a directory in CD format.
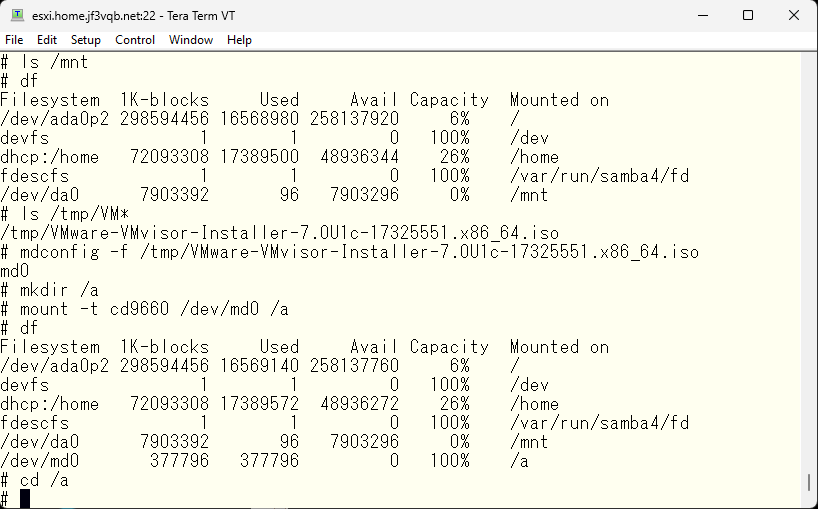
Since both source and destination are mounted, now we can copy the files. After the copy is completed, we unmount and perform post-processing.
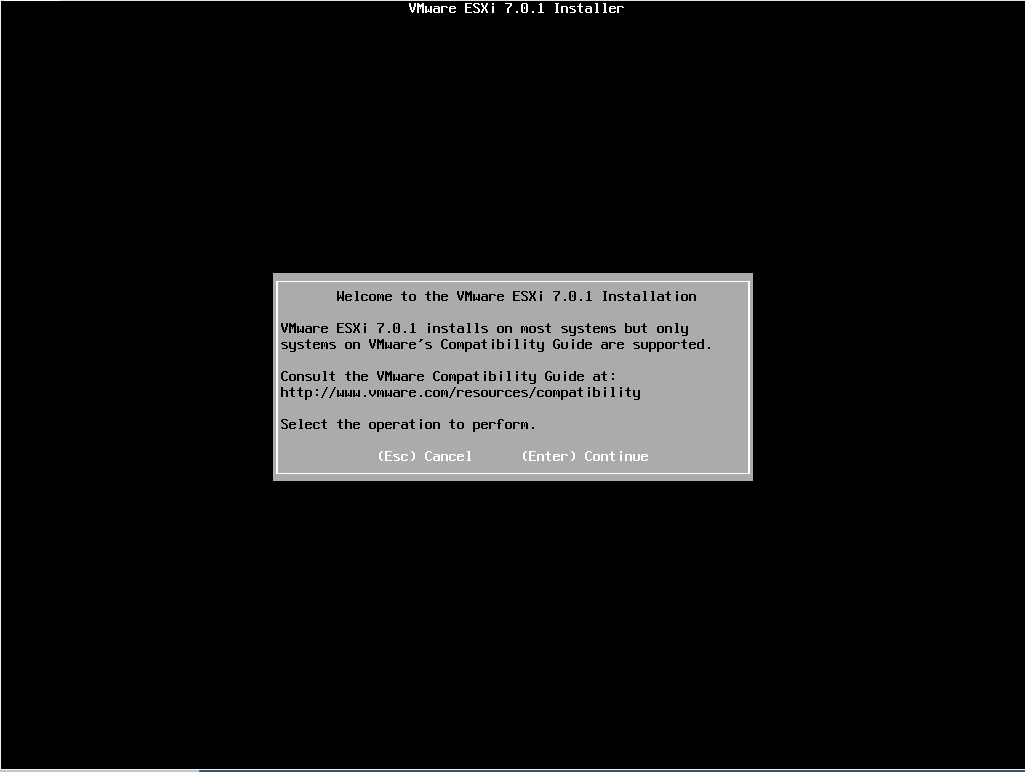
Boot from the USB key we’ve just created and start the installation process.

After the installer finishes booting, it will look like this. Follow the instructions to proceed with the installation. Press ENTER to indicate that you want to install. If you made a mistake, you can abort by pressing ESC.
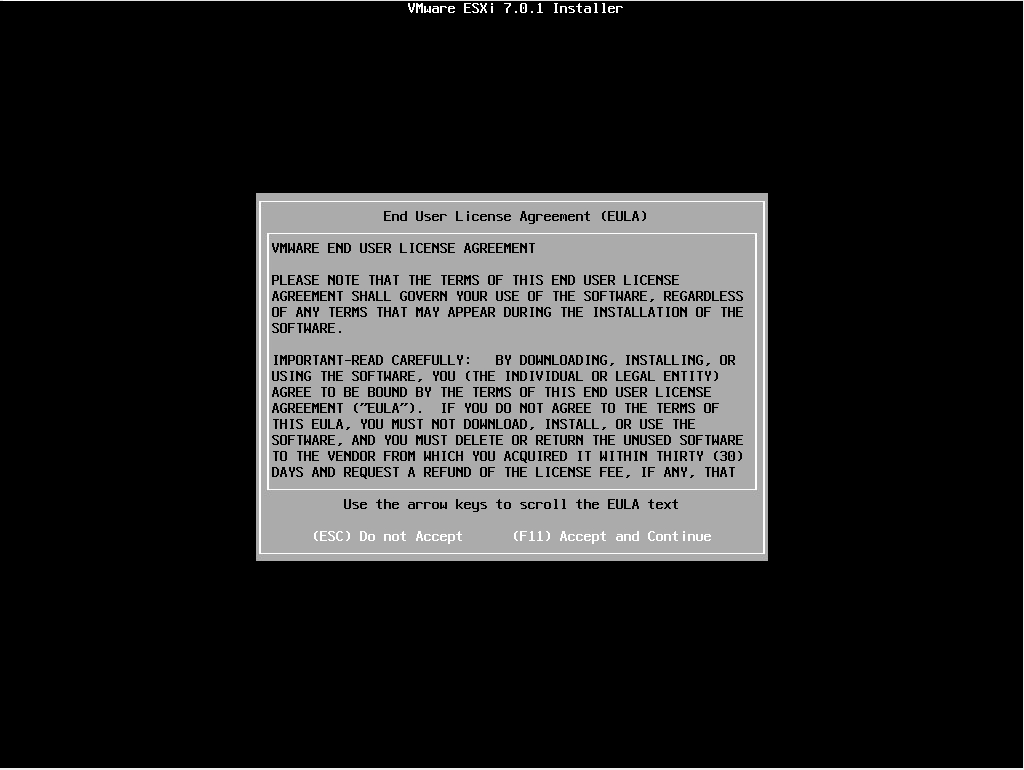
Press F11 if you agree to the EULA.
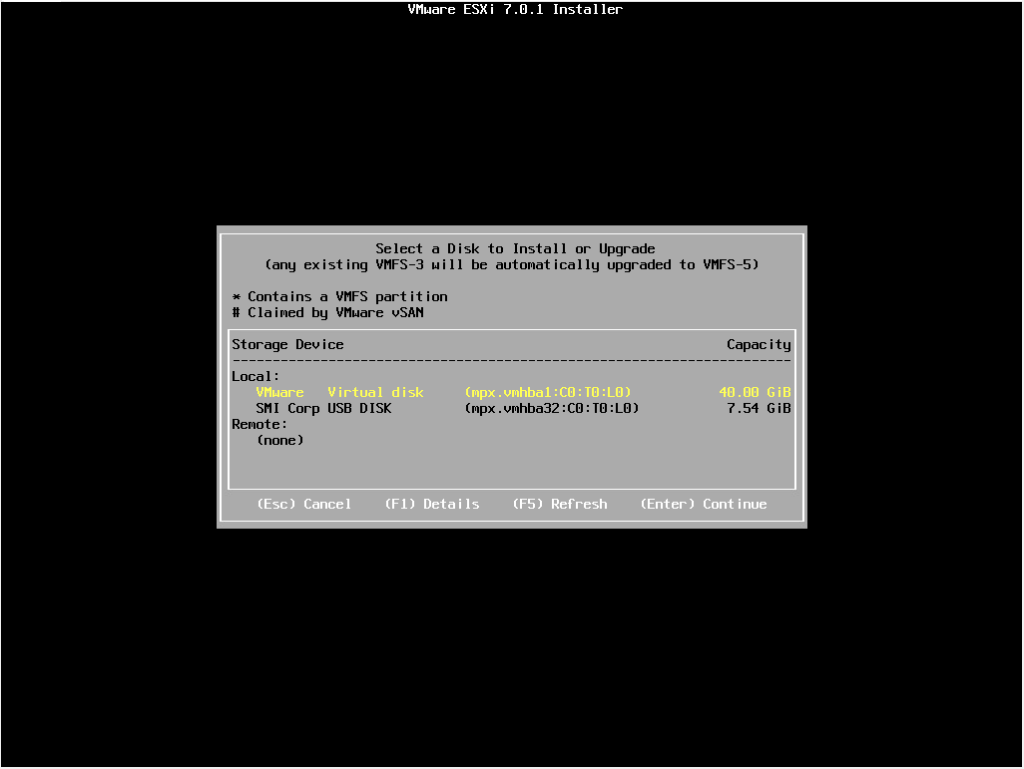
You can see at least two disks, one for installing ESXi and the other is the USB key that contains the installer. Select the disk for installing ESXi and press ENTER.
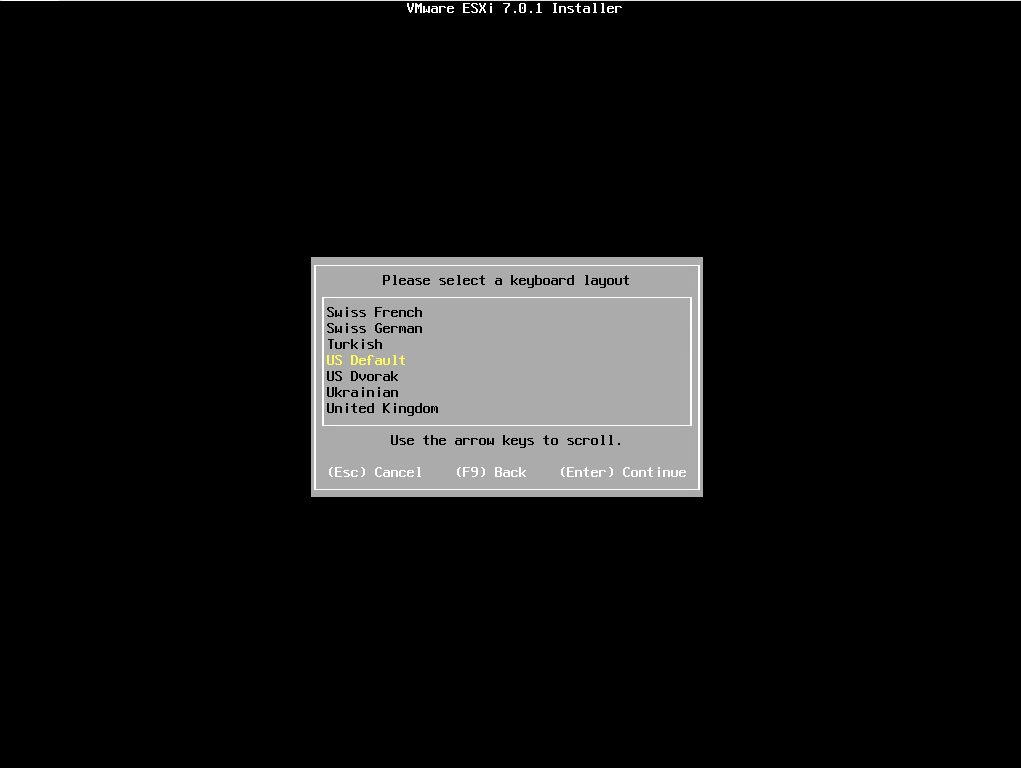
Select keyboard layout” and choose “US default” which is my preferred layout.
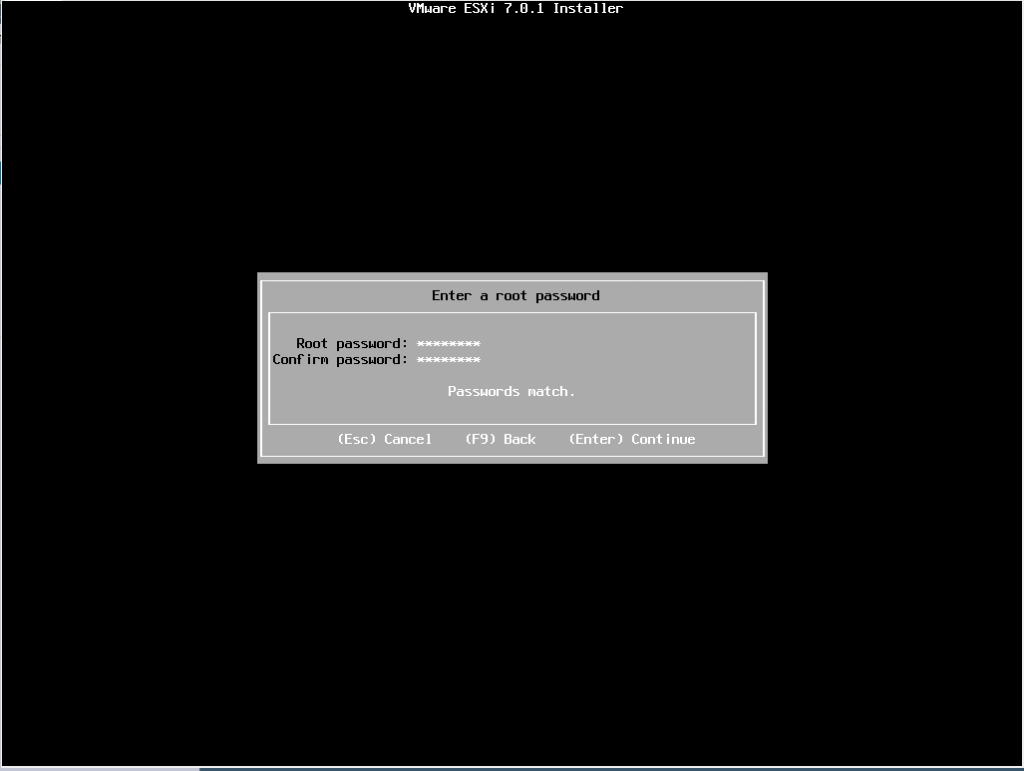
Specify the password for the root user.
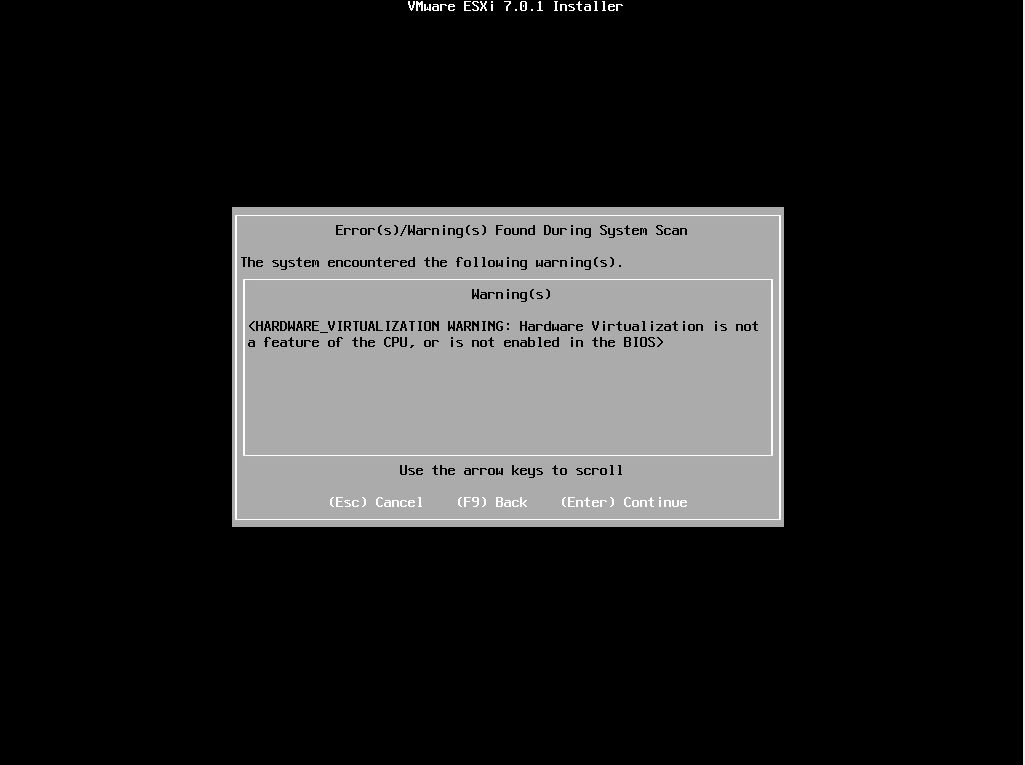
If you see a message like this, stop the installation and enable virtualization in the BIOS before resuming the installation.
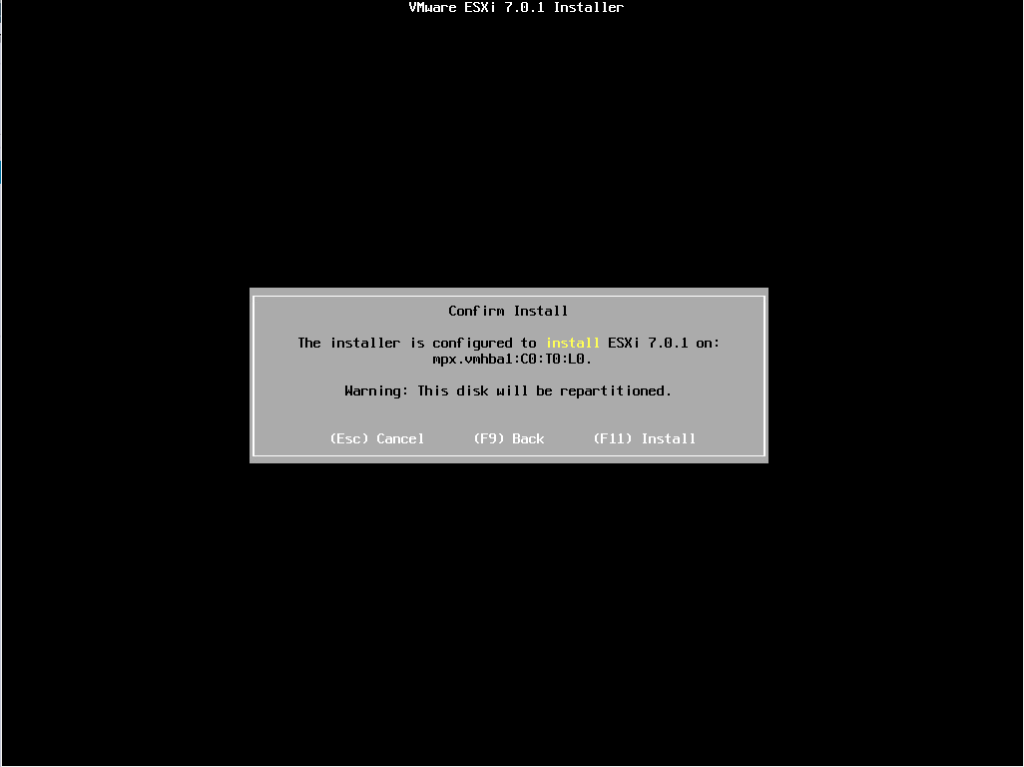
Finally, press F11 to start the installation.
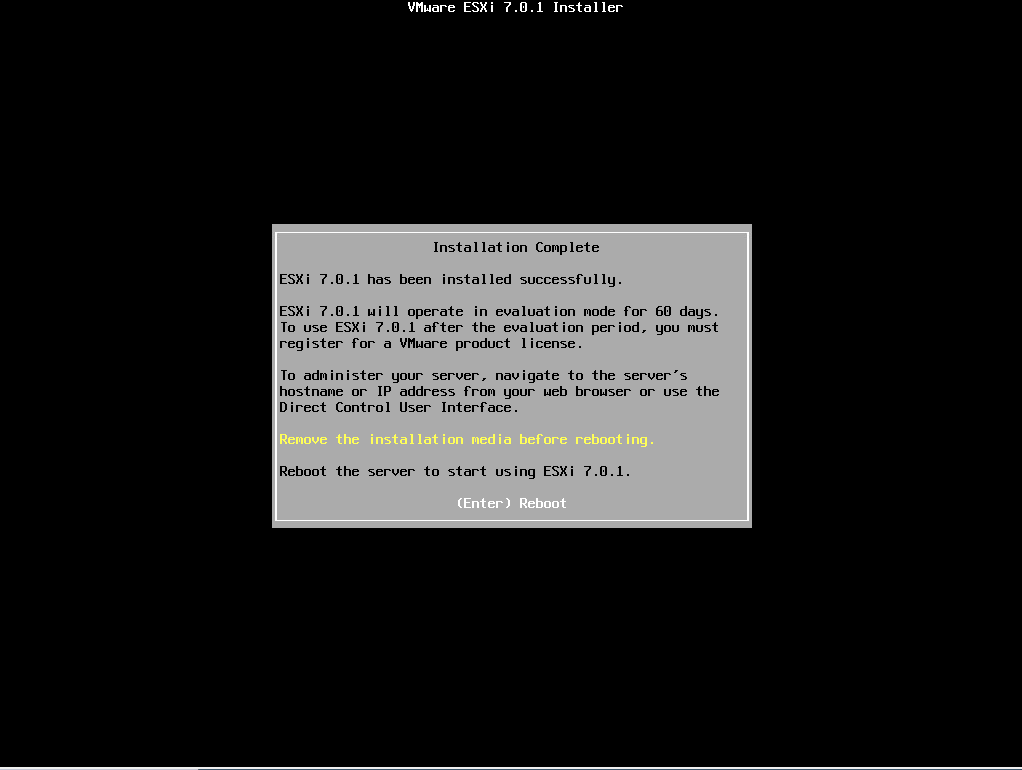
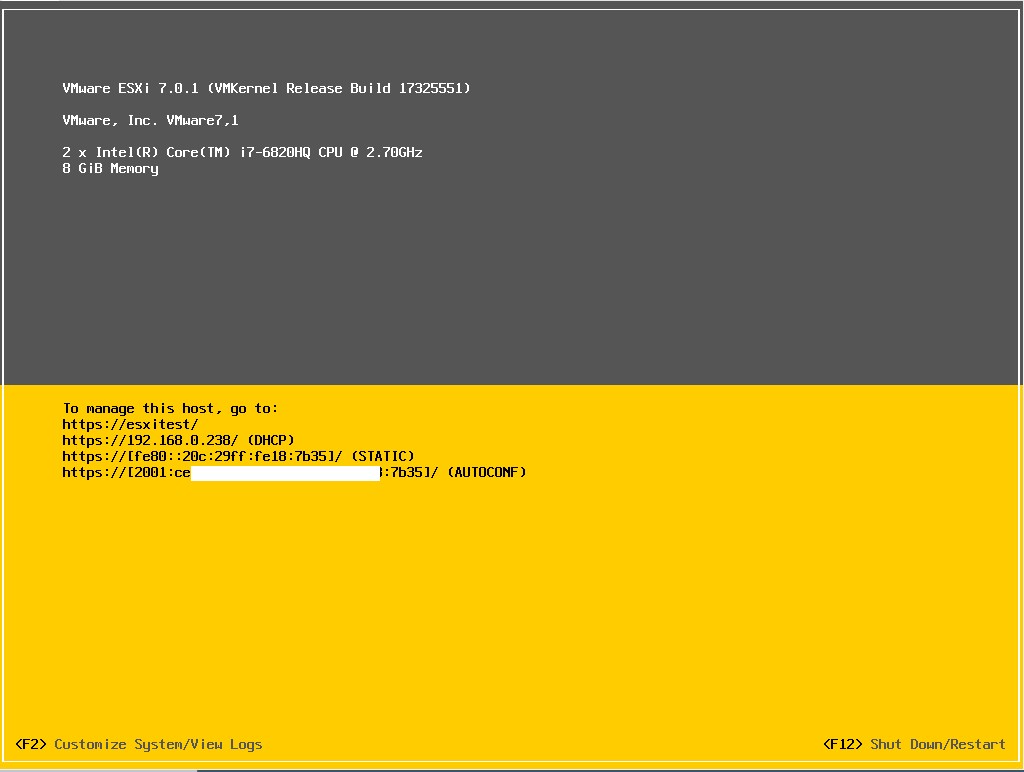
After the installation is complete, it will look like this. As instructed, remove the USB key and restart.
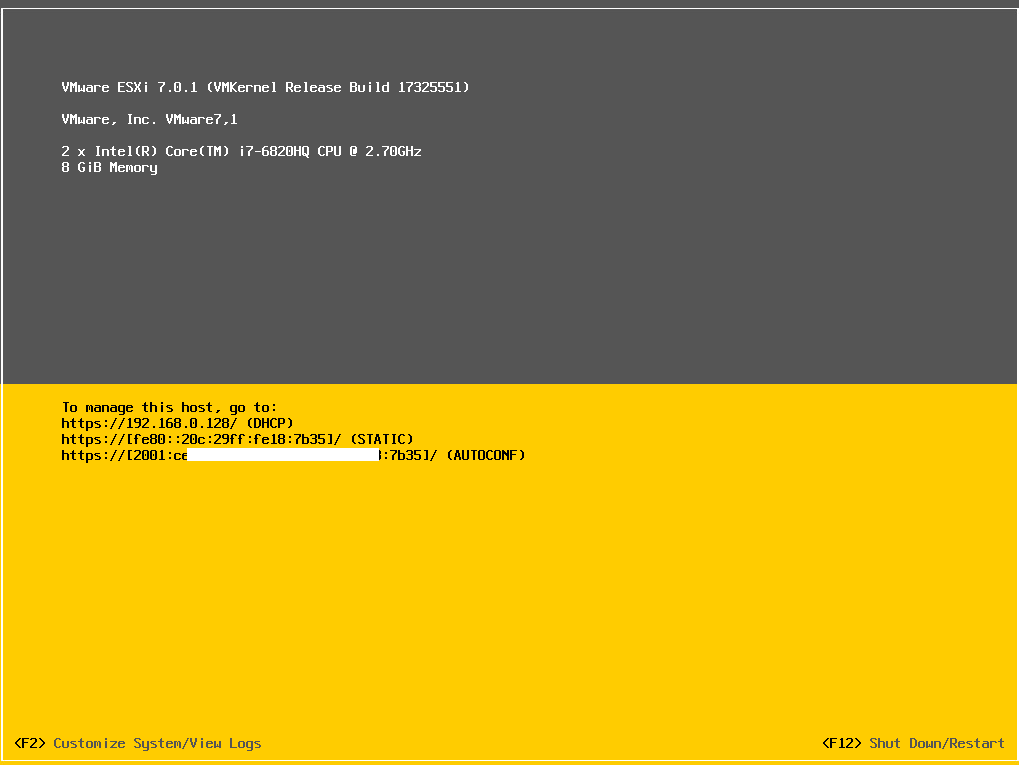
If the console looks like this, then it’s completed.
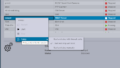
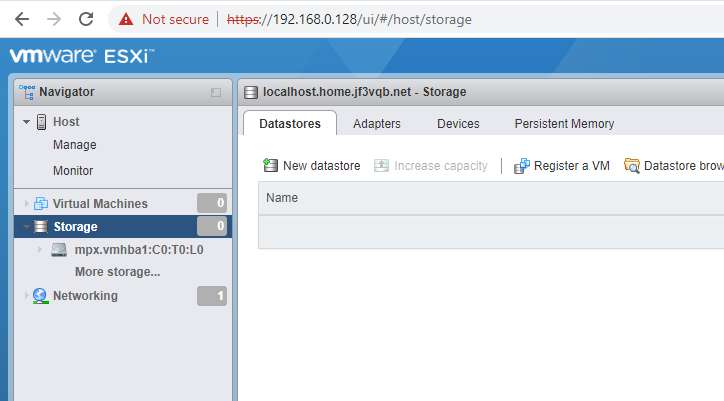
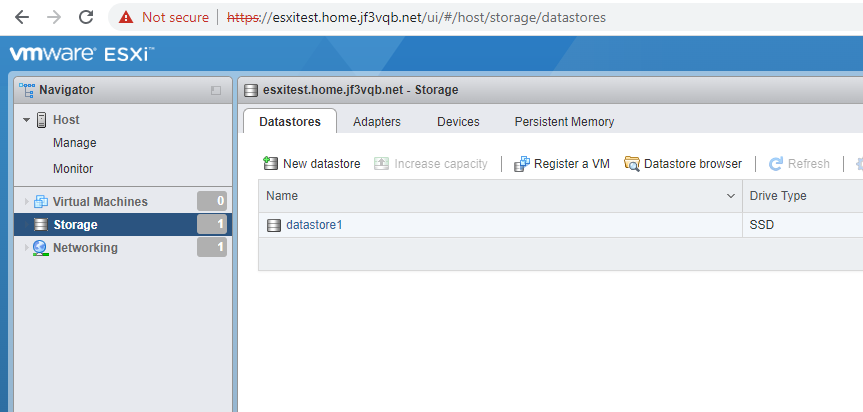
Let’s try accessing it with a browser. Some problems were found: there is no space to place virtual machines. This is the problem I mentioned earlier. Also, the machine name is currently set to localhost.
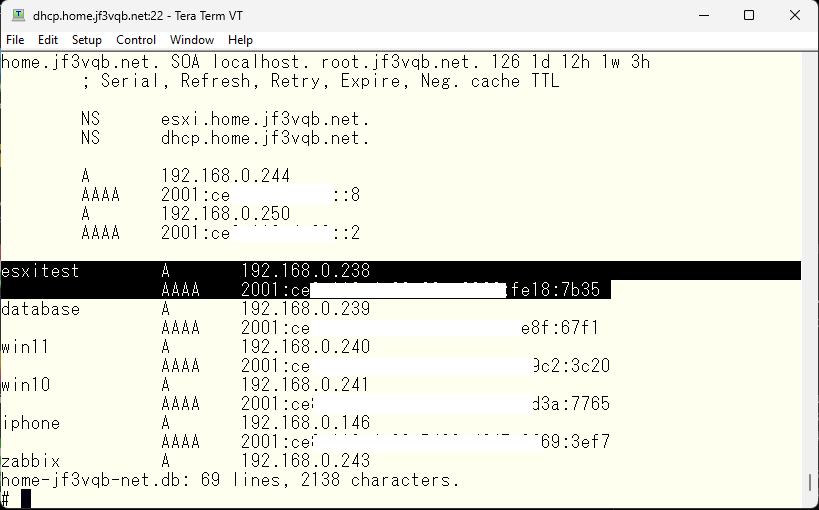
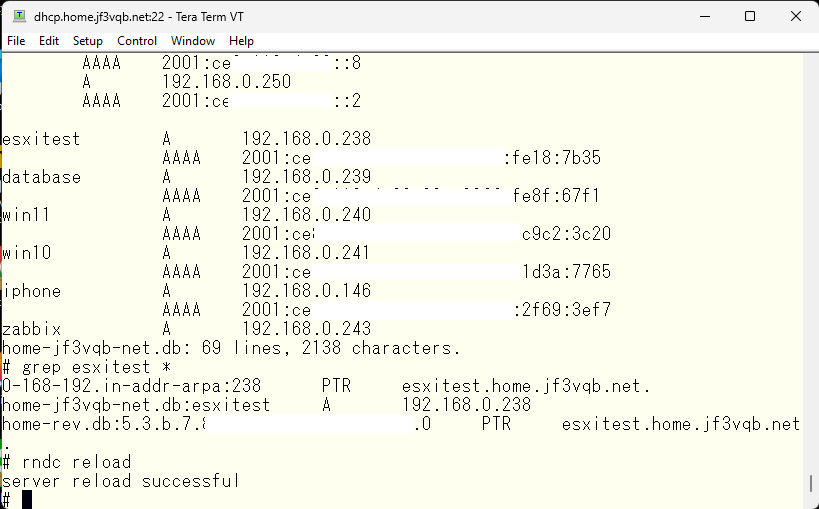
Let’s use the network functions to set the machine name, IP address, etc. Let’s set the DNS forward and reverse lookup.
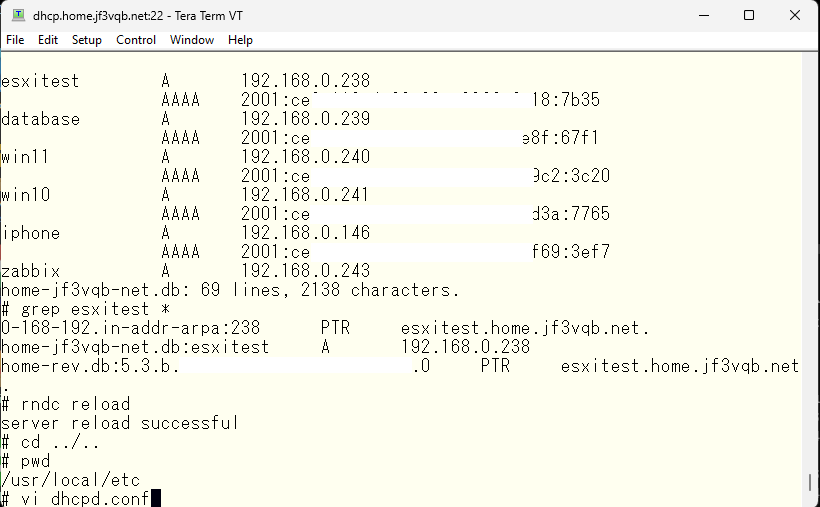
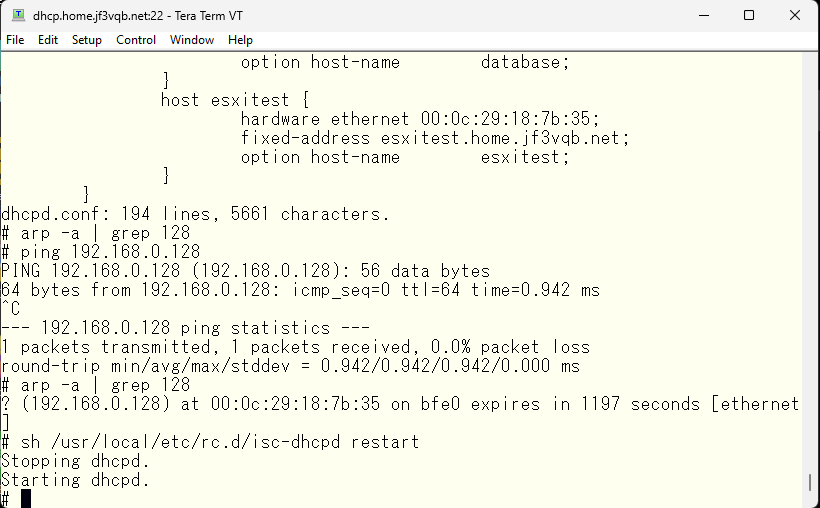
Next, we will configure DHCP settings, which means assigning addresses semi-statically. Of course, assigning them statically is also perfectly fine.
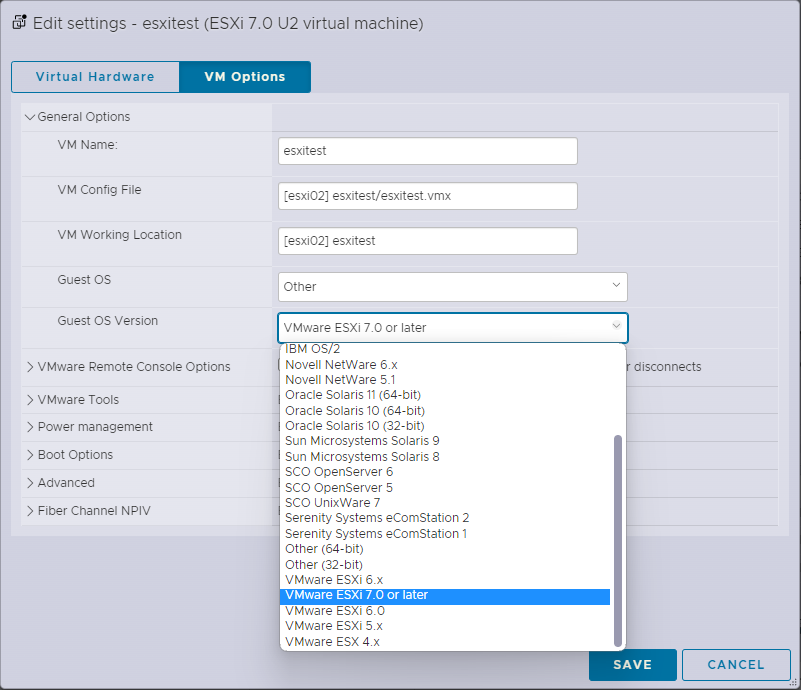
I’ll try reinstalling it again. Then, I’ll enable input of boot options by pressing Shift-O. Here, you can also edit the boot.cfg file on the USB key in advance to enter options. There are boot.cfg files in the root directory of the USB key and the /EFI/BOOT directory, and you can write any options as kernel options in either of them. As you know, PCs without UEFI mode use the boot.cfg directly under the root directory, while machines that can use UEFI Secure Boot use the boot.cfg under /EFI/BOOT. When requesting a remote office to install it over the phone, for example, it is recommended to edit the file in advance to save time and effort. Please refer to this for more information.
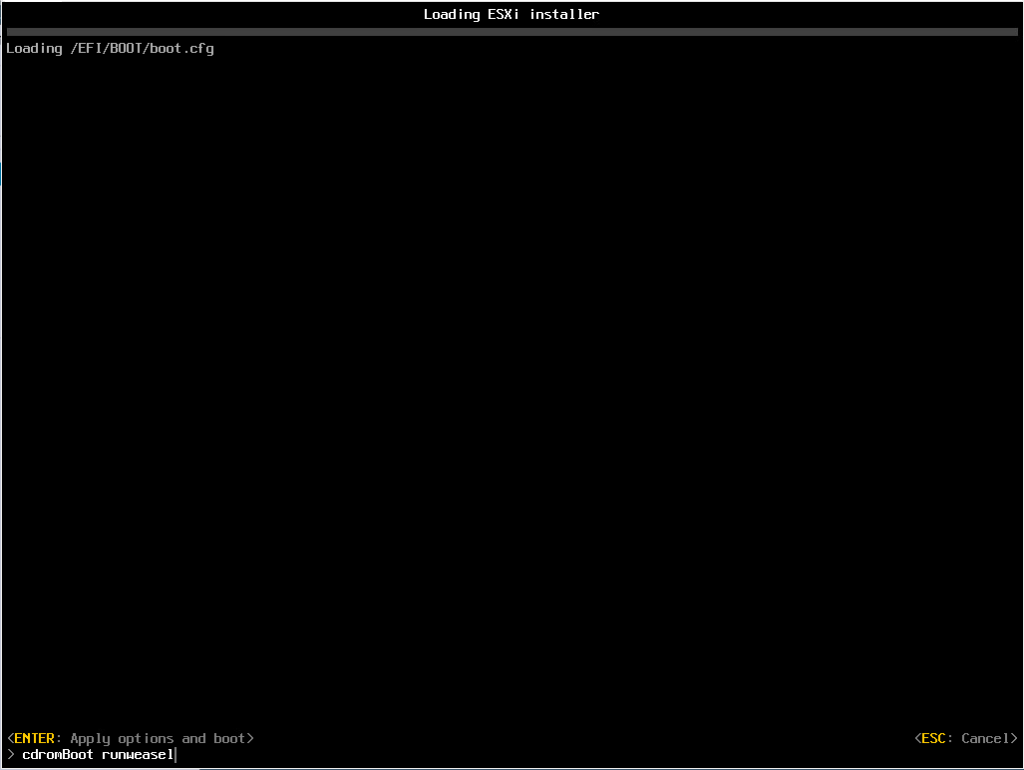
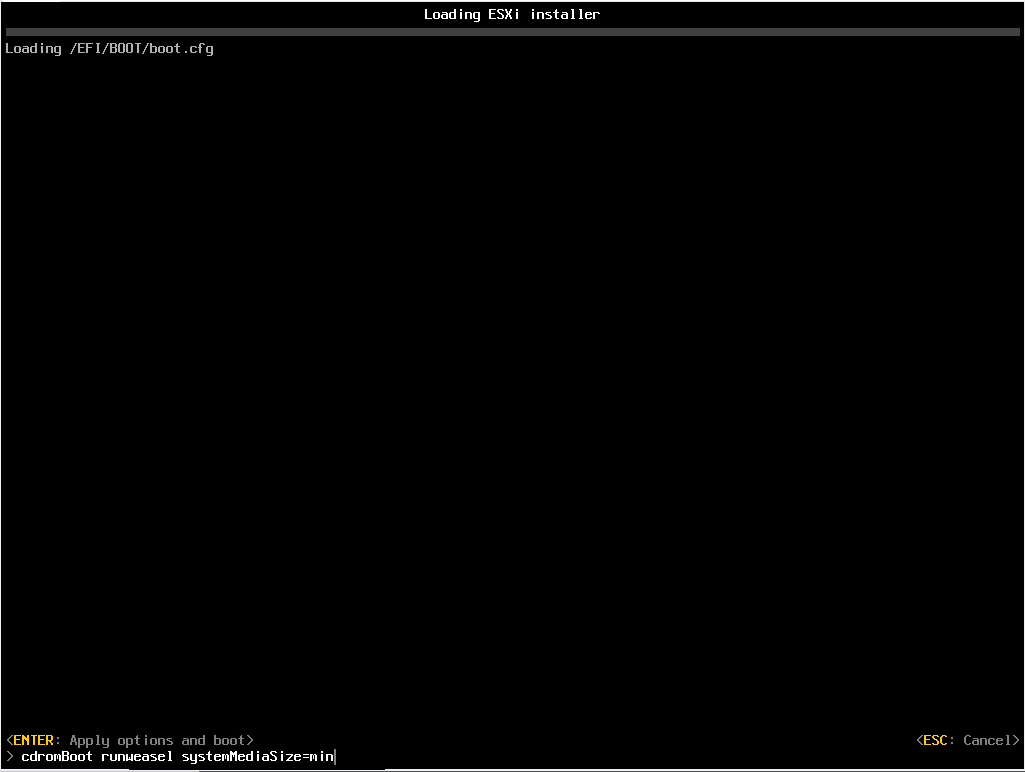
Add an option to minimize the size of the VMFSL.
Just follow the instructions to complete the installation as usual.
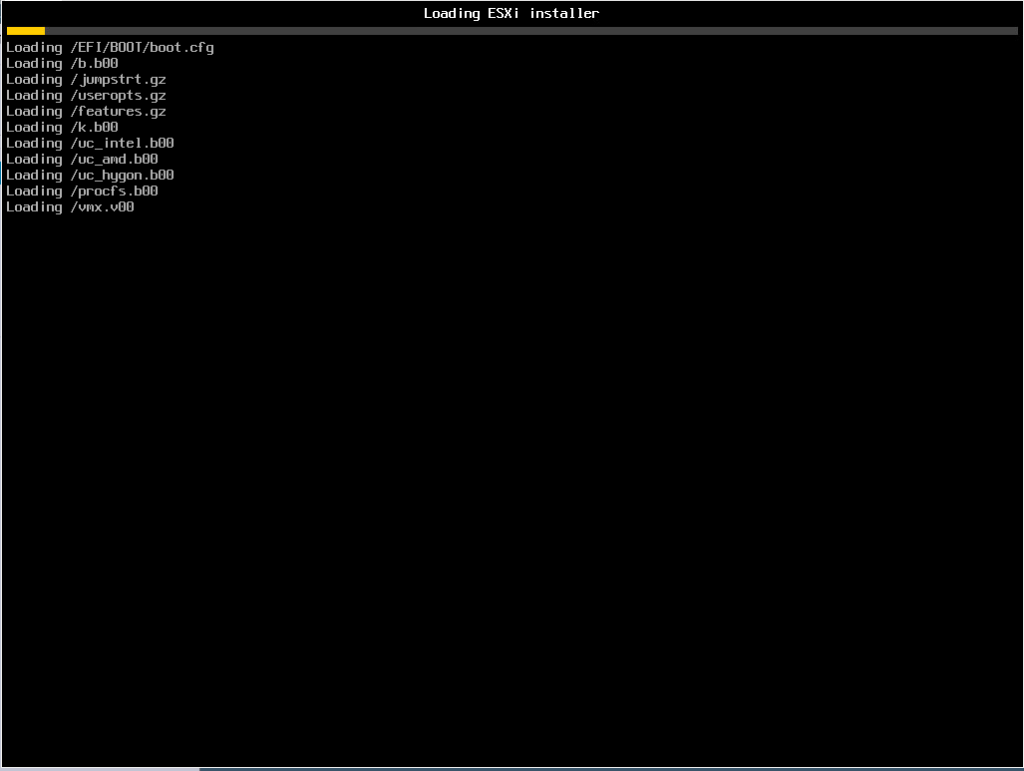
If it looks like this, the installation is complete.
Confirm that a datastore that was not present before now exists. Also, confirm that the hostname has been set as specified by DHCP.
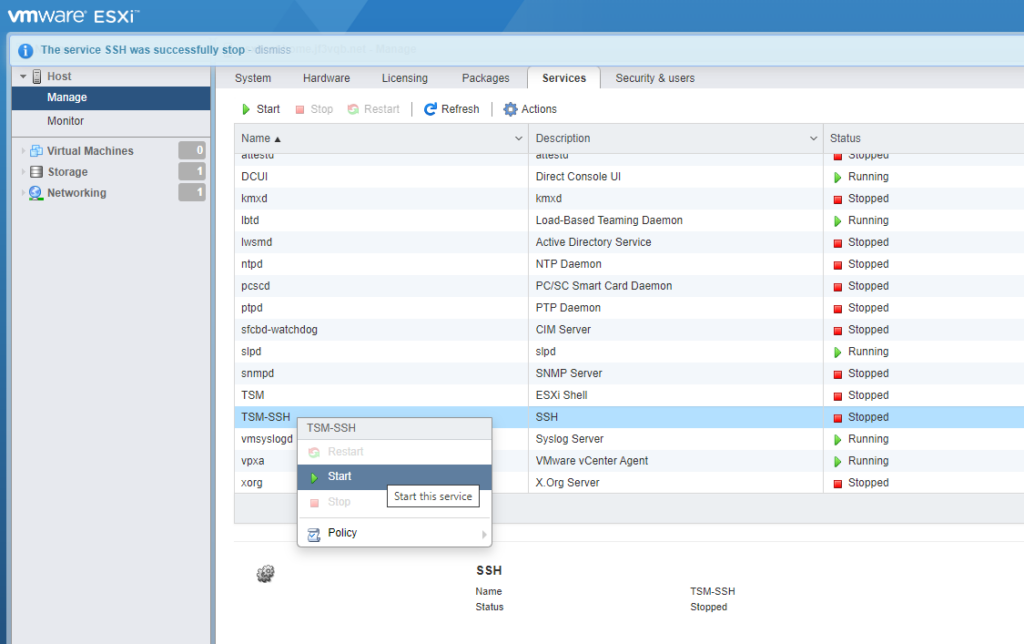
The version used was V7.0.1c, so we will update to the latest version of V7. I usually use the method with SSH, so I will start SSH.
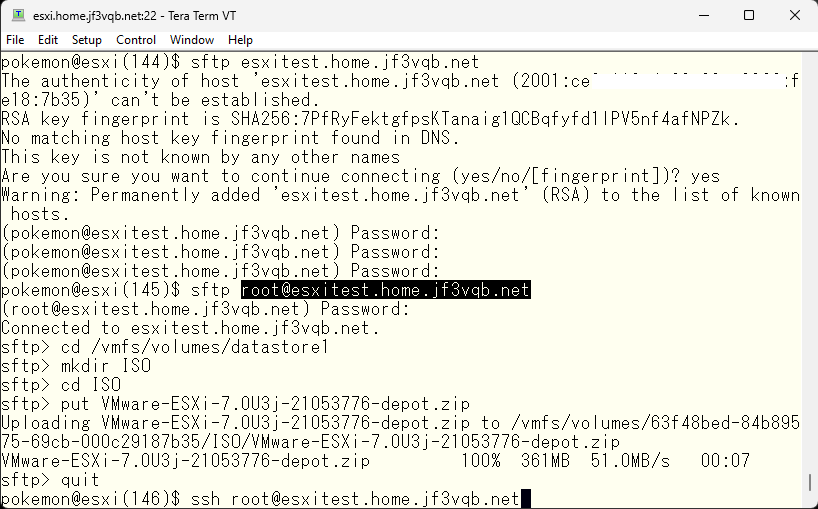
Connect via SFTP. There is only one user, root, so make sure to use that. Of course, create additional users if necessary 🙂
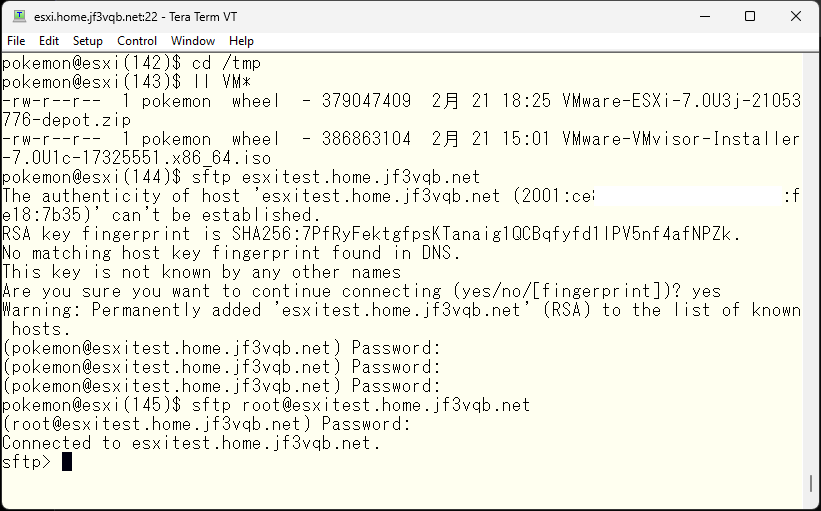
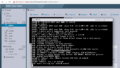
Send the patch file and then connect via SSH. Once you are connected, it’s easy since you are in the Linux world 🙂
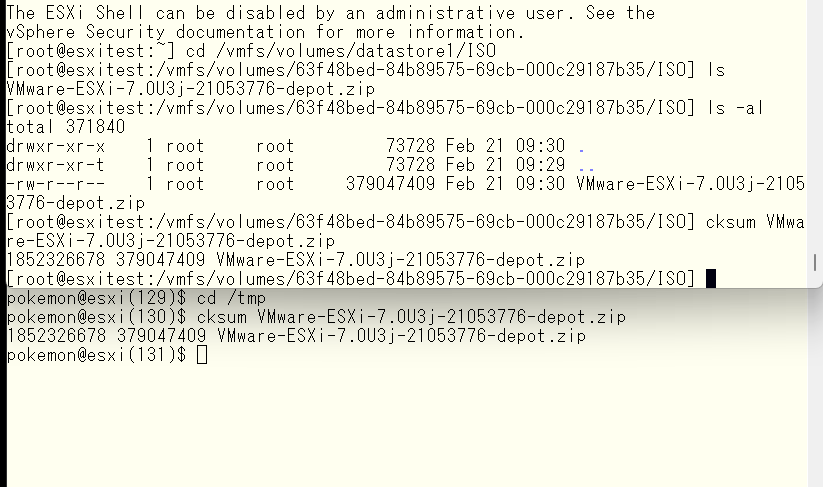
First, check if the file was transferred correctly by comparing checksums. It is especially recommended to compare checksums when copying files over WAN.
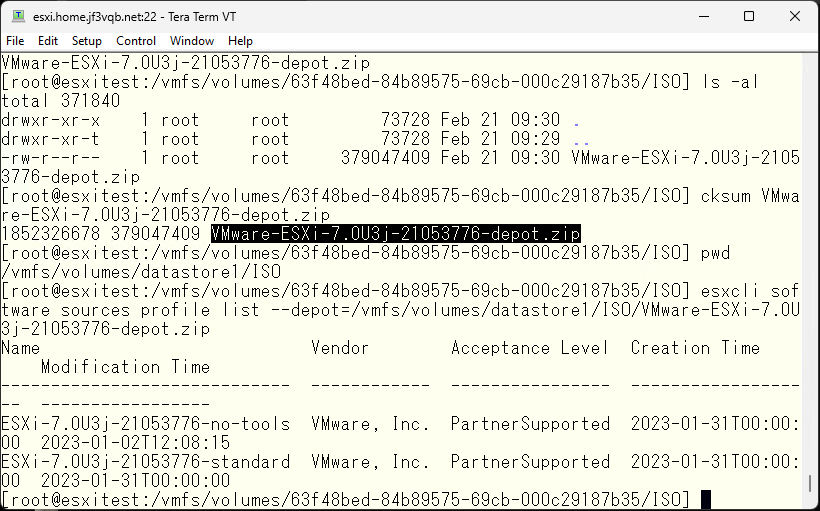
Examine the patch profile.
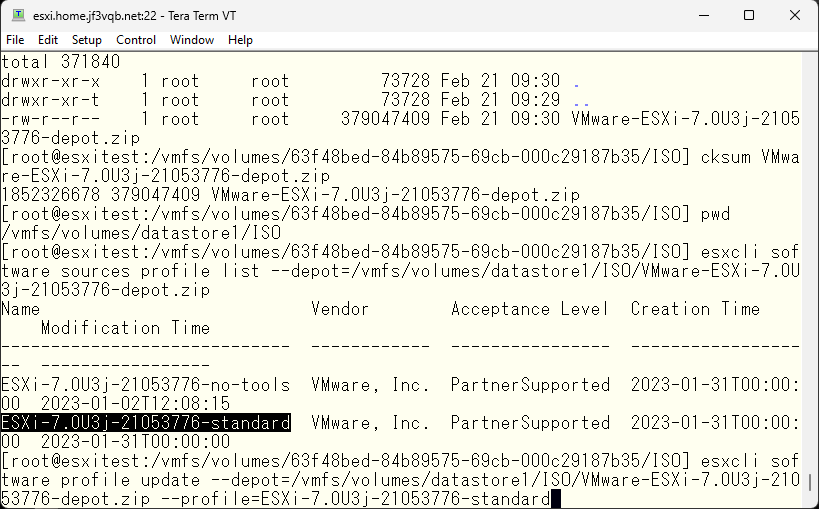
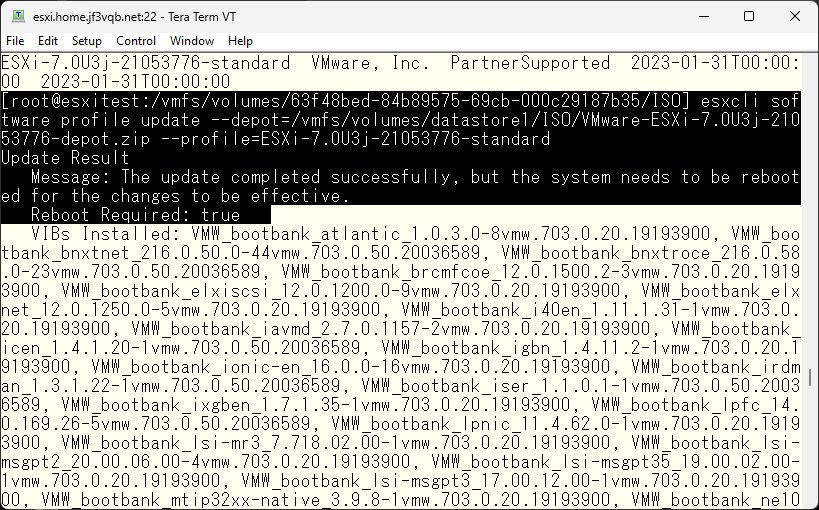
Install the patch for the standard profile.
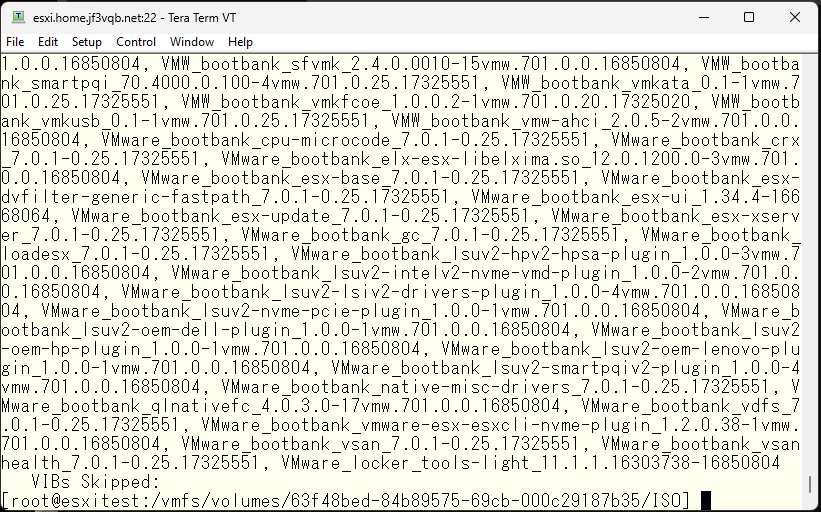
When the installation is complete, it should look like this. If you receive a message about unsupported CPUs in future releases, use the –no-hardware-warning option and run the installation again. Of course, this means that the hardware will eventually become obsolete, so you will need to start preparing for new hardware.
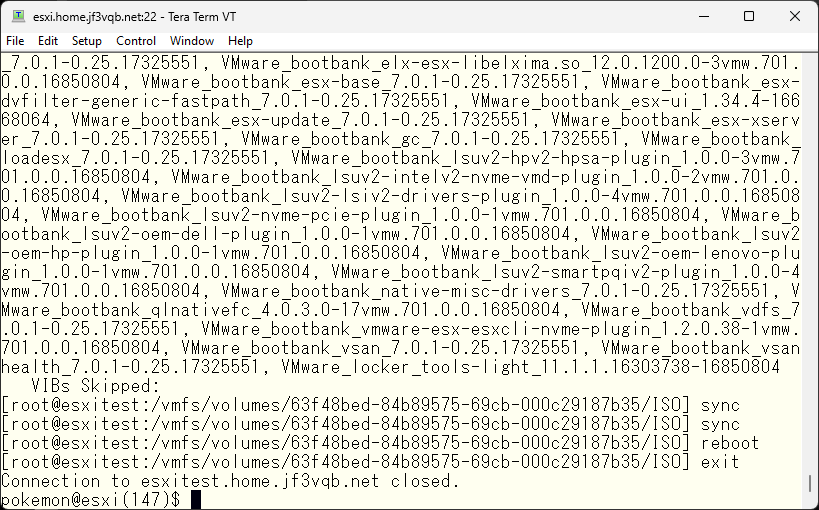
Check to see if it completed successfully. You can see the results if you go up a little bit.
After confirming that it has completed successfully, restart the system. Of course, this assumes that the virtual machine is not running. If it is running, stop it and then restart.
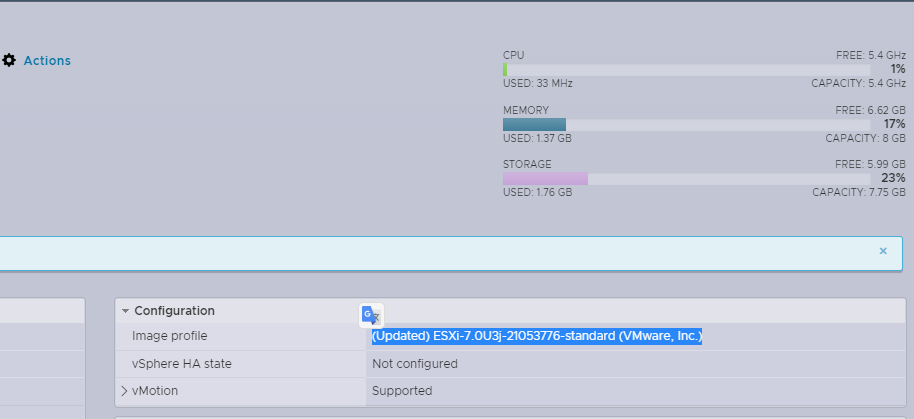
After restarting, check the version. Since you used the latest patch, it should be the latest version.
Next, we will make sure it is ready for use. First, check if the machine name has been set as specified in DHCP.
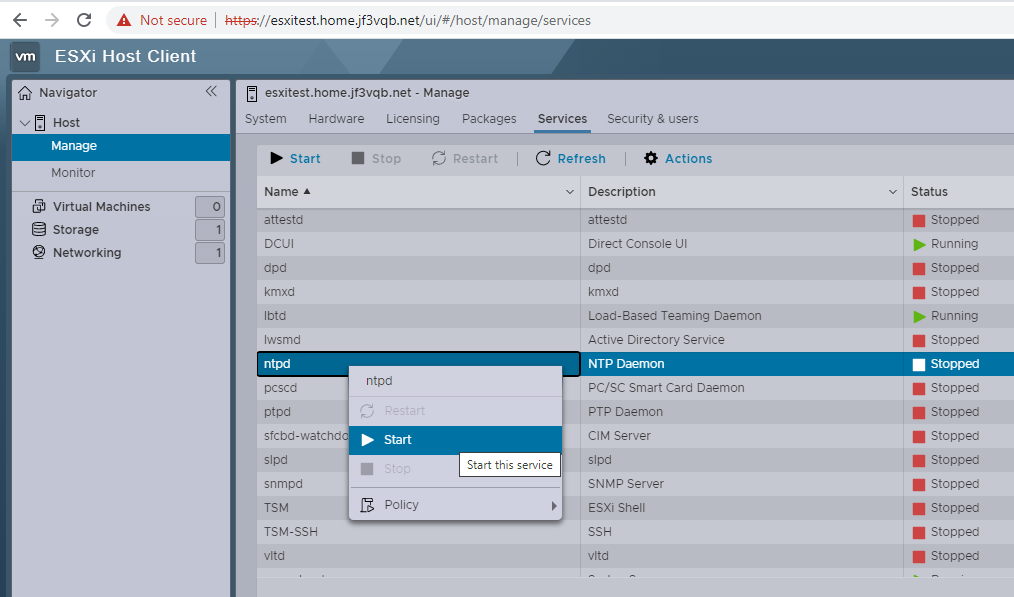
Next, if the time is not accurate, various problems may occur, so get the time from NTP. Set the parameters.
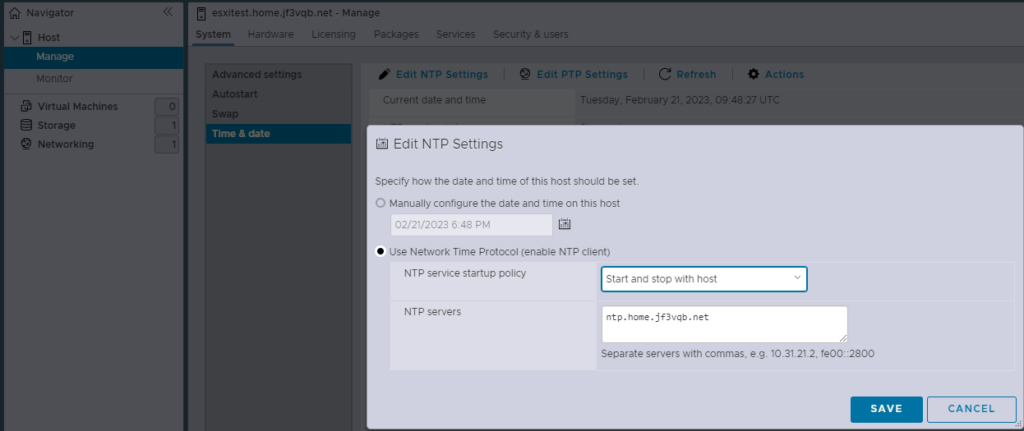
Then, start the NTP service.
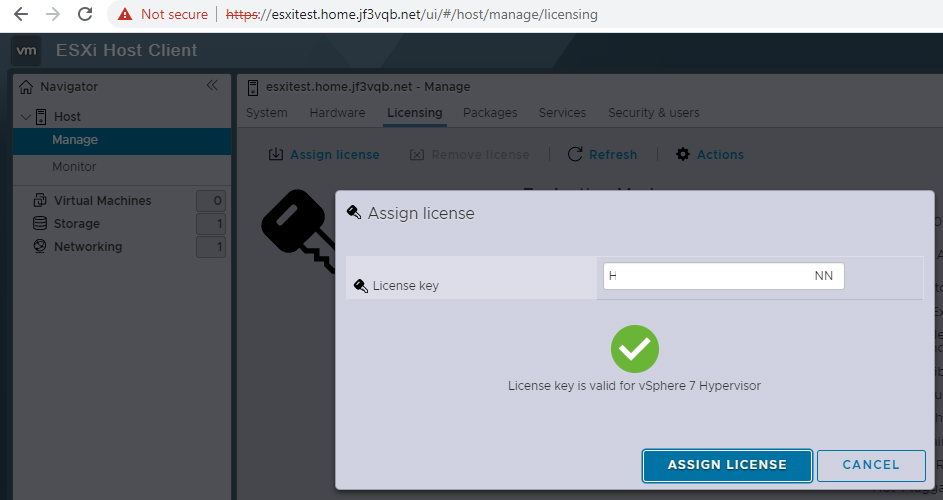
Next, let’s install the license. When you create your account with VMware, you can download the ISO image and get a license.
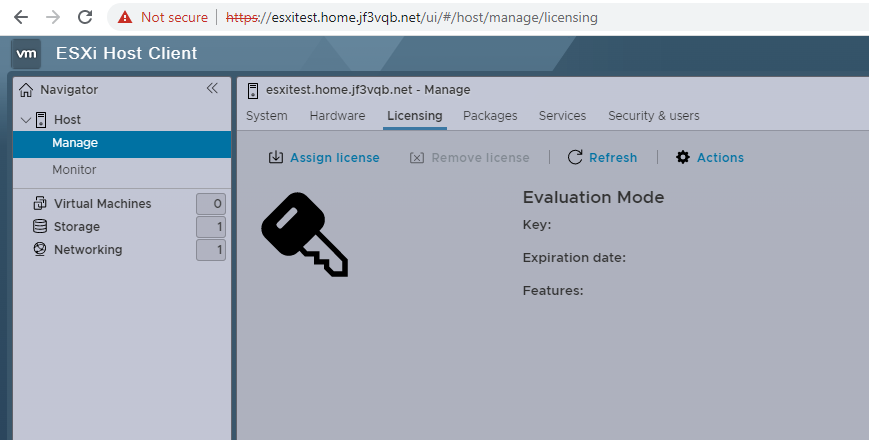
Enter the obtained license key and verify its validity.
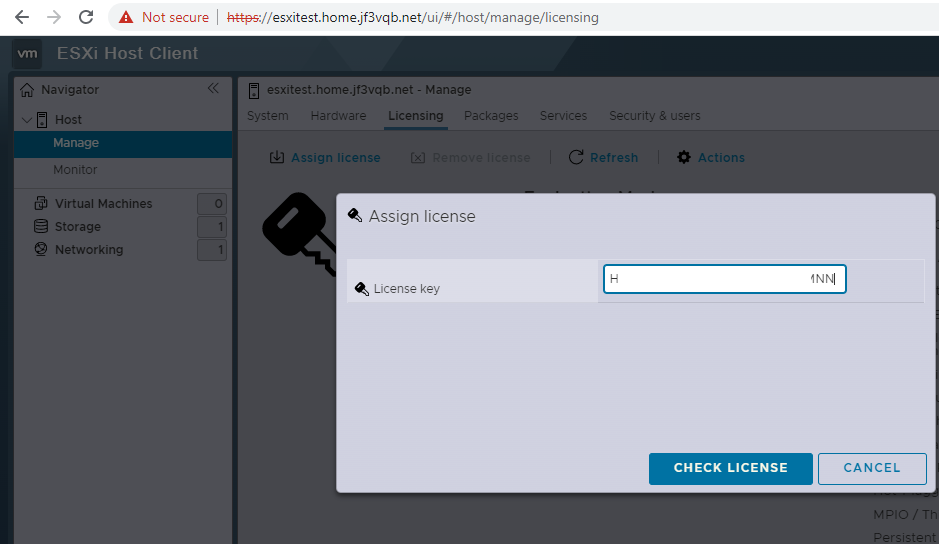
If it looks good, assign the license.
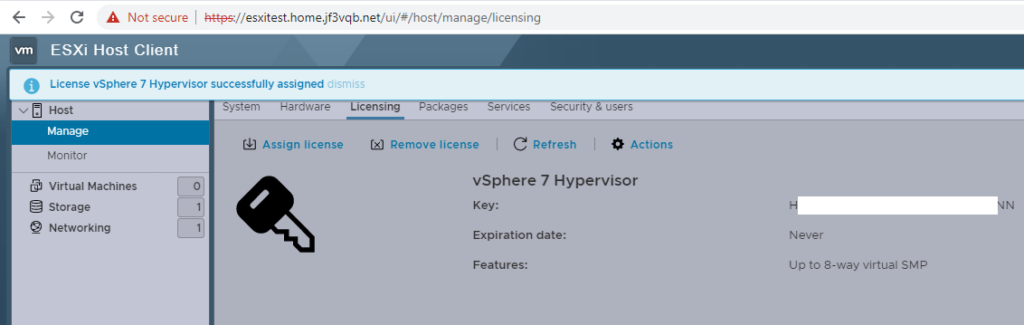
The license has become a perpetual license. However, it can only be used for up to 8 CPUs of SMP. Therefore, it is not a license that can be used for hardware for large servers, etc.
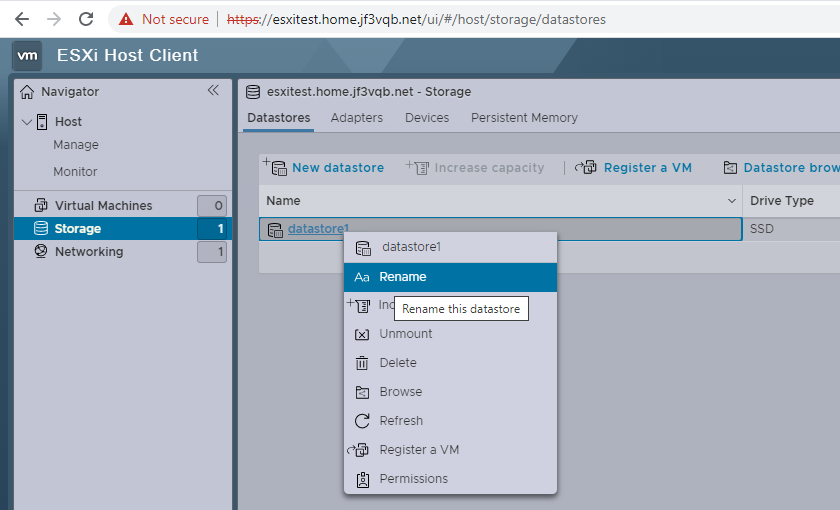
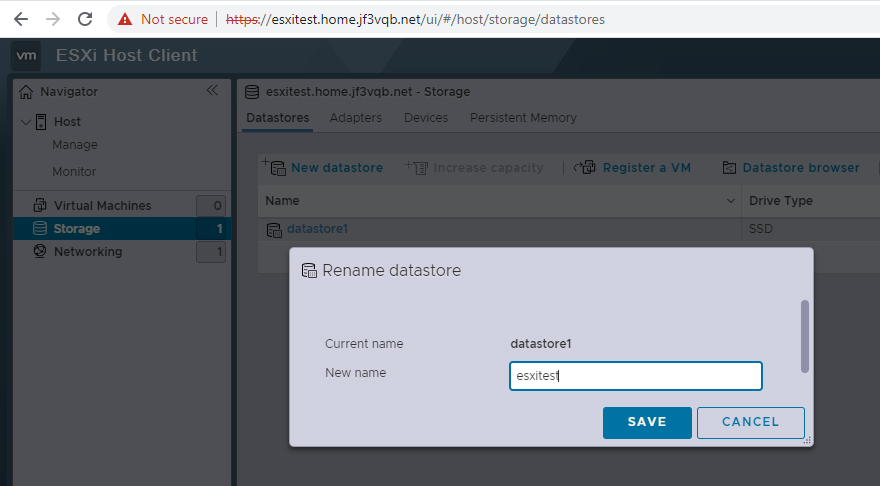
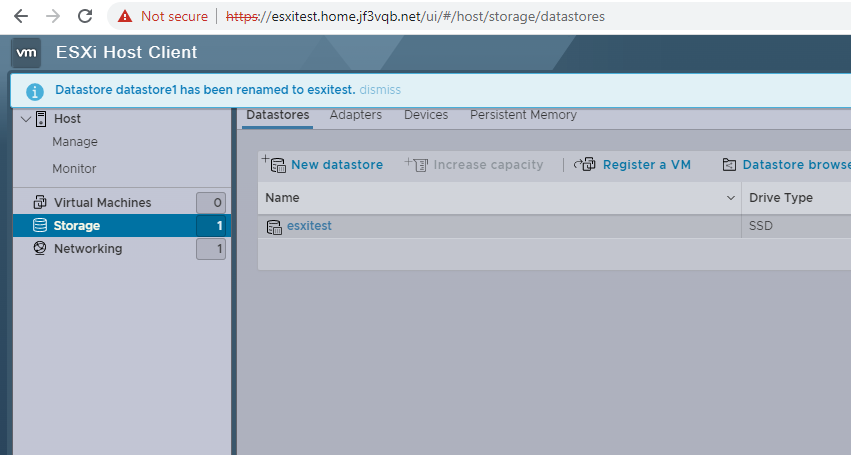
While this is not necessary, I personally like to have the storage name the same as the hostname. Therefore, I will change the name.
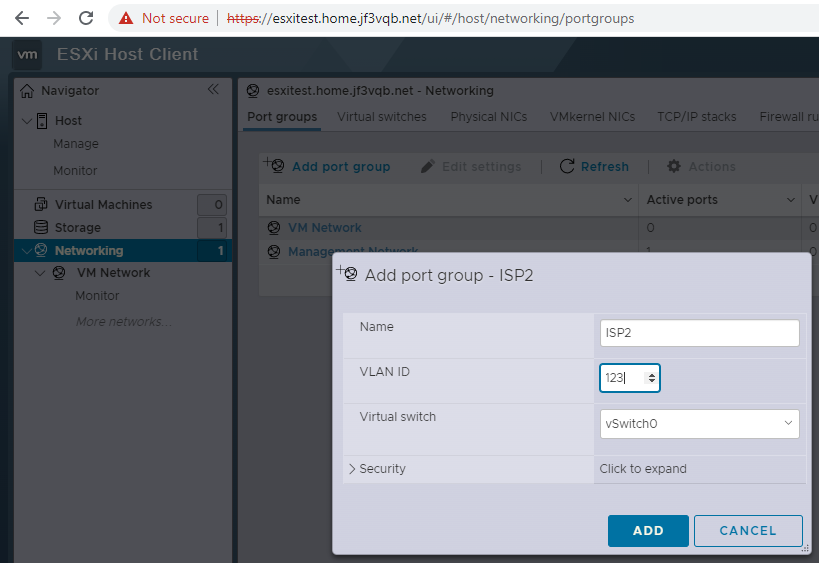
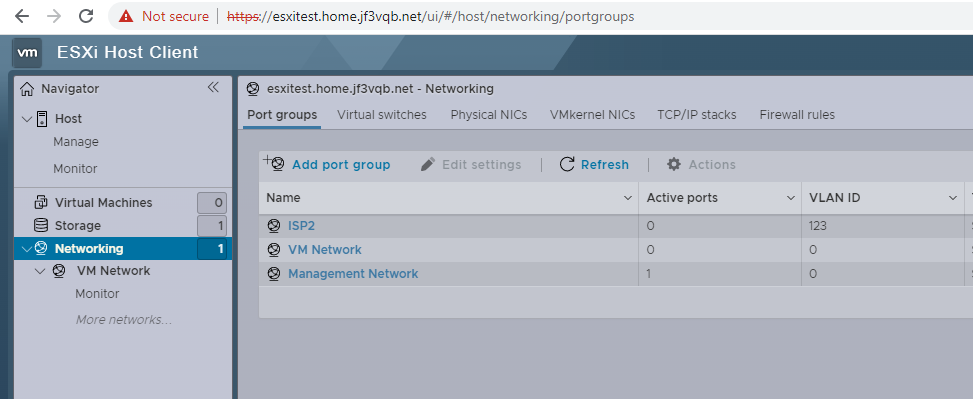
Next, modify the network settings. If a VLAN is set on the switch, make sure it can be used. Since VLAN 123 is used for the network outside the ISP router, create that network. You can also directly connect virtual machines for experiments such as PPPoE.
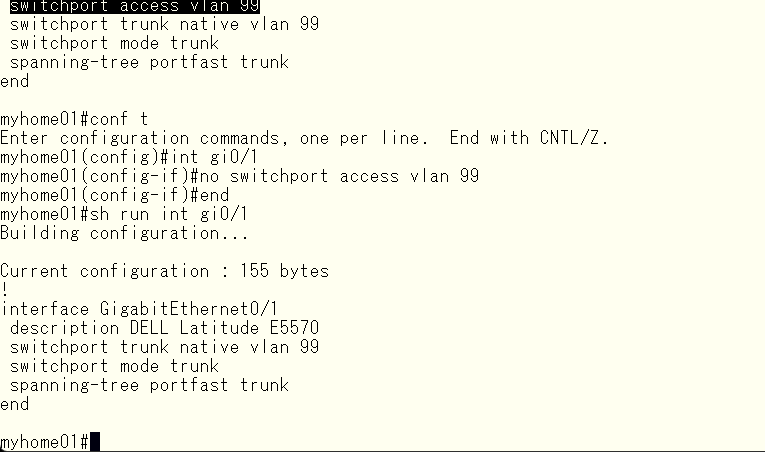
The port was originally configured as an access port for vlan 99. We will now change it to a trunk port. As you may know, an access port does not add a vlan tag to the network frames. On the other hand, a trunk port basically adds a vlan tag to the network frames. An exception to this is the native vlan, which does not add a tag to the frames for the specified vlan. Therefore, if you only look at vlan 99, it will behave exactly the same way.

If the access port has been changed to a trunk port like this, it will match the VMware configuration.
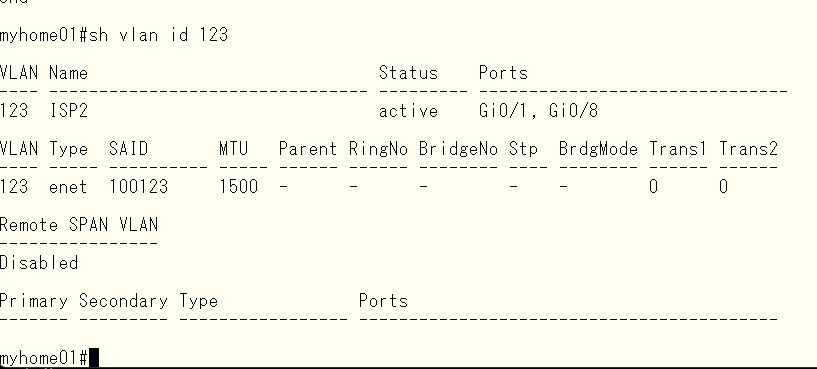
I will check which ports have been assigned to vlan 123 using the command, because if the default settings of the switch are different, it may not work. If vlan 123 is not assigned to Gi0/1 as shown, it is likely that no vlan has been assigned by default to the trunk. Therefore, I will make it usable with the command ‘switchport trunk allowed vlan add 123’.
This is what it looks like on the VMware side.
This time, I took screenshots of the nested ESXi configuration on ESXi. So the disk size is not the actual one, such as 40GB. However, the VMFSL is 32GB and the remaining space is allocated to VMFS, so the installer worked as expected.
This is not a typical usage, but it can be useful for experimenting before execution, so please take it as a reference.
By the way, this is the state of VMFSL when upgrading from V6.7 to V7. This is for reference only.
The method I introduced today cannot be used for large-scale configurations due to licensing restrictions. However, it is a legitimate license, so it can be a powerful troubleshooting tool as a remote office tool on a laptop PC or similar. Even though it is a used laptop, it comes with a battery that can be used as a UPS 🙂 You can also define regular startup in the BIOS, and it will start up automatically after a long power outage. You can also turn it on at any time with WOL. There are many ways to use it depending on your ideas. However, before sending it to a remote area, be sure to replace the motherboard button battery. Otherwise, they will forget everything you have ordered:)
Advertisement below