The original Japanese version is available here.
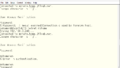
Last time, we touched on the initial configuration before using TACACS, where we configured Cisco switches. This time, we will set up a FreeBSD server as a TACACS server. Checking the /usr/ports directory, we found two TACACS options. Reading the description in the directory, it seems that the “tacacs” option is a higher compatibility version of “tac_plus4”. However, after compiling, we found that the installation failed, so we will use “tac_plus4”. The document says that “tac_plus4” plus alpha is “tacacs”, so in case we need to use the “plus alpha” part, we would like to try “tacacs”. We hope that by then, the installation problems will be solved. So, we will do “make install clean” in the “tac_plus4” directory.
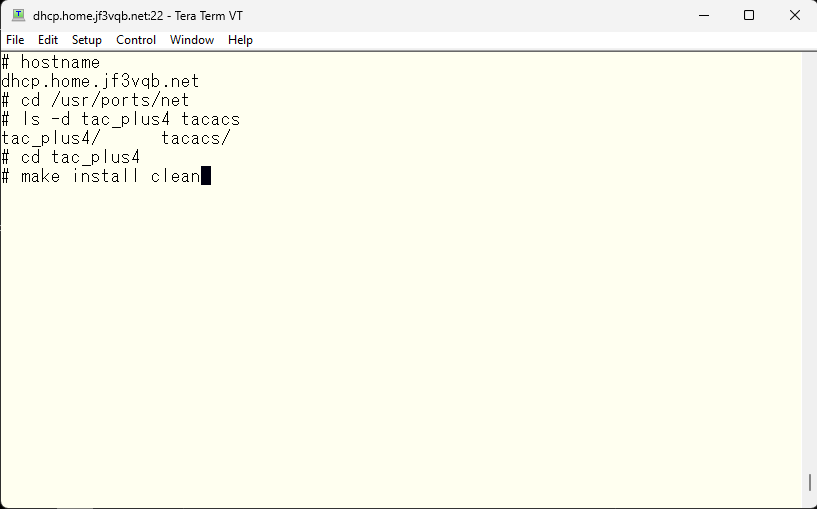
Upon completion of installation, this message was displayed.
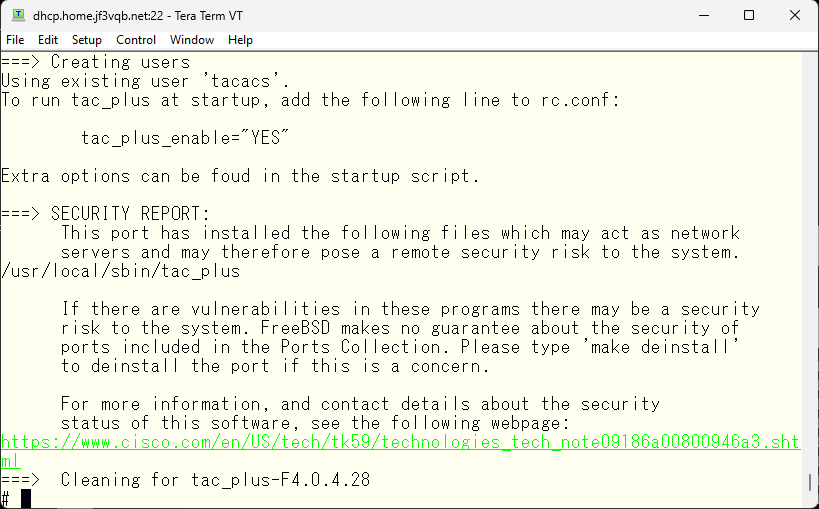
As instructed, add the variables to /etc/rc.conf.
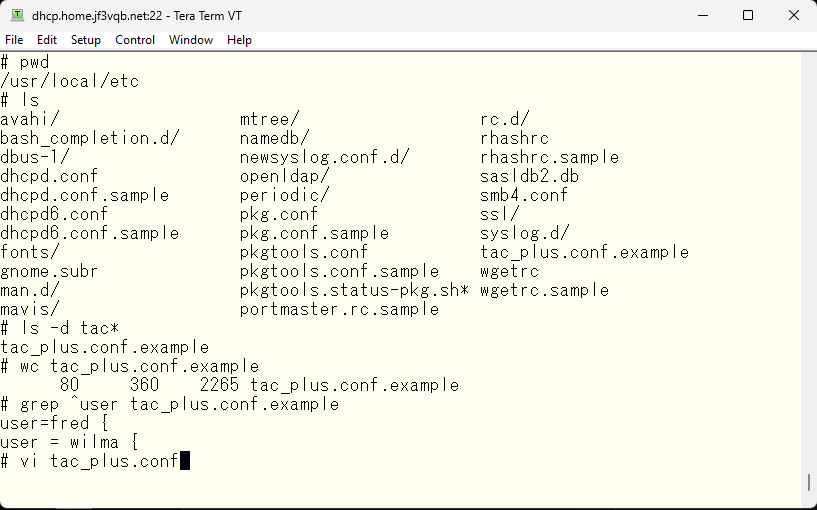
Upon examining the configuration file, I found that there are two sample users. These samples may be seen later as examples. For now, I will create the configuration from scratch.
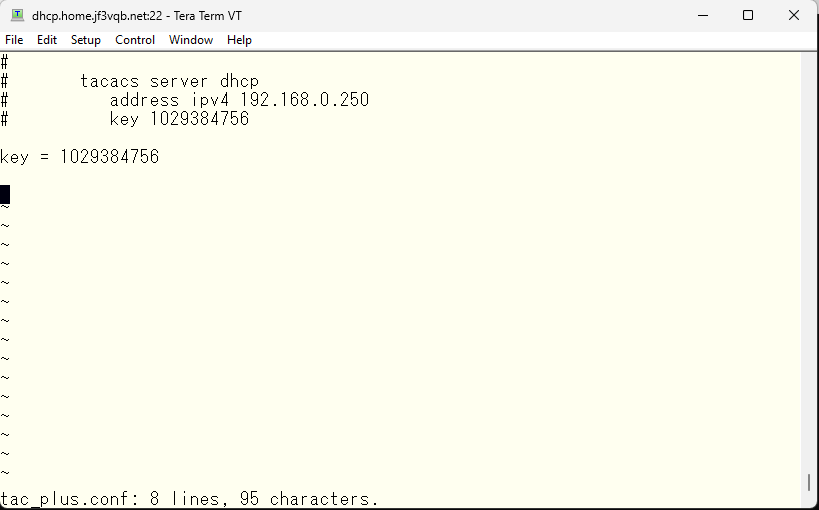
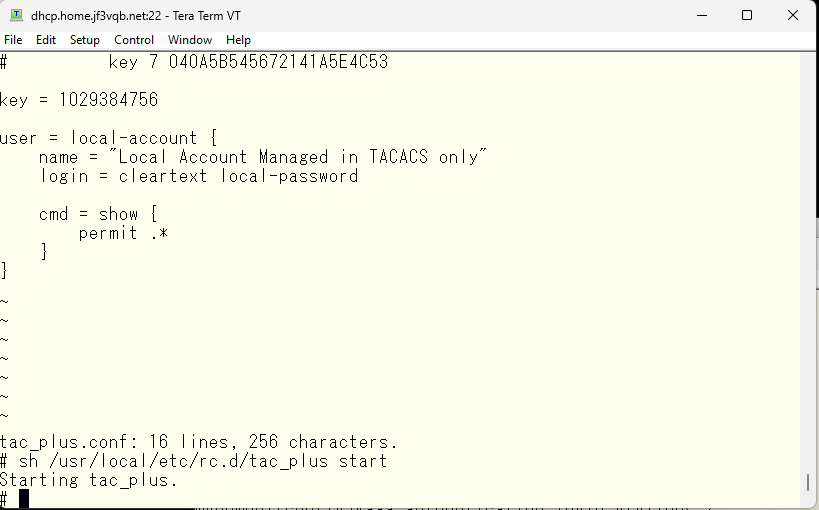
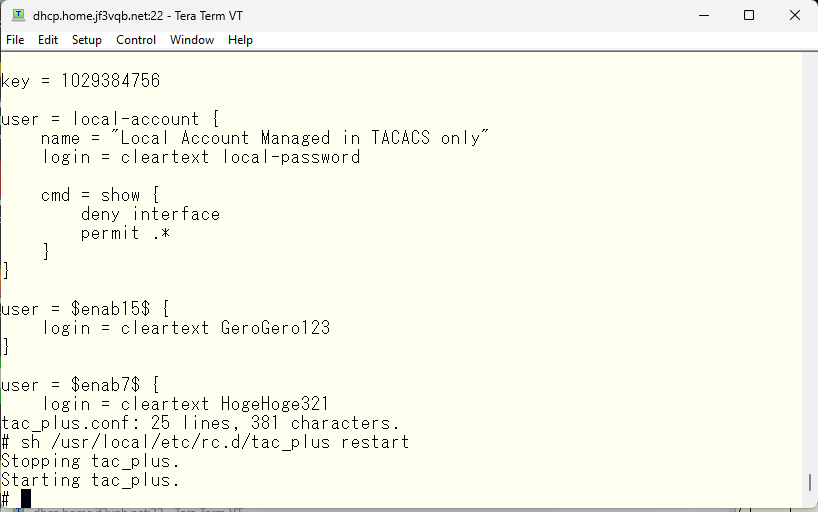
First, define the key variable. As stated in the comments, the key must match the key defined in the tacacs server part of the Cisco device. If not, the encrypted traffic can’t be decrypted by each other. In other words, the TACACS server can’t be used.
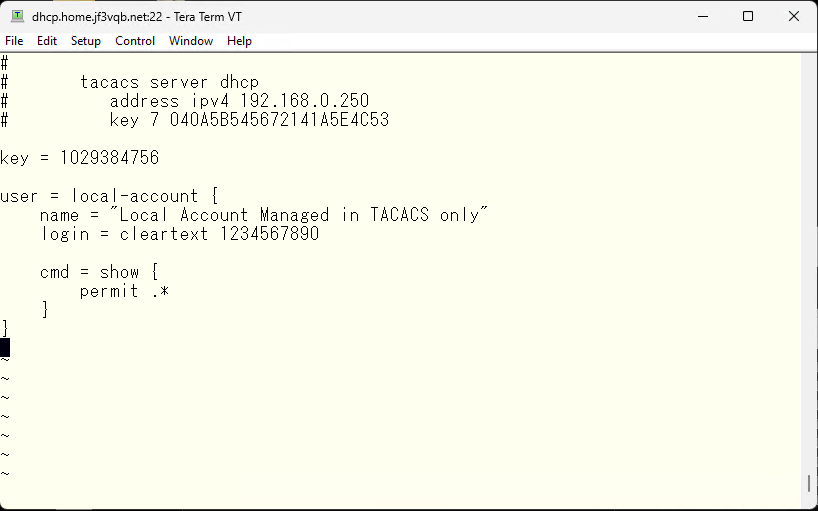
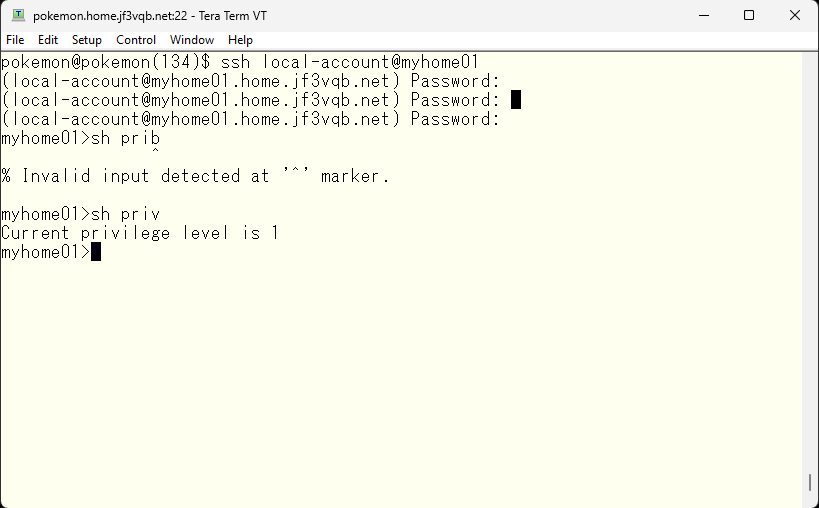
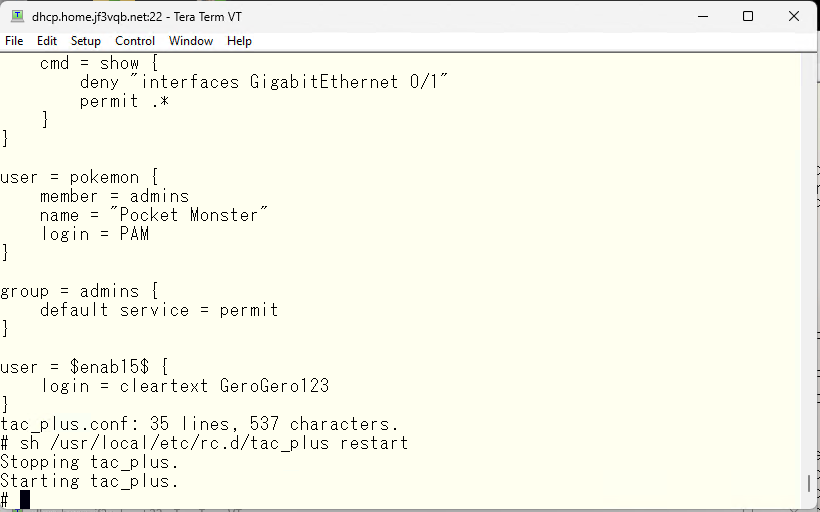
First, let’s create a TACACS local user that is easiest to understand. The user name is “local-account” and the password is “1234567890”. The only command that is specified is “show xxxxx”
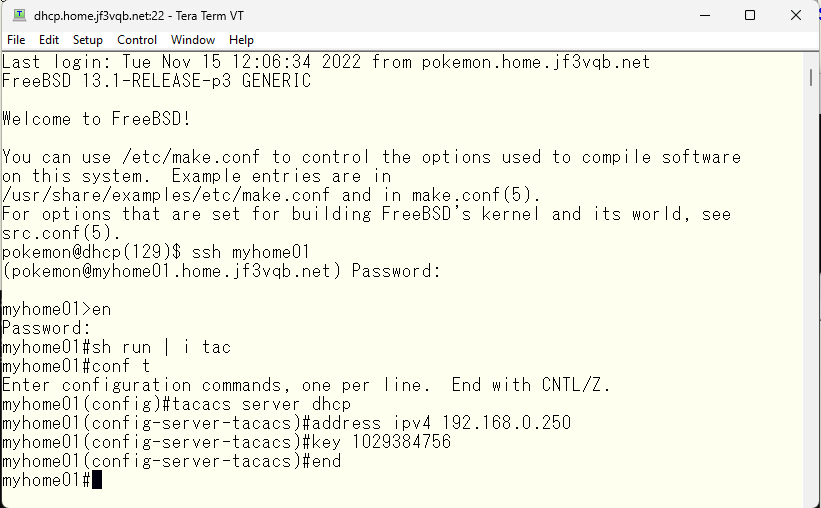
Next is the configuration on the switch side to use the TACACS server we just created. The essential requirements are the IP address and password. There are various other options, but these can be checked when problems occur, apart from them.
Next, multiple TACACS servers can be used. To do so, we create a server group. As an example, we’ll call it the JF3VQB group. The only TACACS server that can be used as a member is the server dhcp, so we will add it.
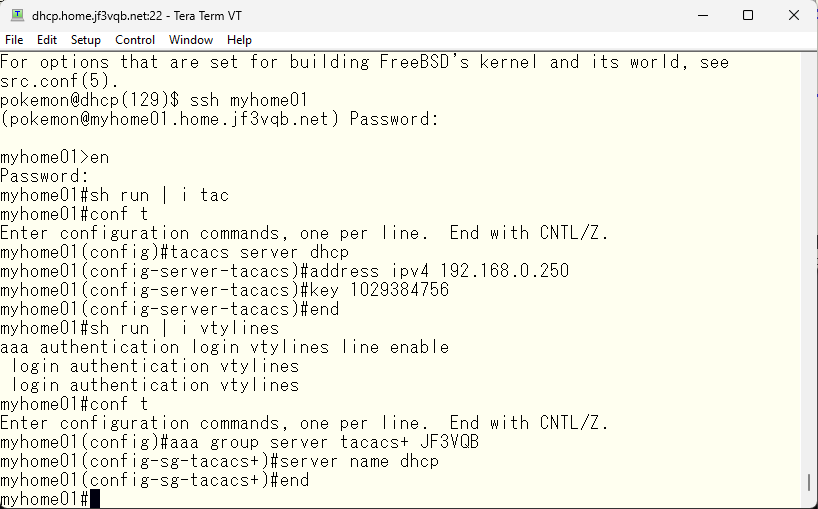
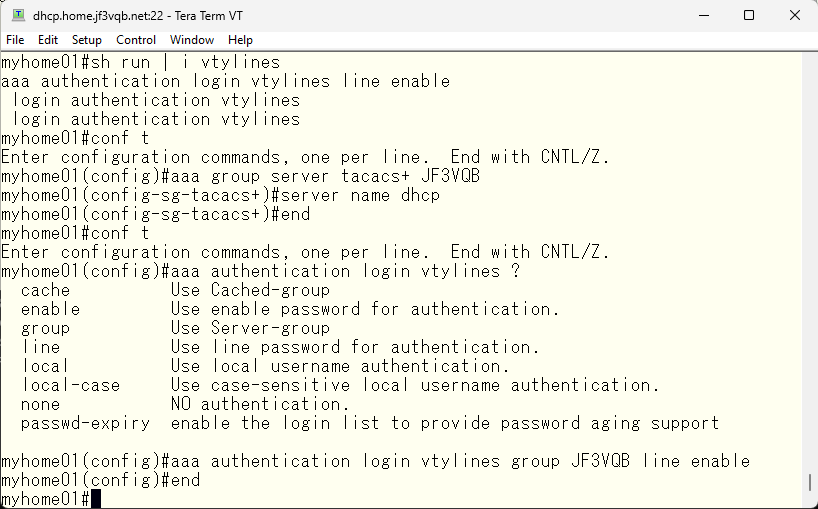
Next, you must tell the switch to use TACACS for the VTY line access control. You specified it using the aaa command with the line and enable options in the previous step, but now add the TACACS group as an option. It is important that the TACACS group is specified before other options, as it will be tried in the order specified. As mentioned in the previous step, the order of the specified options matters.
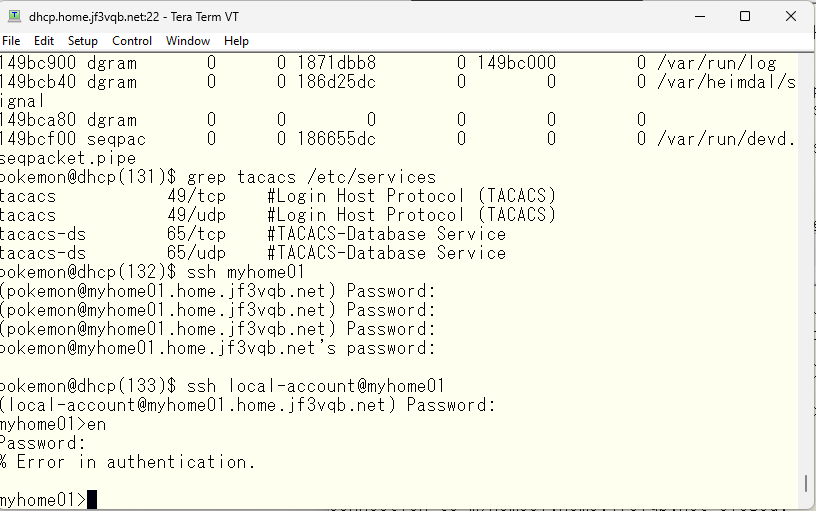
Now, you should be able to log in to the switch with the local-account user. Let’s give it a try. Start ssh with a user specified.
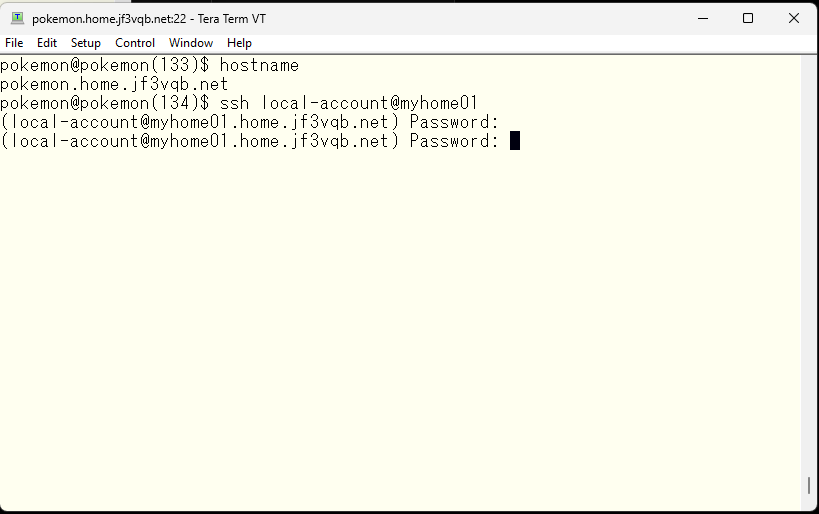
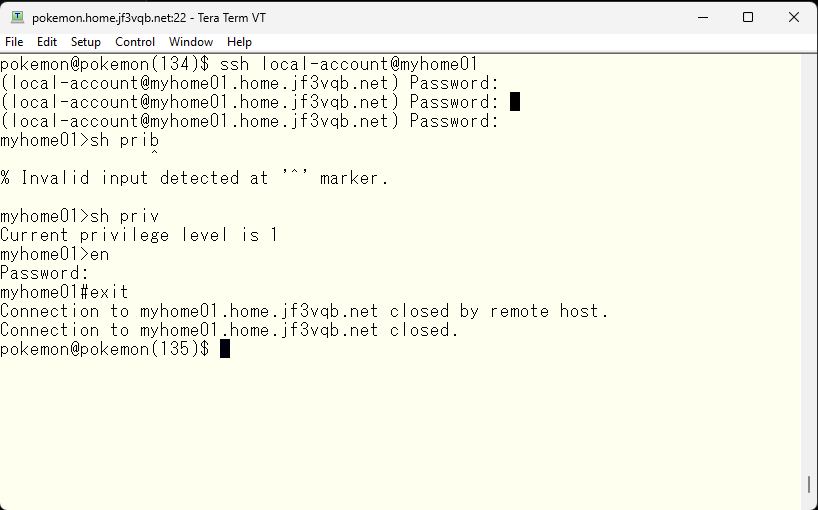
Oops, the TACACS server was not running 🙁 Let’s start it.
Next, let’s try the password specified in the TACACS configuration file again
It worked 🙂 I was also able to become an administrator. In this case, the password is the one specified in the local “enable secret” statement.
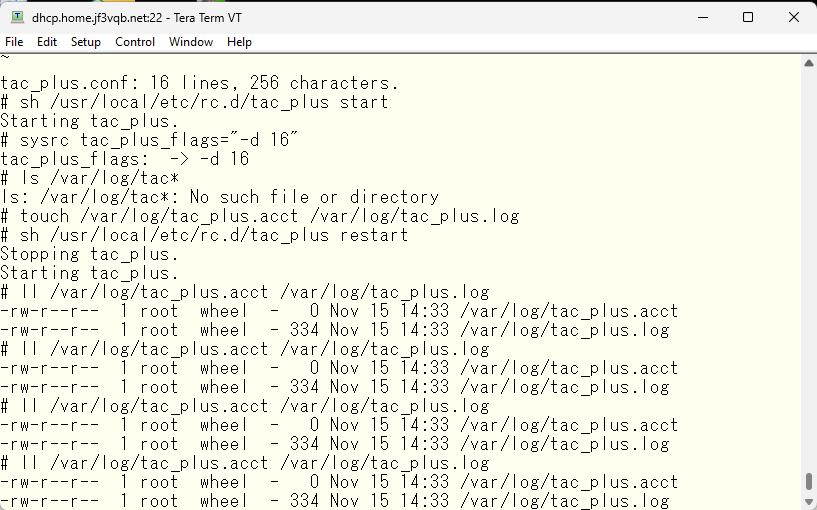
Next, we will enable accounting. According to the manual page for tac_plus, operational logs will be output to the tac_plus.log file and accounting-related logs will be output to the tac_plus.acct file. However, you need to specify what level to output is required with the “-d” option. For now, you can record authentication and authorization-related logs by specifying “-d 16”. Add this option to /etc/rc.conf, create an empty log file, and restart TACACS
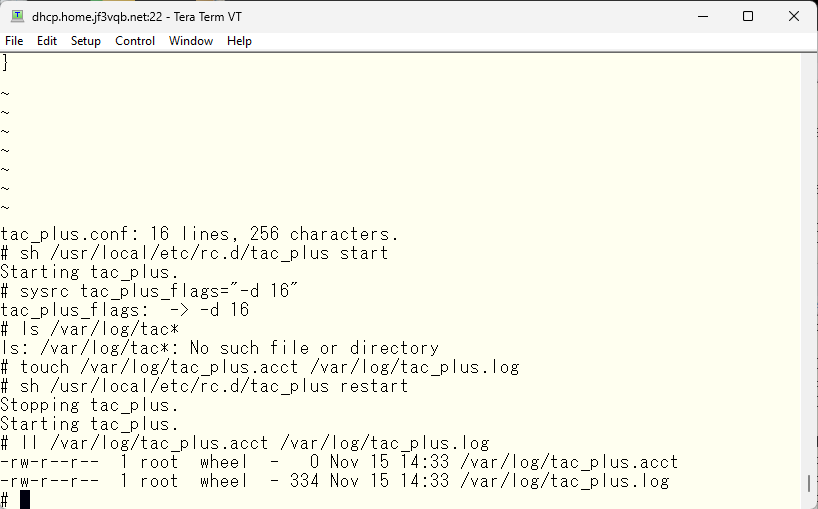
The tac_plus.log file can be verified to contain information such as restarts. Now, let’s add the accounting configuration.
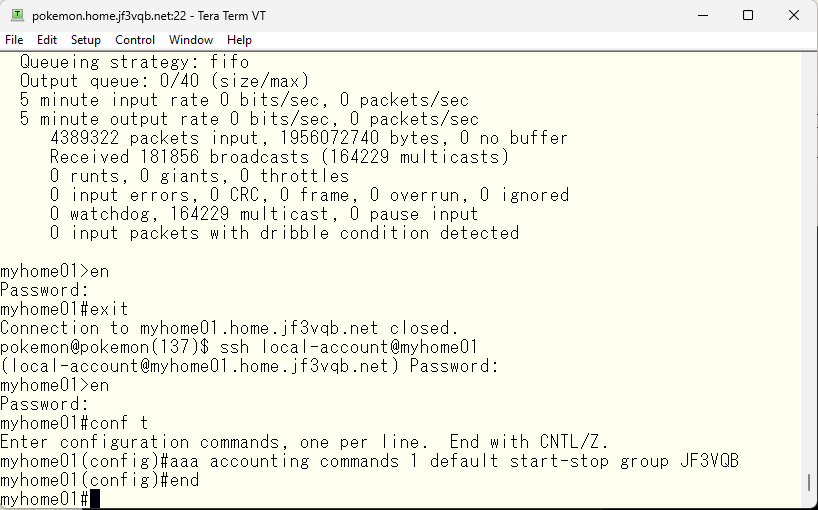
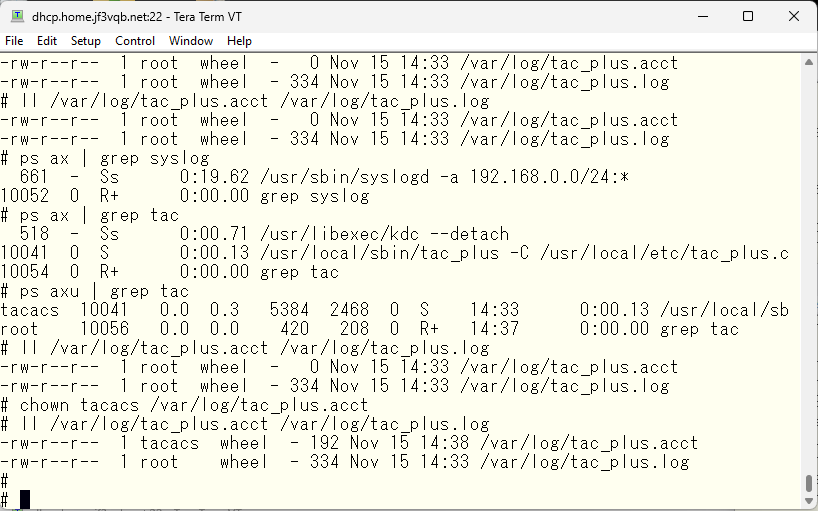
Despite adding the aaa command, the tac_plus.acct remains empty and unchanged, without any content added from the switch.
After checking, it appears that tac_plus is running as the tacacs user, so changing the owner of the tac_plus.acct file to tacacs has resulted in the logs increasing.
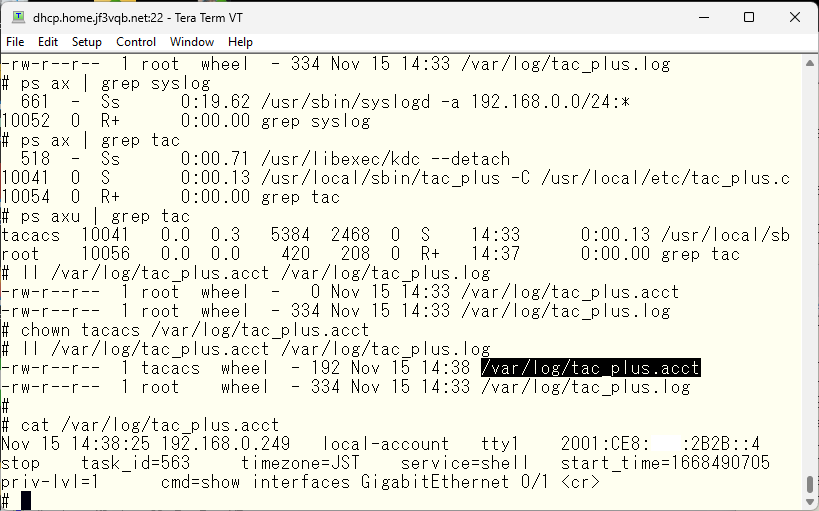
The contents of the file are plain text and record who did what and when.
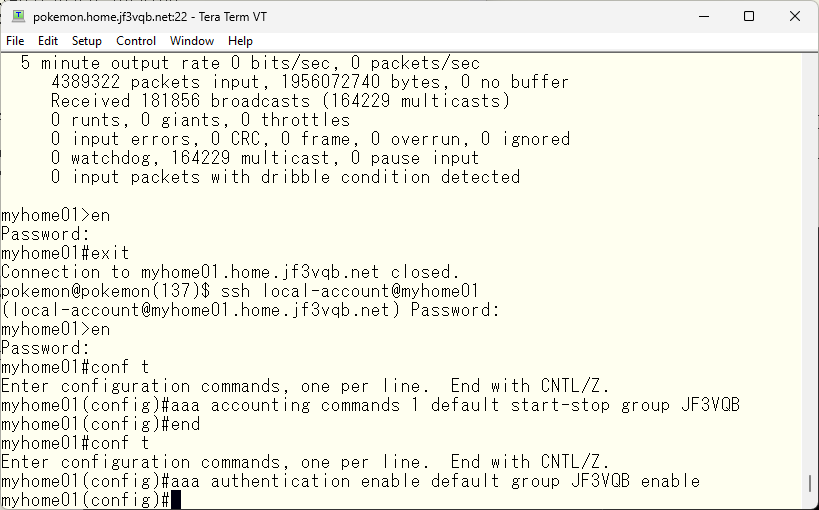
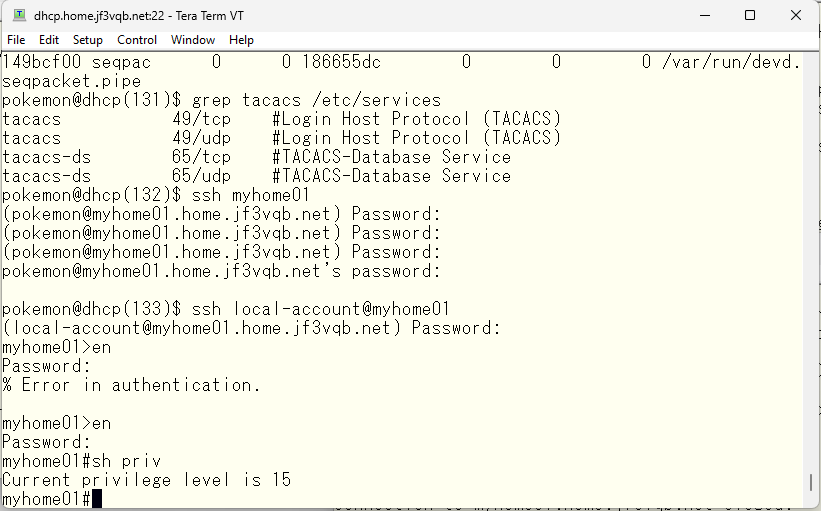
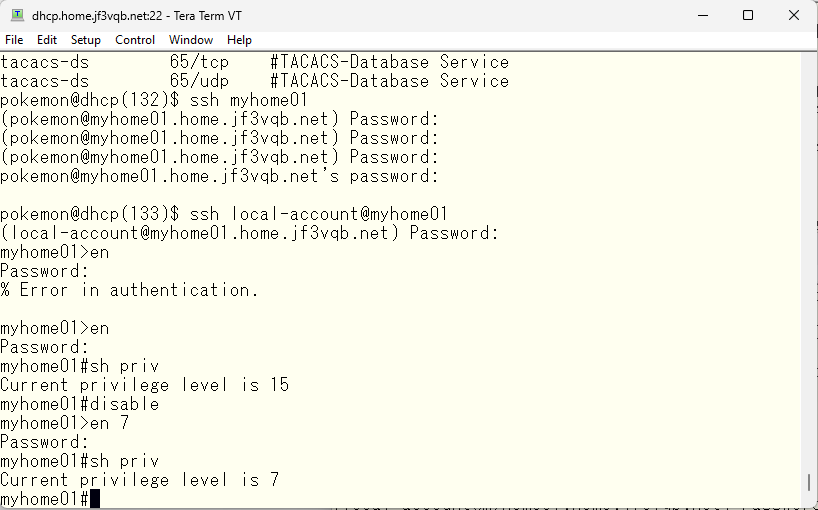
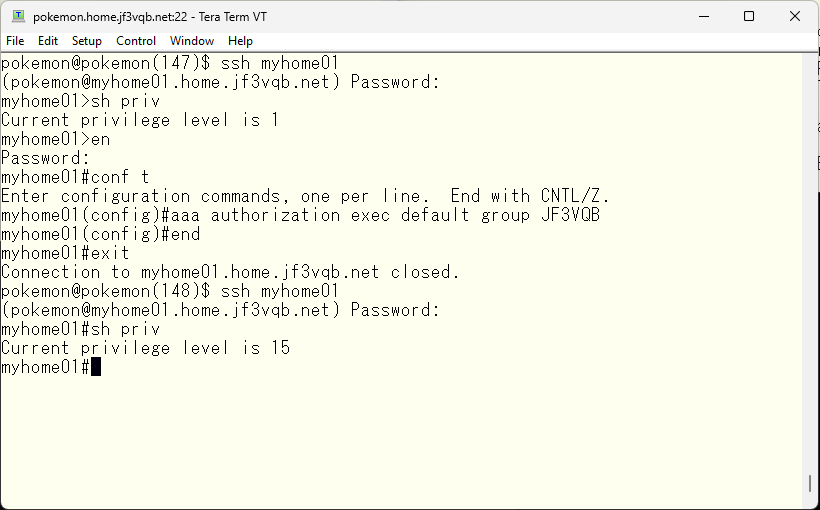
Next, we will try to manage the enable password using TACACS as well. We will add the following aaa command. We want to have the same configuration for both console and vty lines, so we will set it as the default setting.
When we run the enable command and input the password specified locally, the password will no longer work. As specified in the aaa command, TACACS will be tried first for the enable password. In this case, TACACS is not unavailable, but it returns an error (it should be “user unknown”) because the password is different. So, it fails.
According to the Cisco TACACS manual, the password used for the enable command is the password of the enabl + privilege level account. So, if it is at the administrator level, create a $enabl15$ user and set a password.
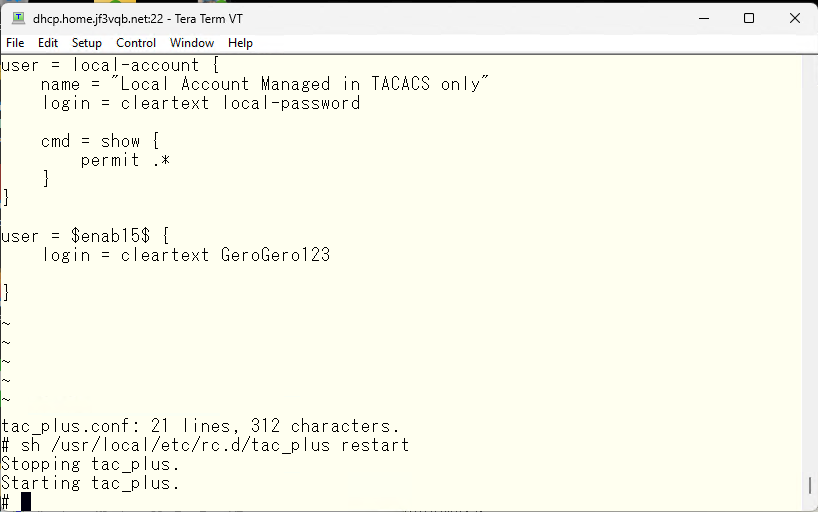
Then, you can gain administrative level access privileges.
By creating a $enabl7$ user with a password, you can use the “enable 7” command at support level privilege level 7.
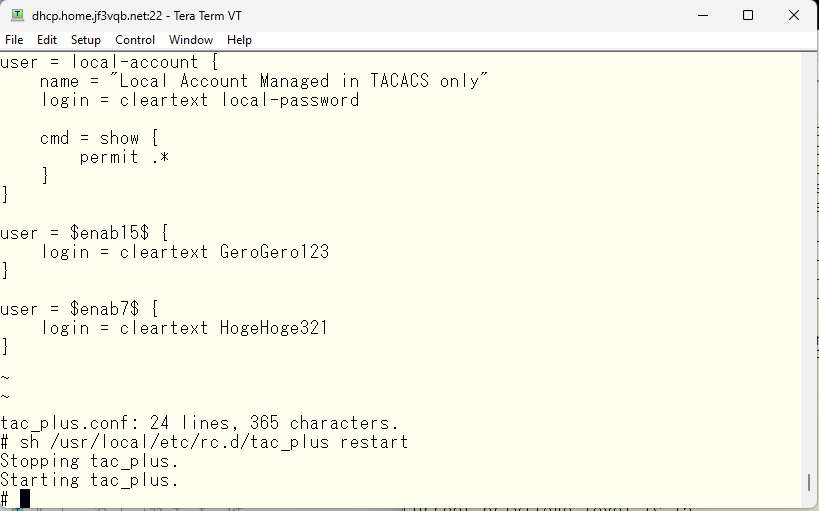
The default privilege level for the enable command is 15, so you need to specify the privilege level as an argument. Of course, you need to enter the password specified for the $enabl7$ user when prompted for the password.
The configuration for authentication, accounting, and enable related settings continued, but the most interesting part of TACACS is the authorization part. Command authorization can also be specified with TACACS using aaa.
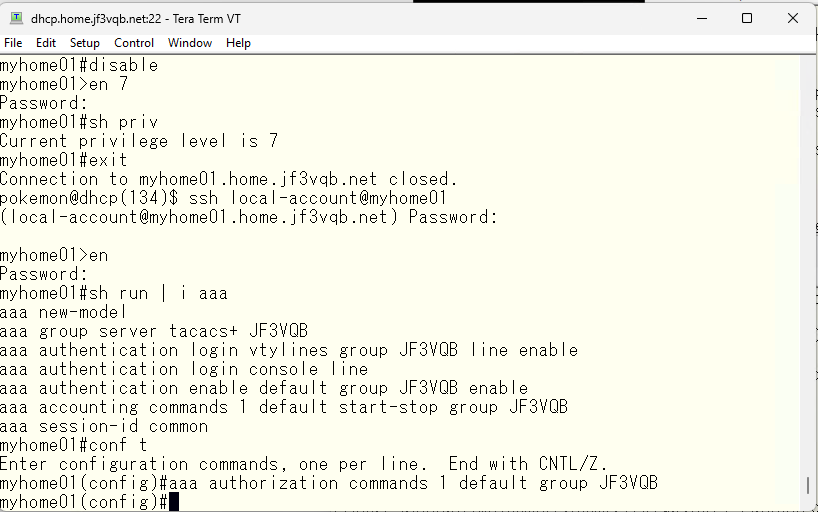
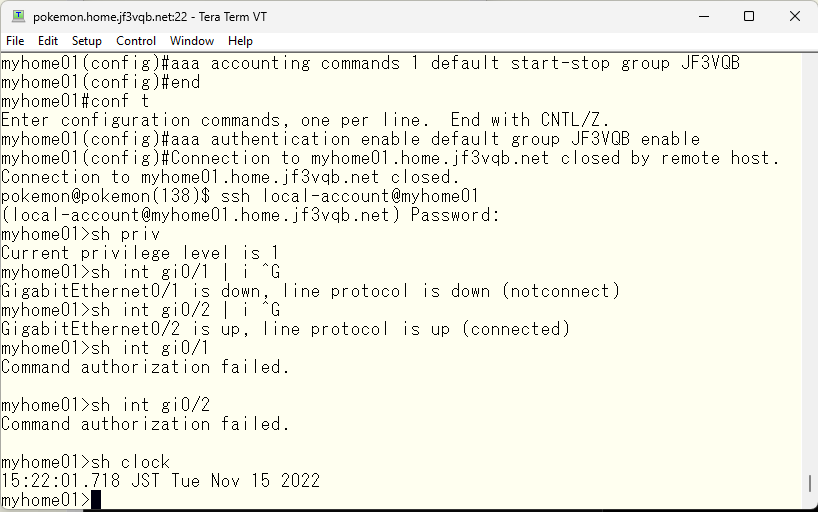
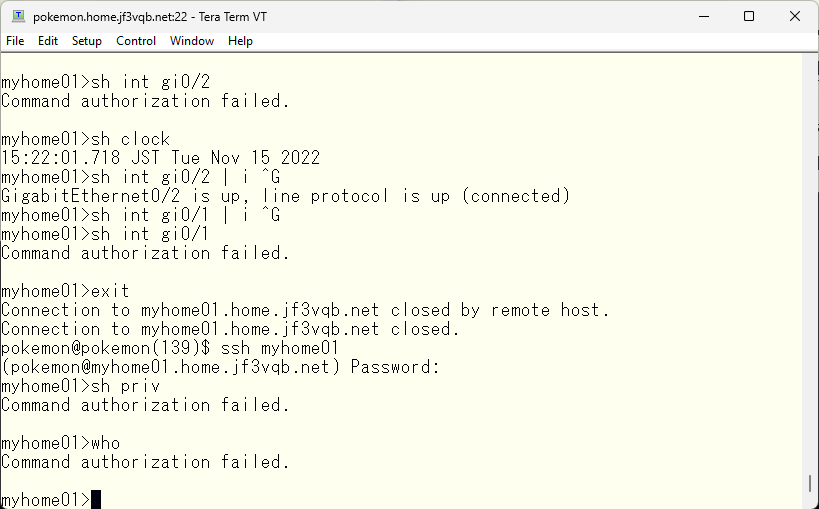
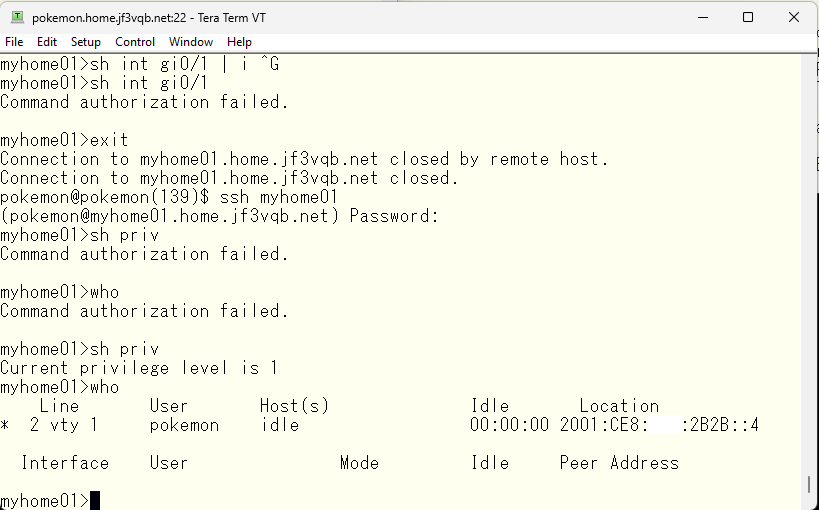
If no action is taken, the “show interface xxx” command can be used because it is written in the TACACS configuration file that “show xxx” is allowed to use. It may be misunderstood, but the current local-account user’s privilege level is 1, meaning that commands that can be executed with privilege level 1 can be managed by TACACS. For example, “show running-configuration” cannot be executed with privilege level 1. So, even if “show xxx” is written as usable with TACACS, that command cannot be executed. The switch’s “privilege” command can be used to change the execution permission level of these commands. For example, if the switch is changed so that “show running-configuration” can be executed with privilege level 1, TACACS can manage the execution of “show running-configuration” as specified by the TACACS configuration.”
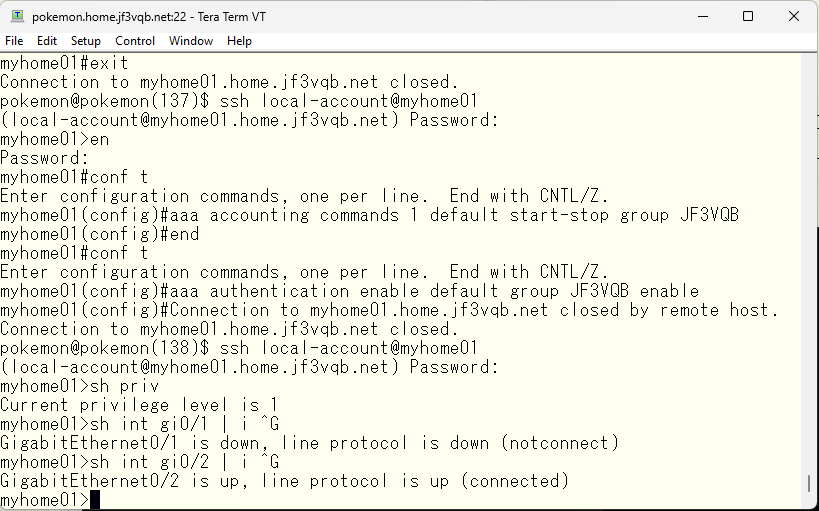
Let’s manipulate the TACACS configuration so that the interface command is not usable.
As a result, the “show interface xxx” command that was previously working will no longer work. However, other commands such as “show clock” will work normally.
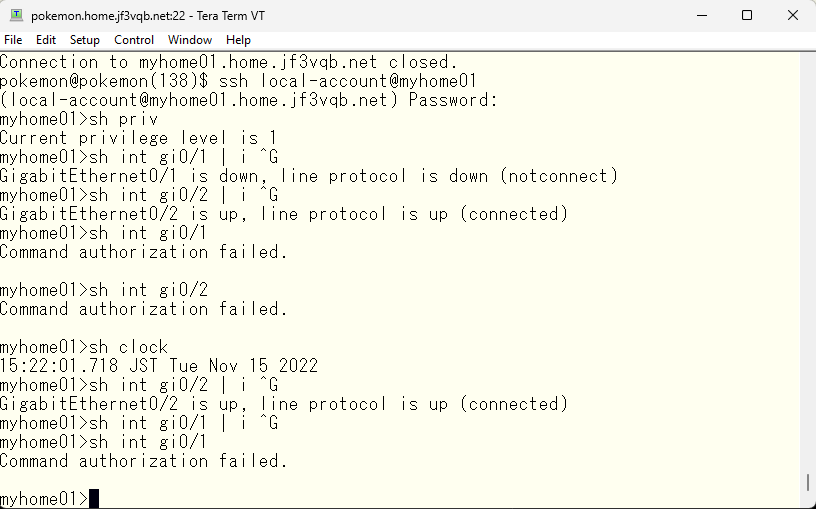
If you want to prevent seeing information only for GigabitEthernet0/1, you can specify it in this way.
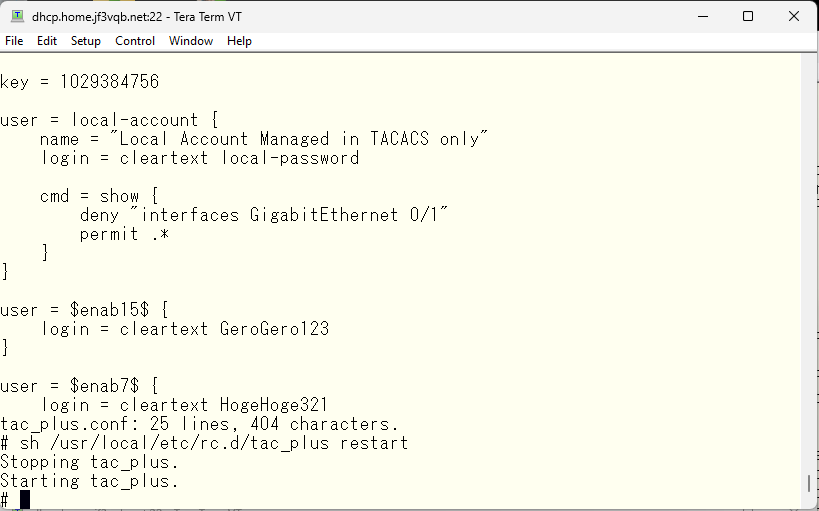
Information for GigabitEthernet0/2 can be seen, but the same command executed for GigabitEthernet0/1 will be rejected.
So far, we have been using TACACS local user, but what if you want to use FreeBSD users to use TACACS? In this case, if you can handle the user with PAM, you can use the OS password like the pokemon user. However, not everyone using the OS can use TACACS, it is limited to those registered as TACACS users and have their password confirmed via PAM. Although there is other OS accounts, the users configured in TACACS are tested first. If there is no user in TACACS, it will be “User Unknown”.
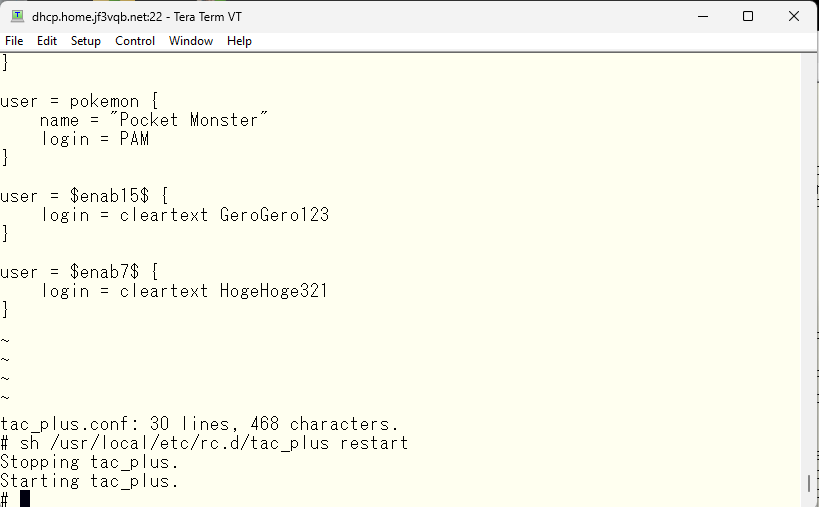
Now that a TACACS user has been created, let’s try logging in as the ‘pokemon’ user. Of course, the password is the password from the OS.
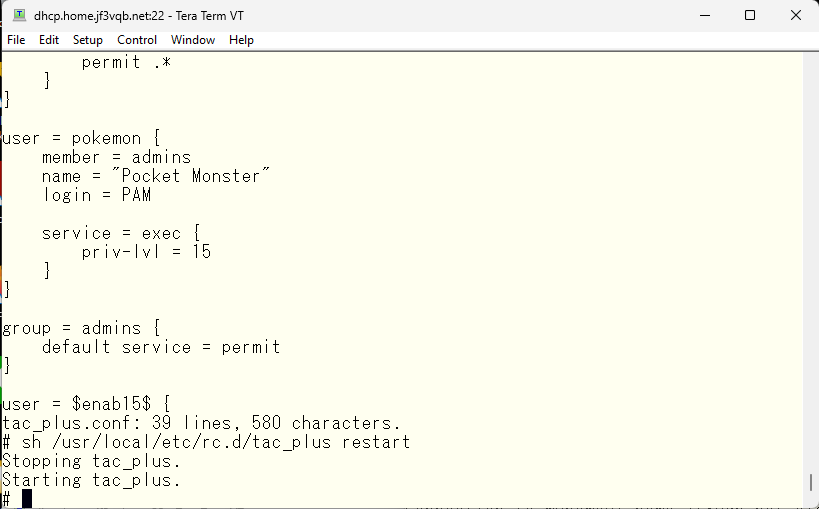
I was able to log in using the pokemon user, and the password is of course the OS password. However, there are difficulties in executing commands. That’s where the convenient feature, groups, comes in. For example, if you want to apply common settings for each user, you can create a group like in this example and set common settings. Let’s make it so that all commands can be used by default.
The command that couldn’t be used earlier is now available.
I usually use a privilege level 1 user and gain authority with the enable command when performing administrative tasks. It’s a nightmare when access to the switch is cut off or the configuration changes due to a carelessly copied command when logged in for daily maintenance. However, it may be necessary to give full administrator privileges from the start. When that is the case, specifying a user with privilege level 15 eliminates the need for the enable command, allowing for administrator-level privileges without executing the command. The same goes for group settings.
Oops, sorry. The privilege level also needs to be in accordance with TACACS, and the aaa command needs to be entered. This is what it looks like.
Well, the server dhcp is a physical machine and we would like to use it as the primary server since it runs continuously, but at the same time, we want redundancy due to the fact that it is a physical machine. If the disk fails or something else happens and it stops working, we won’t be able to access the switch. So, we start tac_plus by copying the same configuration file to pokemon as the backup server.

The redundancy setup on the switch is simple. Create a tacacs server like the server dhcp, and add it to the JF3VQB group. That’s all.
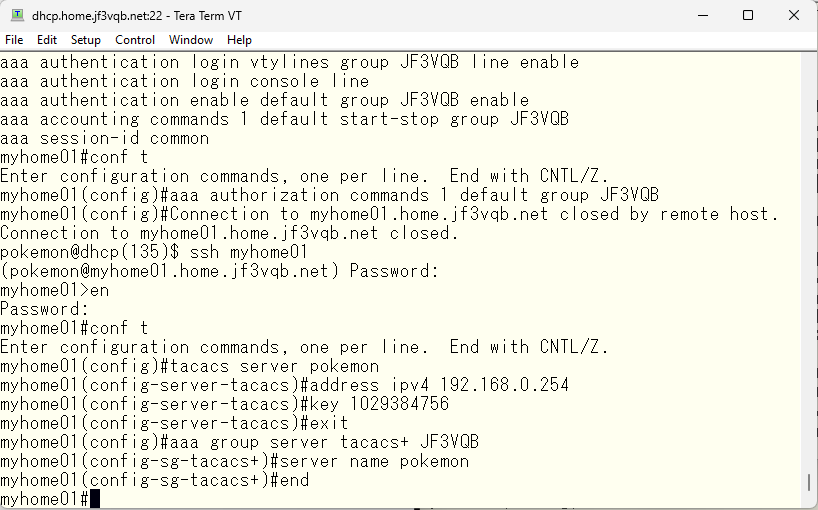
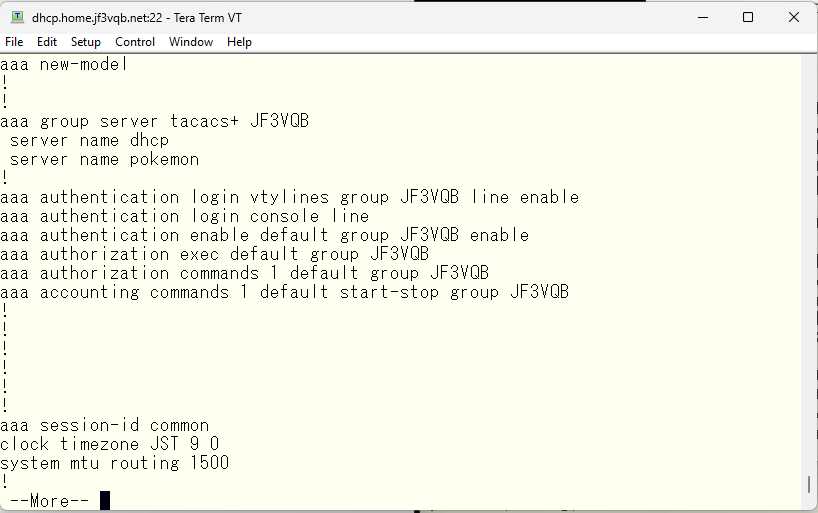
In the configuration file, the server dhcp is listed first. In this case, the switch tries the TACACS on the server dhcp first and if there is no response, it queries the TACACS on the server pokemon next with the same request.
If you want to swap the primary and secondary, simply change the order. The one added later will be added at the end.
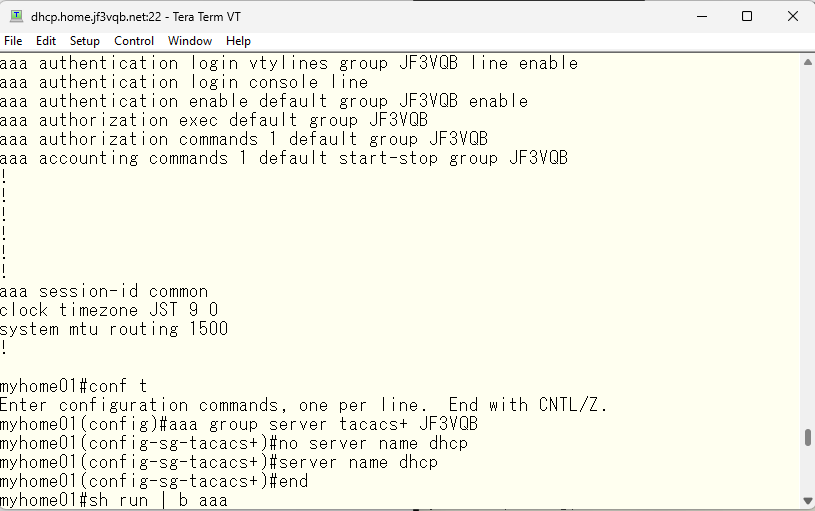
If it’s set up like this, the TACACS on the pokemon server will be tried first.
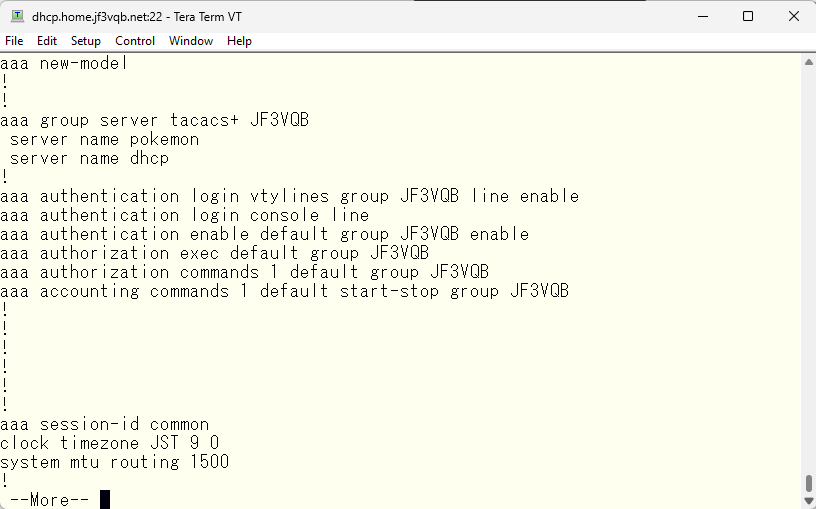
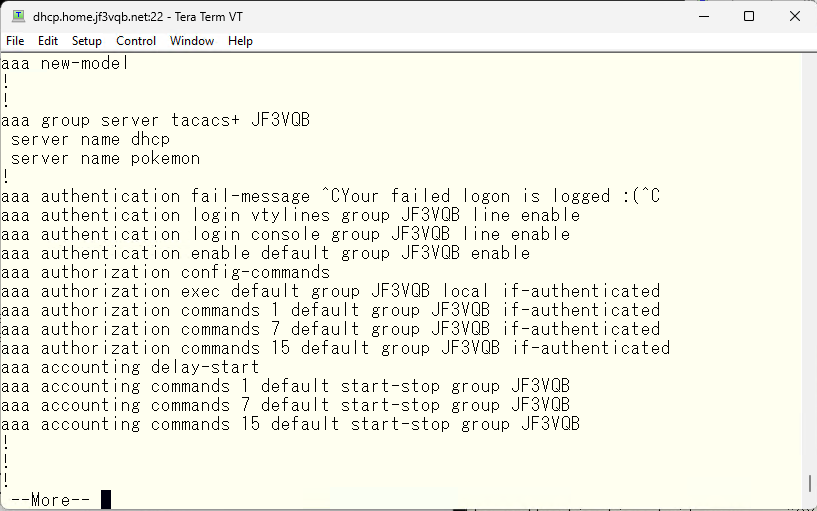
Here is the AAA-related configuration that I am using for your reference.
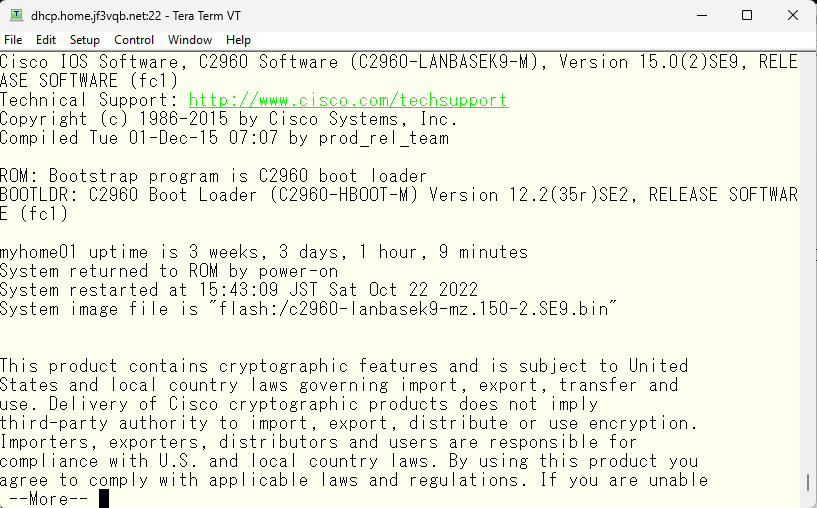
I heard from a friend at a drinking party that he bought a new switches and no longer needed his Catalyst 2960G. So, I got two 2960G switches from him at a extreamly low price. Now, three 2960G switches are running in my home network. The WiFi in the living room, which was previously connected through a 100M hub, can now connect to the internet at 1G 🙂 Anyway, I read through the Cisco 2960 manual and downloaded the latest IOS that could be used with 2960G from cisco.com, and updated the used switch before putting it into production. This is the IOS information of the original 2960G.
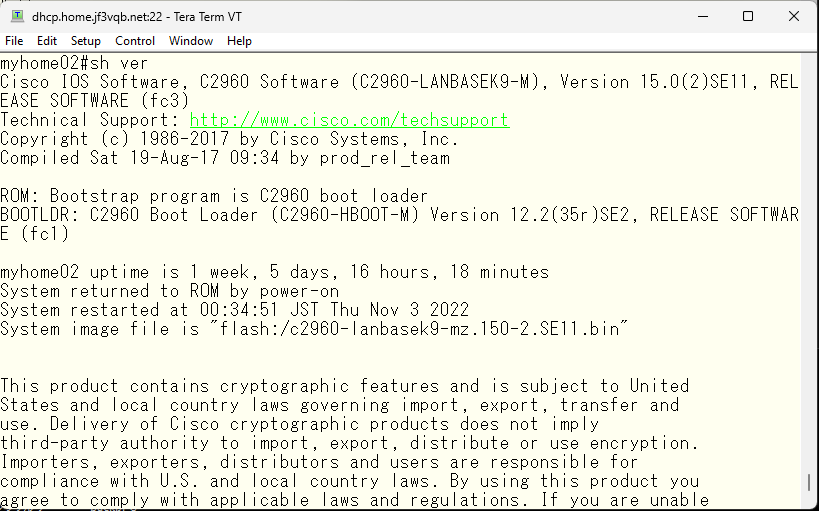
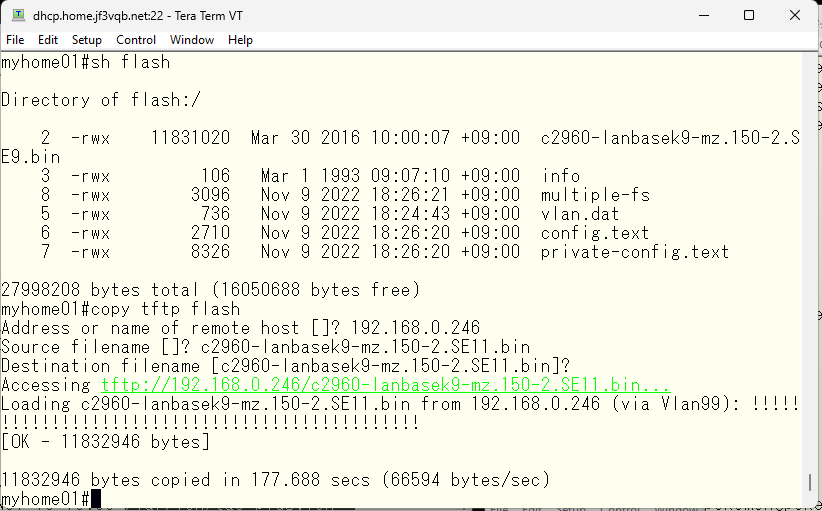
This is the IOS information for the used 2960G with the latest available version installed. I updated the another one using FreeBSD’s TFTP, but it is not interesting if I update the switch firmware in the same way. So I will update them using tftp function on the original switch without FreeBSD.
Let’s take a look at the contents of the flash file system and execute the ‘tftp-server’ command by specifying the file name. First, let’s try accessing it with IPv4.
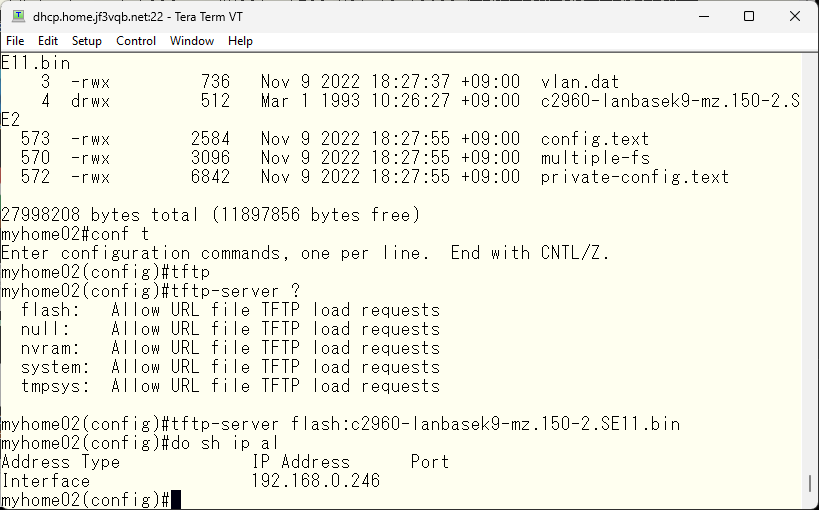
Copy the IOS between switches using TFTP.
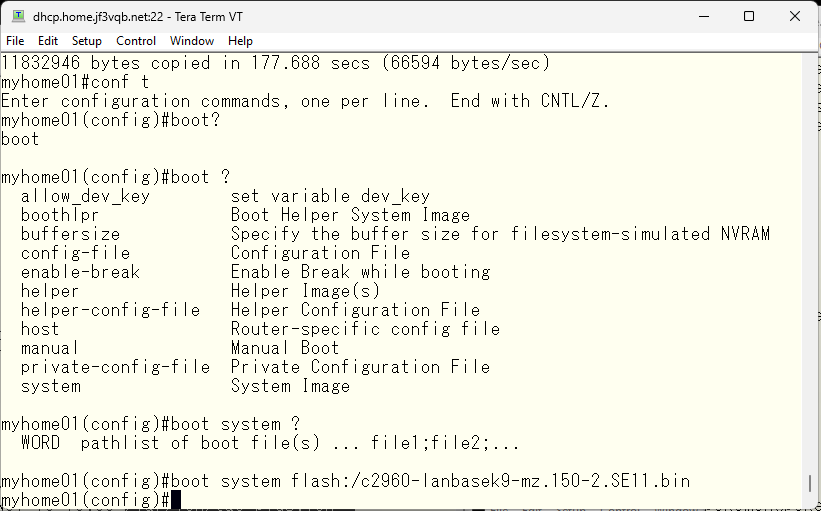
Specifies which file to use during boot.
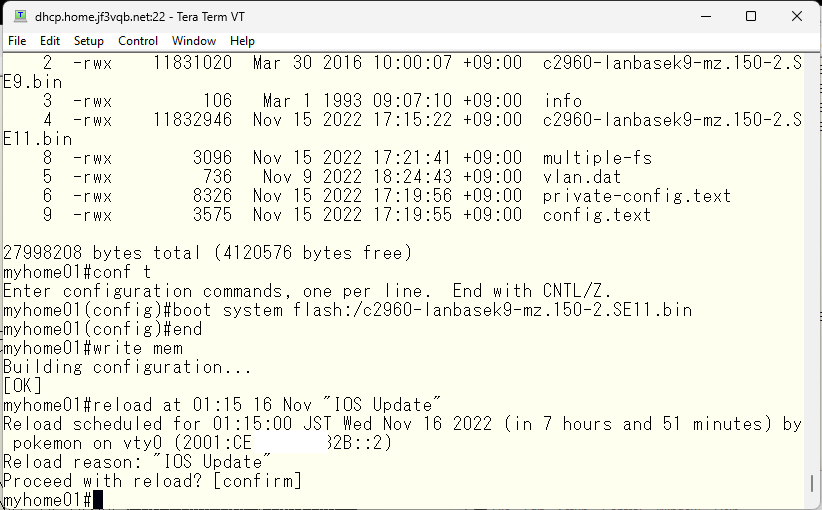
Save the configuration and set the command to restart the switch at night. Use the latest possible version of the OS. New security vulnerabilities are being discovered almost every day 🙂
TACACS was originally a Cisco proprietary protocol, and while many vendors of network equipment partially support it, that seems to be the reality. If you try to control only device access with TACACS instead of RADIUS, it will usually work. However, if you need to control the device access in detail with TACACS, the implementation of other vendors is less than satisfactory.
In a previous article, I think I wrote about how my company merged four separate business units into one. I remember being shocked when I saw the switch configurations used in the other business units. Switch access was restricted to local users only, most ports were left at default settings, and even in relatively large switch network, they had the same switch priority across the switches. The only changes were the hostname and SNMP community. In other words, it was a situation where you could say they simply left things as they were. They did use NTP. The time information retrieved through SNMP was probably strange. 🙂 If you’re interested inswitching network traffic onlt, then I think switches from any vendor should work just fine. But for those who truly understand network management and take into account more than just switching, I think they would prefer to use Cisco in most cases.
Advertisement below