The original Japanese version is available here.
Last time we consolidated the in-home email to the server dhcp, and were able to authenticate the server and encrypt data using a self-signed certificate. This time, we tried to add a signature to the email content using DKIM, but encountered an issue called the OP25B problem when trying to verify the validity of the email using a trial account created on gmail.com.
In the past, when email was popular and not yet social media, people delivered everything by email. If you had a list of email addresses, even if they were legitimate or not, you could set up an SMTP server on your home network and send emails to those addresses, as DNS would tell you where to deliver. As a result, SPAM became rampant. As an ISP’s countermeasure, they blocked the use of TCP port 25 for SMTP at each AS boundary. This meant that you could no longer send emails from an ISP A’s legitimate mail server to an ISP B’s mail server, but regular mail users who crossed providers could no longer send emails either. To overcome this, in addition to TCP port 25 used by SMTP, they started using TCP port 587 (submission port) to pass authentication, allowing users to use the mail server just like port 25. Thus, if the mail server you are about to create is from a different ISP, the SMTP session cannot be established and you cannot send emails. This is called the Outbound Port 25 Blocking (OP25B) problem. Although the volume of SPAM emails is still quite high, it is thought that this approach was taken because ISP fees were much higher than today. Nowadays, it is very cheap to purchase business-use networks, and it is said that there are many people who set up legitimate mail servers on networks without the OP25B problem and send SPAM from there. The ISP I am using is a very ordinary home ISP, so the mail server I am trying to create will be treated as a SPAM server. This is the case with yahoo.co.jp.
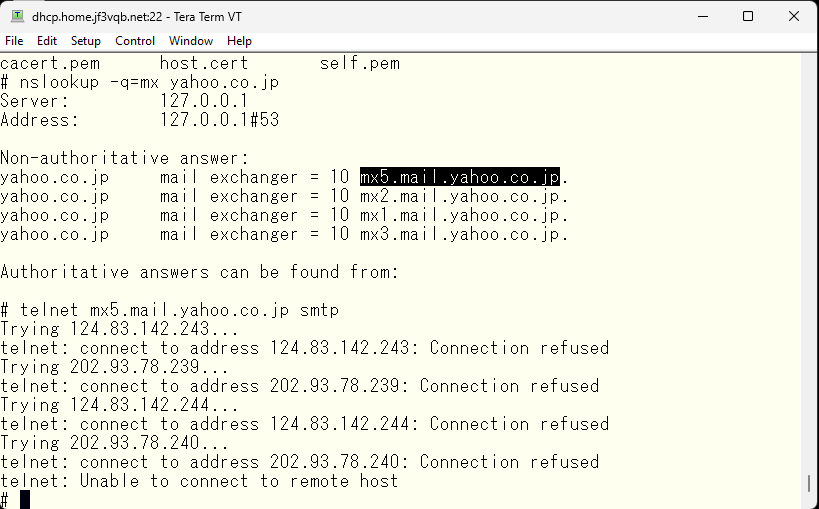
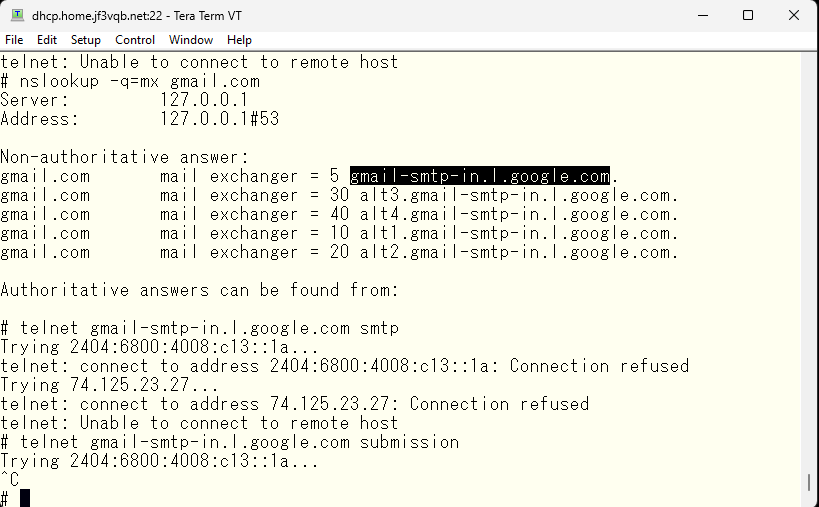
Of course, in the case of gmail.com, the smtp port is also blocked. These seem to be mail servers for receiving only, and the submission port does not seem to be open. Without knowing the internal situation, you cannot send an email from a privately-owned SMTP server.
What about if you have inside information and use an SMTP server? My ISP and the ISP of my rental server are different. I made the internal DNS and external DNS respond differently as mentioned previously.
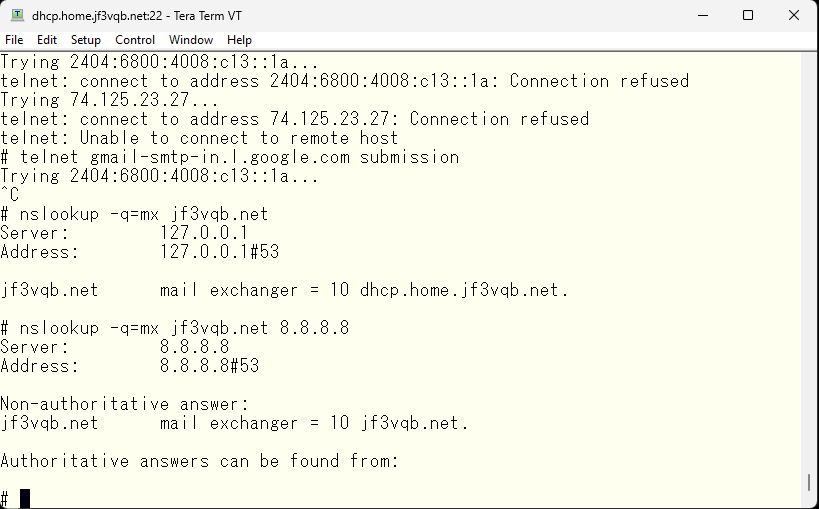
The screenshot of the internal information would be full of mosaics 🙂 There’s nothing embarrassing to reveal, but there’s also no need to make it open, so I’d like to keep it unchanged until my personal mail server is complete. The mosaics are not significant anyway as they can be inferred from other parts… for now.
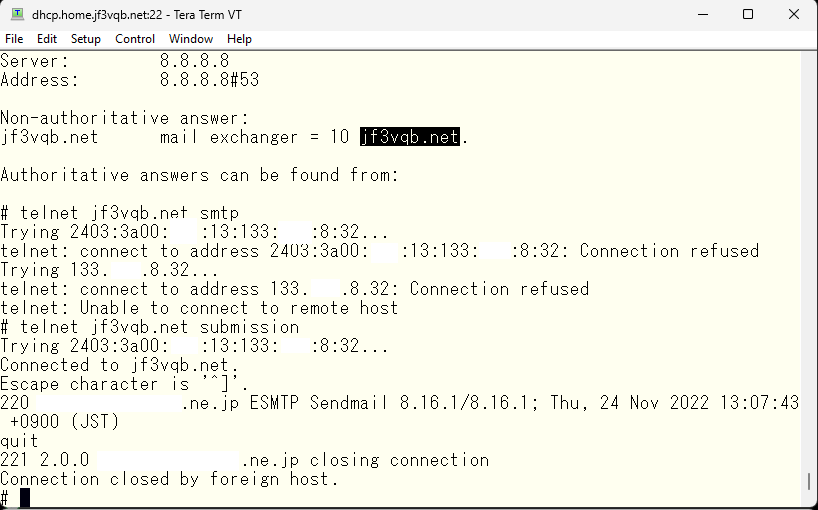
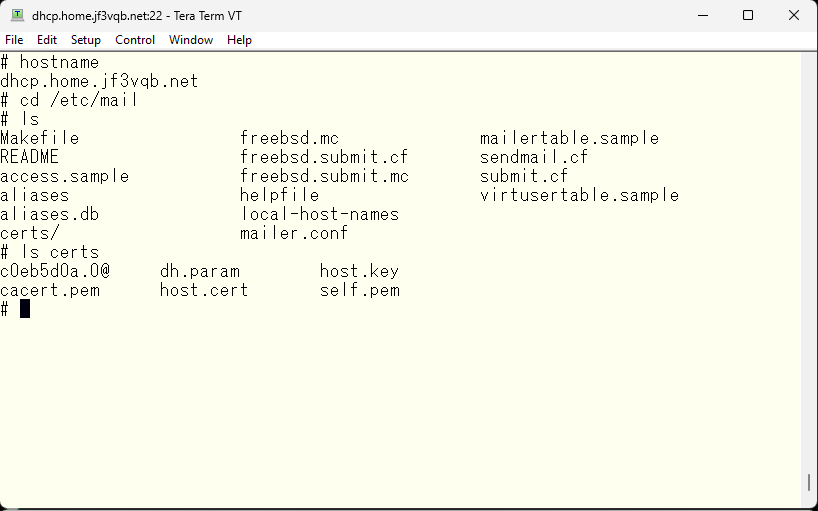
As you can see, the SMTP port is blocked but the submission port is accessible. So, I will pass the SMTP authentication via this submission port and relay it to this server. I haven’t checked yet whether the DKIM signature will be valid even through a relay server, but for now, I will pass the SMTP AUTH via the submission port and defer the DKIM related matter to next time. The /etc/mail directory for the DHCP server has become like this since last time. There have been no major changes, only the local-host-names file has increased.
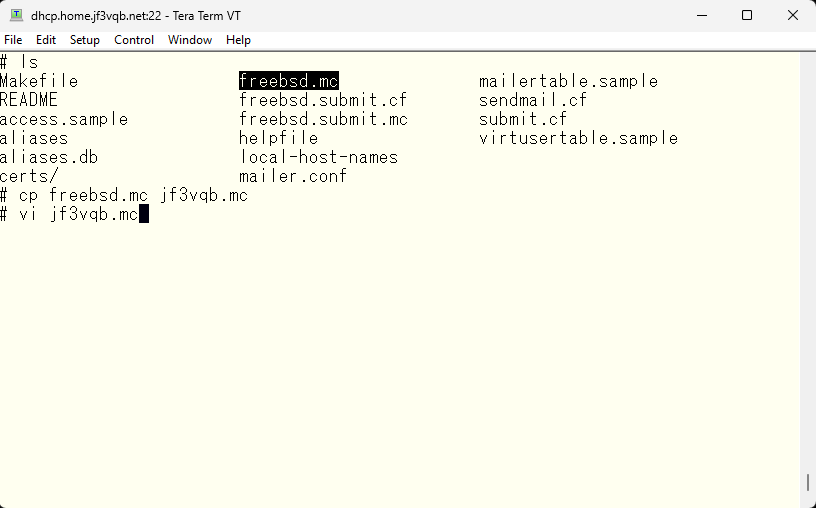
This time, as a preliminary step for DKIM, we will arrange the email headers and make it possible to send emails anywhere by passing SMTP AUTH. First, we will arrange the email headers. The sendmail.cf currently in use was created based on the original freebsd.mc file. So, we want to copy this file, make changes to it, and create a customized sendmail.cf file from it.
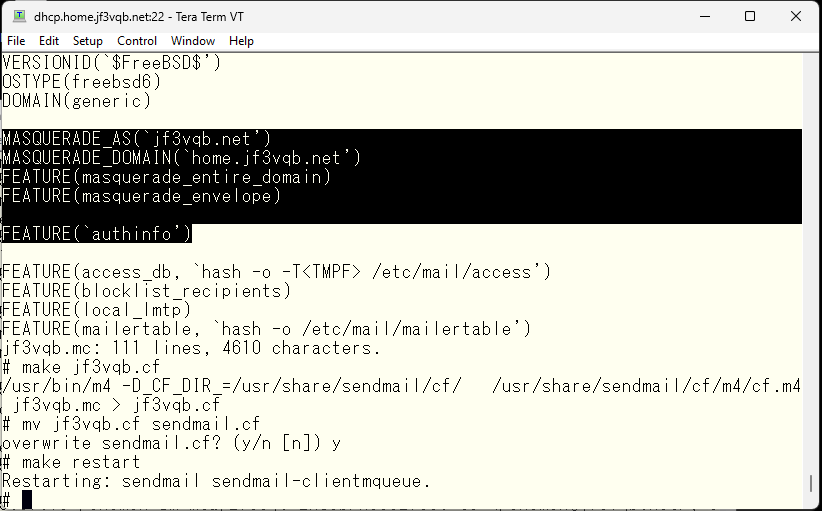
The sendmail related documentation can be found in the /usr/share/sendmail/cf directory. Among them, the README file is the file that should be read first, and it contains various parameters, default values of variables, various macros provided by sendmail, and HOWTOs such as what to do. Almost everything can be done by reading this file. The first thing I want to do is that I need a rule set to change the email address that is user@hostname within the household to user@jf3vqb.net. When I look for it, it is written in the masquerade_entire_domain part. I will add this rule set, create the sendmail.cf file and test it.
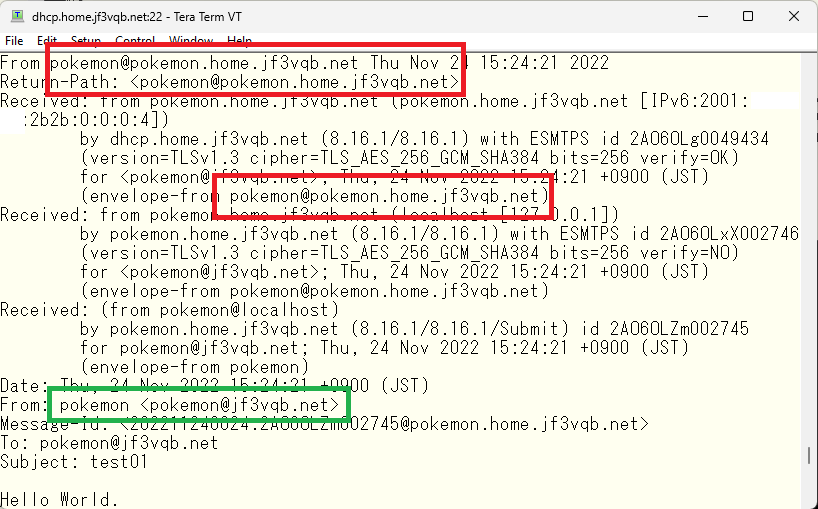
The ‘From’ email address has been changed as expected, but the host name is still being used for other addresses. Since it is not expected to receive emails directly from external hosts to the server pokemon directly, these addresses will also be changed to ‘jf3vqb.net’.
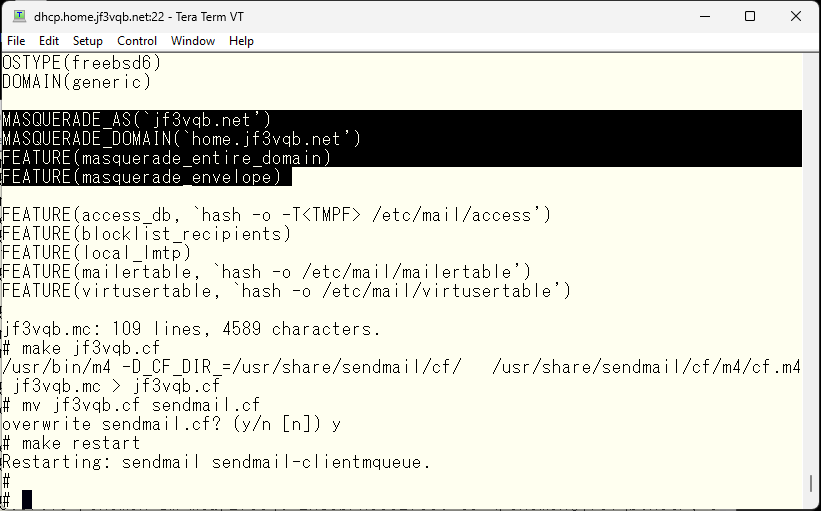
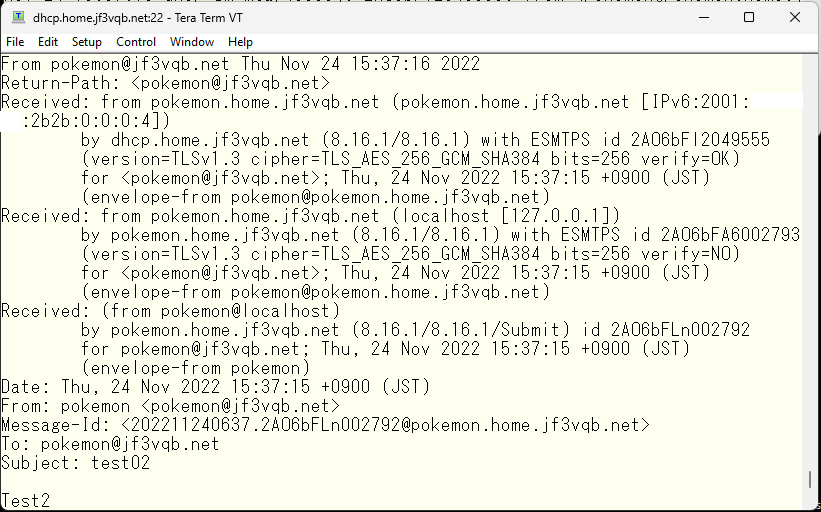
Let’s send a test email and check the header. It looks much better now.
Next, I will test how the header is rewritten by sending a mail to an external mail server, but for that I need to be able to send mail via SMTP AUTH. I will make the change. In the same way, by reading the README, it is written in the authinfo section. I will modify the jf3vqb.mc and create the sendmail.cf.
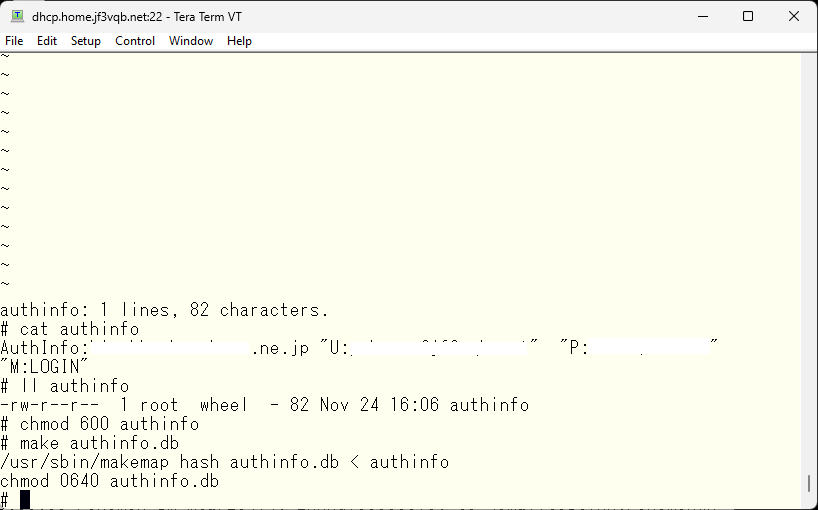
And, we will create the /etc/mail/authinfo file as described in the README, and create a hash file based on this. There is a sample written in around 70% of the README file, so we will replace it with our own authentication information. It’s in a state of confusion with a lot of mosaics, so we don’t know what’s what. 🙂 This is an excerpt from the README.
- AuthInfo: remote hostname
- U: user (authorization) id
- I: authentication id
- P: password
- R: realm
- M: list of mechanisms delimited by spaces
The authentication method varies depending on the operating system of the connection destination. Only the parameters required for the authentication method being used are described. The M:LOGIN used here uses encoded username and password in base64, which always have the same value unless the username and password are changed. Encrypted network sessions are minimally required to avoid falling victim to replay attacks. There are other methods such as creating a hash value from the username and password and sending it. In this case, the authentication will be performed after encryption, so that is sufficient. Of course, it is also possible to write the available methods separated by spaces.
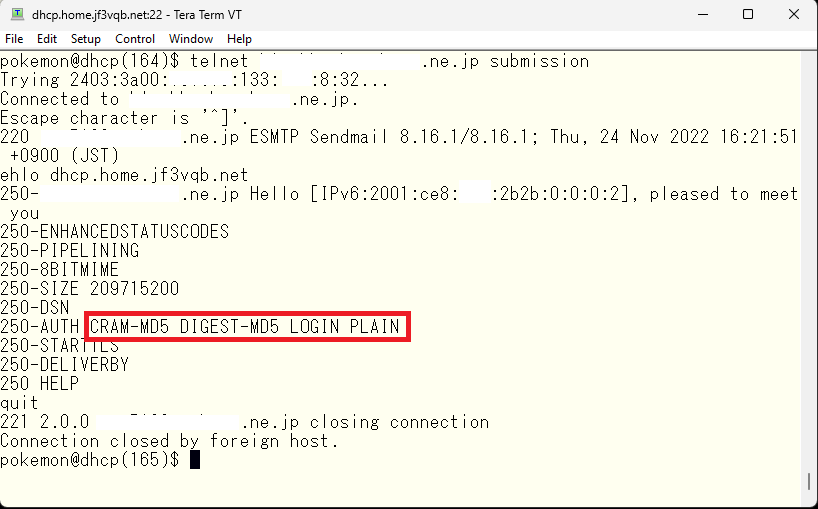
You can check what is available by connecting to the submission port using telnet or the like. Confirm before creating the authinfo file. This is how it is done.
The expected outcome is that if pokemon sends an email to test@gmail.com, it will be relayed by the server dhcp and then forwarded to the official mail server of the ISP and finally to the MX host of gmail.com. I will try sending one to see.
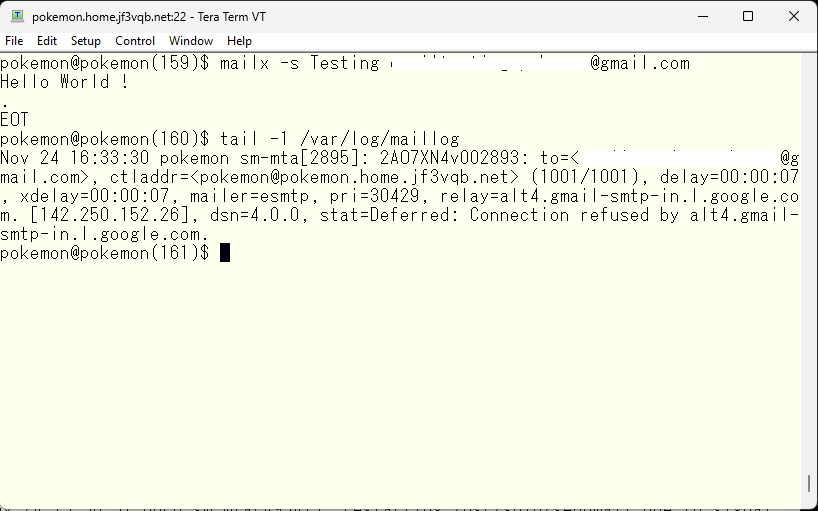
Oh no, it seems I sent it directly. So I will set the smart host. According to the README, there is a description around 42% of the README. I will edit the freebsd.mc file on the server pokemon to specify the smart host as dhcp and recreate the sendmail.cf file. In fact, it is only one line different, so it is also okay to directly edit the cf file and add the relay server name without recreating it from the mc file. Don’t forget to restart sendmail.
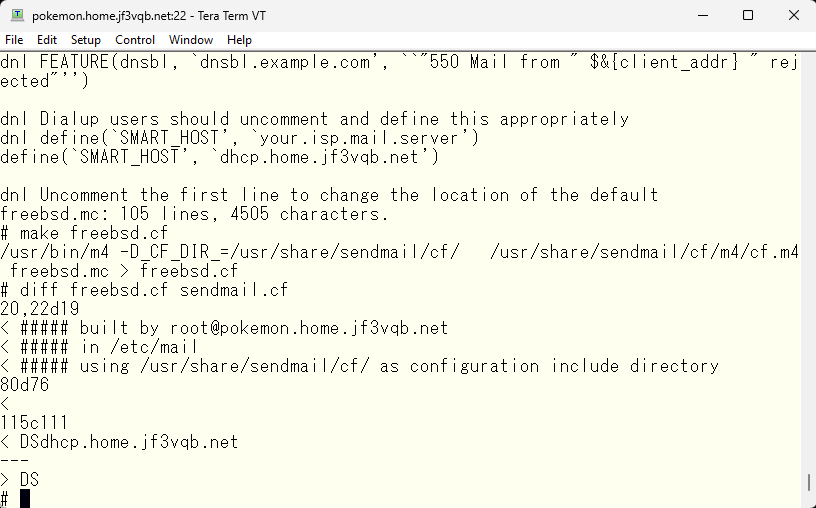
Let’s start over and resend.
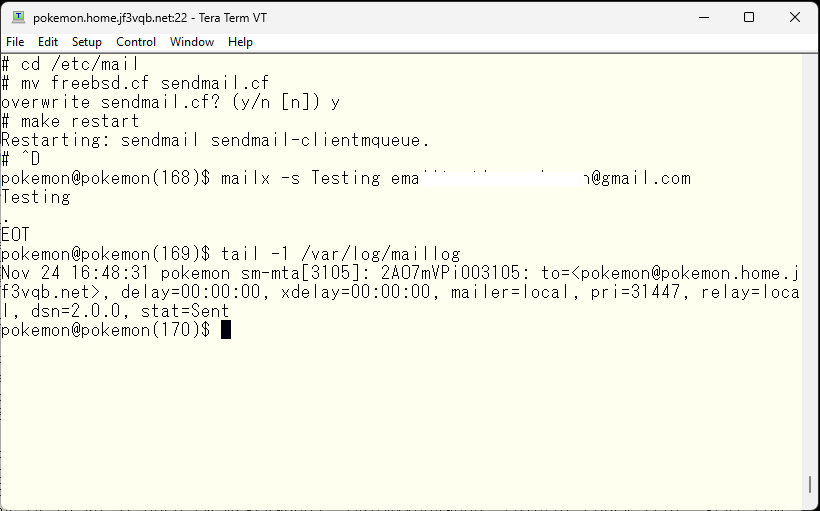
Hmm? Does it seem like the mail was returned? Let’s check the log on the server dhcp.
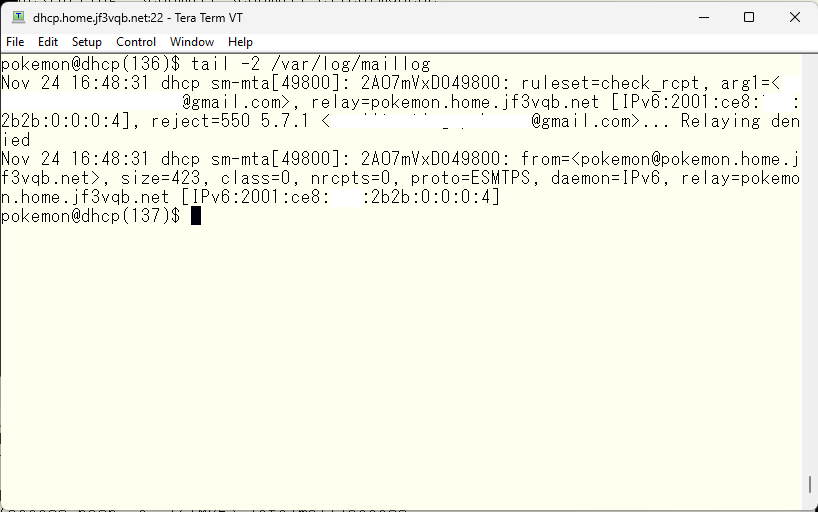
It seems that the relay was not allowed 🙁 Let’s allow relay on the home servers. It should be controllable with the /etc/mail/access file.
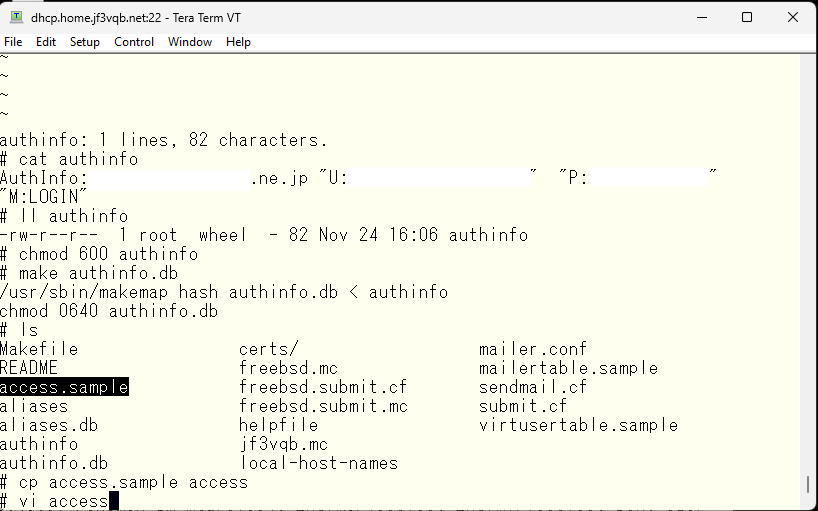
Let’s copy the sample and make a hash file marking it as the relay operatin is allowed.
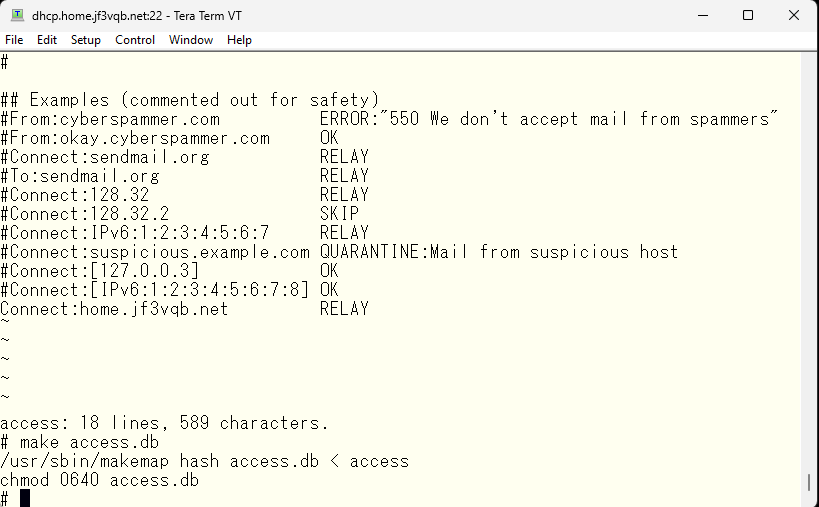
It looks like I was assuming that I have granted permission to the host in the home.jf3vqb.net domain, but is that okay? There are forward and reverse lookups in DNS. The registration of the IP address for *.home.jf3vqb.net -> IP address is only something that I can do. But on the other hand, consider the reverse. Reverse lookup can be registered in the DNS of another provider with the source address. So, if I make a DNS pointer record that 8.8.8.8 is ggl.home.jf3vqb.net, dhcp’s sendmail seems to allow relay requests from 8.8.8.8. However, in reality, it performs a bit more complicated check. If there is a connection from malicious 8.8.8.8, dhcp performs a reverse lookup and knows that the connection is from ggl.home.jf3vqb.net. Instead of allowing relay immediately, dhcp obtains the IP address from ggl.home.jf3vqb.net. If the obtained IP address matches the original 8.8.8.8, it recognizes it as an access from the home.jf3vqb.net domain. In this case, I haven’t created ggl.home.jf3vqb.net on my local DNS. So, access from 8.8.8.8 is not recognized as access from the home.jf3vqb.net domain. That is, relay is not allowed. So, let’s perform the experiment again.
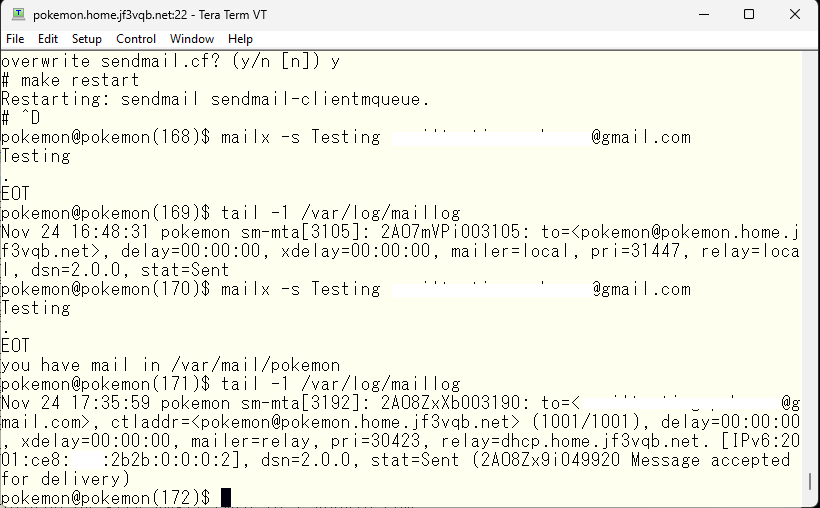
今回は正常にリレーされたようです。dhcp さんでもログを見てみます。
It seems the relay has worked properly this time. I will also take a look at the log on the server dhcp side.
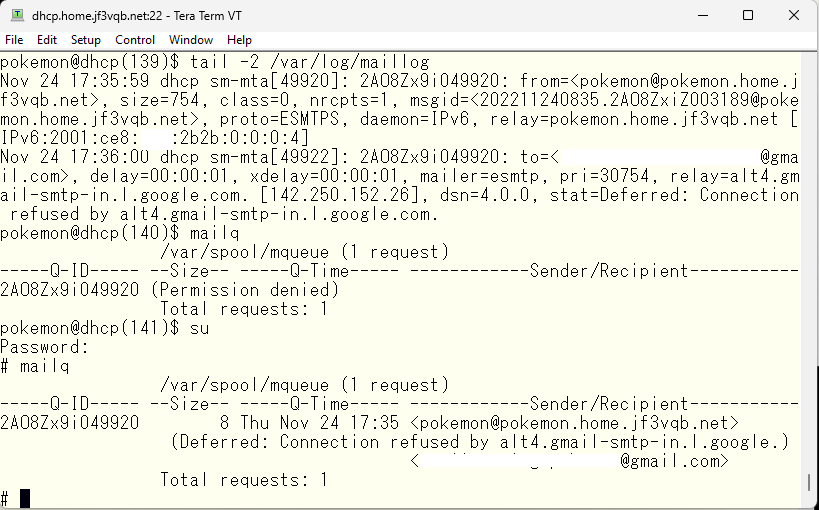
It seems we also forgot to set up the relay on the server dhcp 🙁 The difference with the server pokemon is that it passes SMTP AUTH using the submission port. The SMTP AUTH setting has already been added, so we will add a smart host.
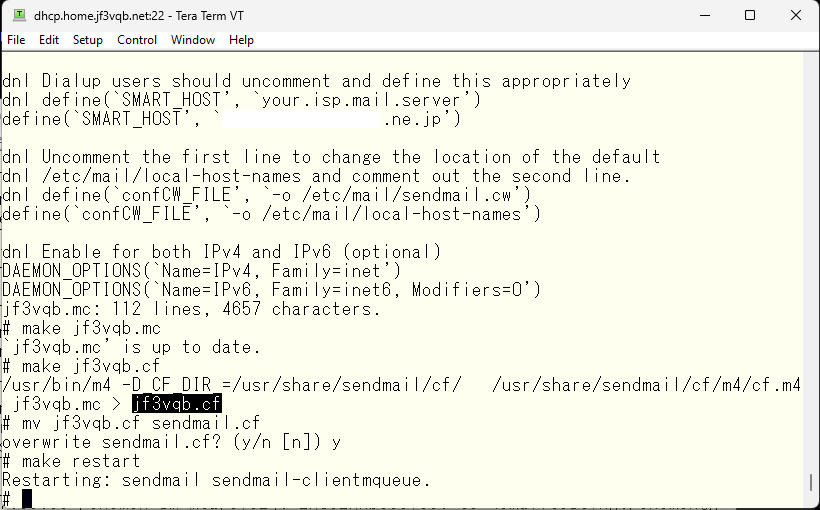
Now, let’s send a test email and check logs on the server dhcp again, just like we did before.
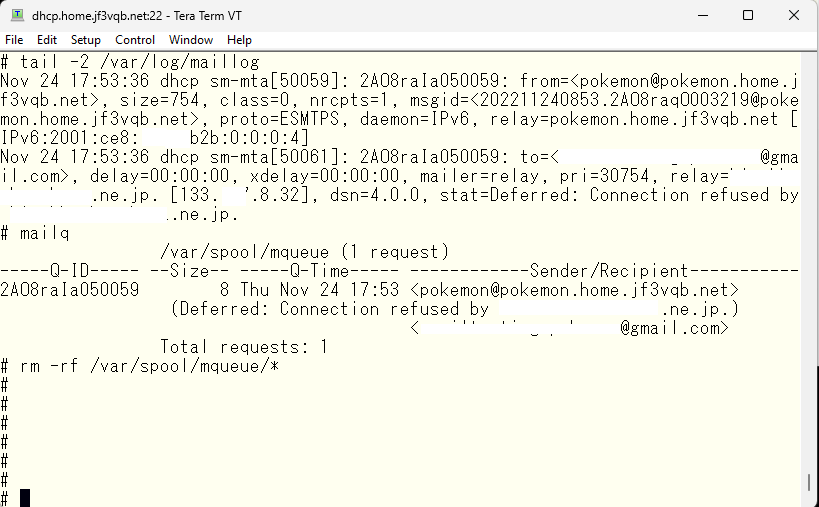
The logs show that the mail was successfully sent to the ISP’s relay server, but it appears that the authentication was not passed or the submission port was not used. It may be worth checking with tools like tcpdump. That’s where the README comes in handy again. As we read through it, we need to check if sendmail was compiled with the SASL option turned on. This option is required for using SMTP AUTH and for using advanced authentication methods instead of M:LOGIN. So we’ll check the compile-time options
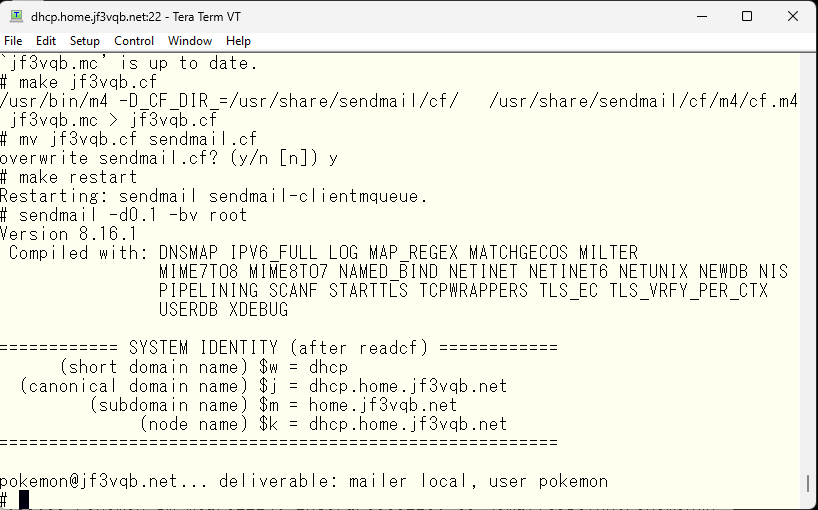
It appears that dhcp is using the OS-bundled sendmail, and the SASL option is not clearly visible from the logs. Therefore, let’s recompile with the SASL option turned on. Now, the question is, should we recompile the OS-bundled sendmail or use the /usr/ports/mail/sendmail port? The port version is version 8.17.x, while the OS-bundled version is 8.16.x. If we’re going to recompile it, let’s use the newer version. Additionally, updates to the OS may overwrite the SASL-less version of the OS-bundled sendmail, making it difficult to understand why SMTP AUTH stopped working and causing frustration. So, let’s compile the port version with the SASL option added and use it.
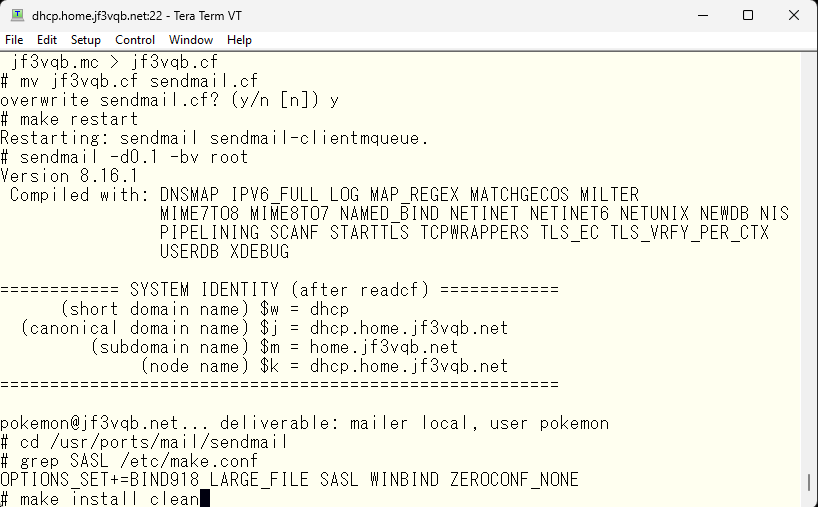
It seems to have worked. I will set it up as instructed by the message.
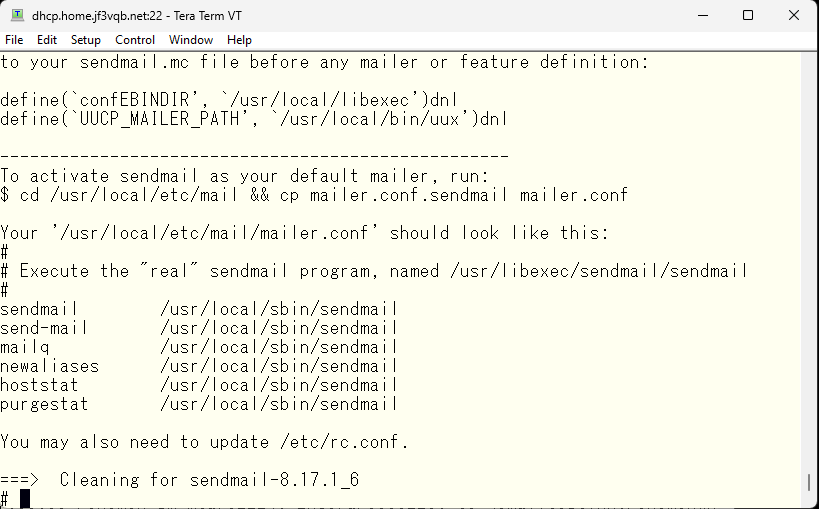
The message mentions modifying the mailer.conf in /usr/local/etc/mail, but I would like to keep using the existing /etc/mail directory, so I will make some modifications to the /etc/mail/mailer.conf.
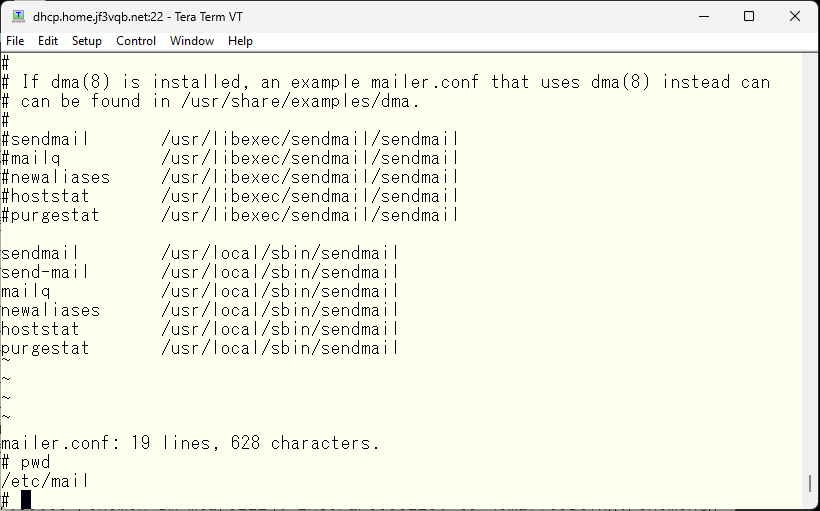
Now, when restarting sendmail, the newly created sendmail will be used.
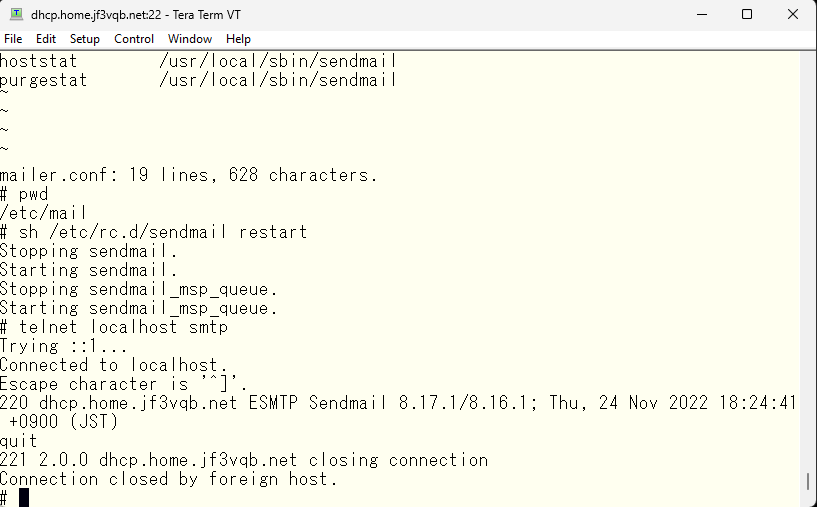
It’s easy to see because the version is different. I’ll also check the SASL option.
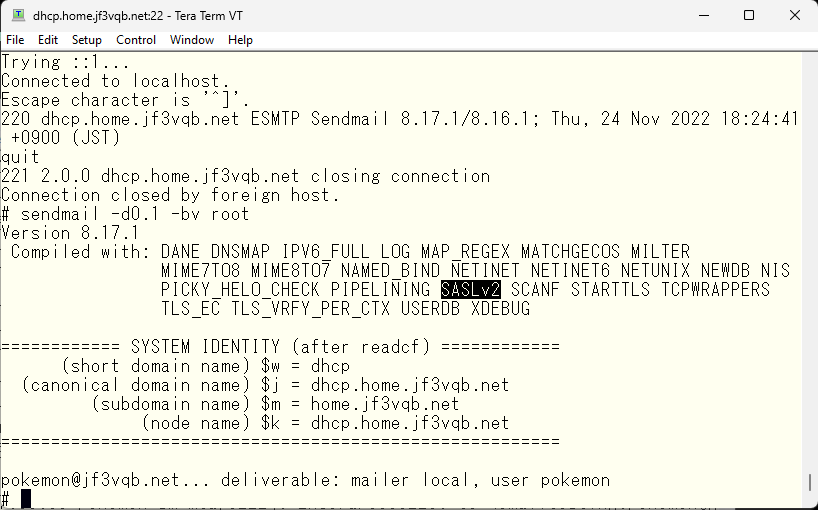
Okay, it seems like a smooth operation. Now let’s send a test email with a refreshed mindset.
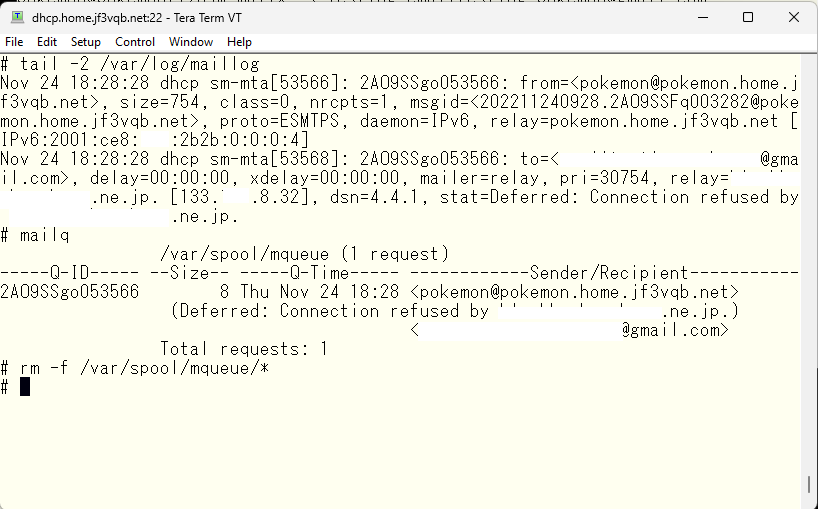
The symptoms look the same, but it seems that the session itself has not been established before trying SMTP AUTH. It’s time for the README again. It says that the default of RELAY_MAILER_ARGS is [TCP $h] around 9% of the README. That is, it seems to be connecting on tcp port 25. Specify the port number.
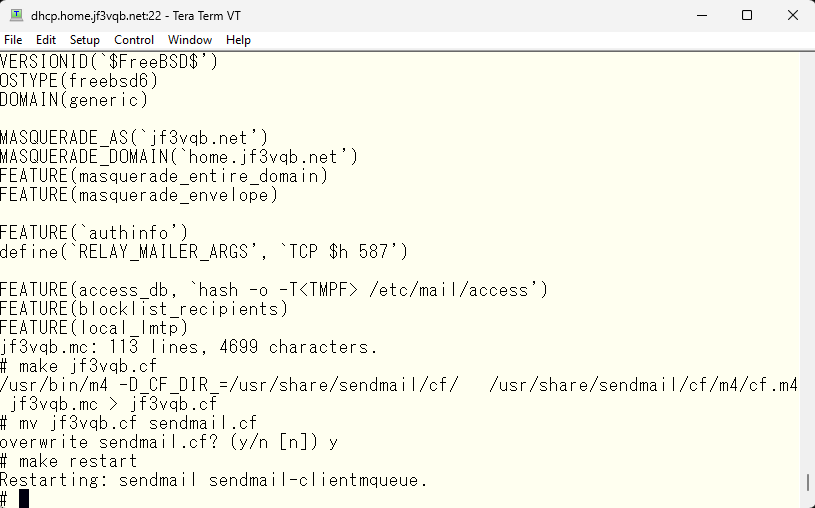
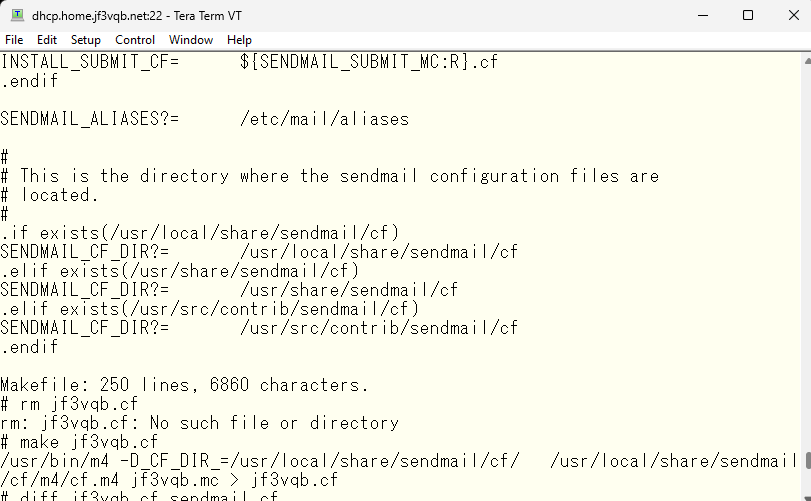
Hmm? I installed sendmail using ports in /usr/local/sbin/sendmail. Is it okay to use the files in /usr/share/sendmail/cf? I think it’s probably okay, but just to be sure, I will modify the Makefile so that it can be made using the files included in the port version of the sendmail.
Let’s compare the sendmail.cf made with the cf file that came with the OS.
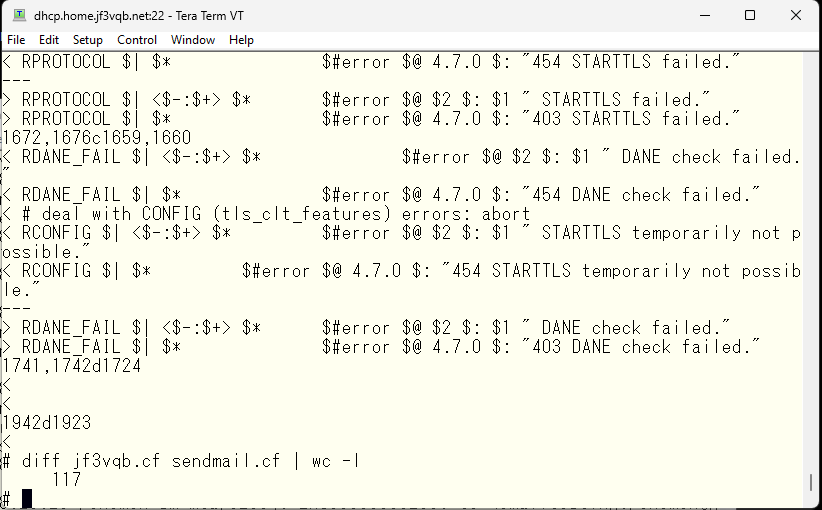
If there’s such a big difference, then there’s no reason not to use the new cf file. So, I’ll replace it and test it.
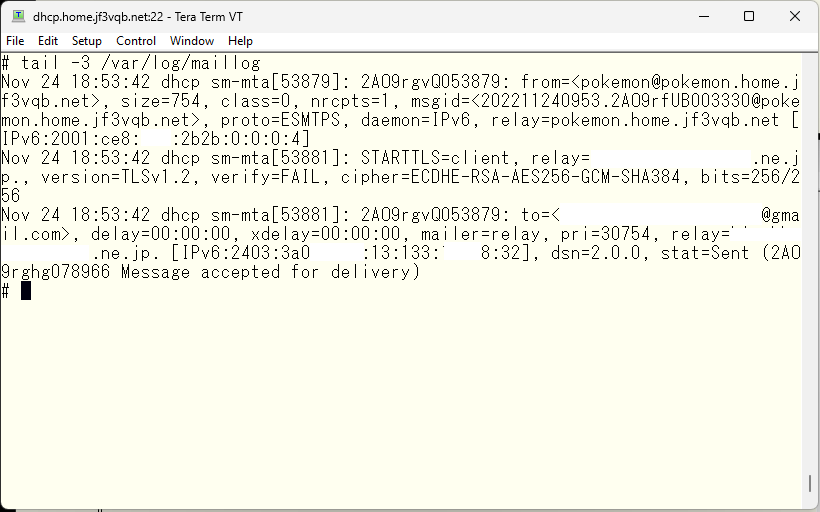
It looks promising. The status is ‘sent’ with ‘mailer=relay’, but the ‘verify’ is ‘FAIL’, so I need to tweak the certificate. I will add the proper root certificate and restart sendmail.
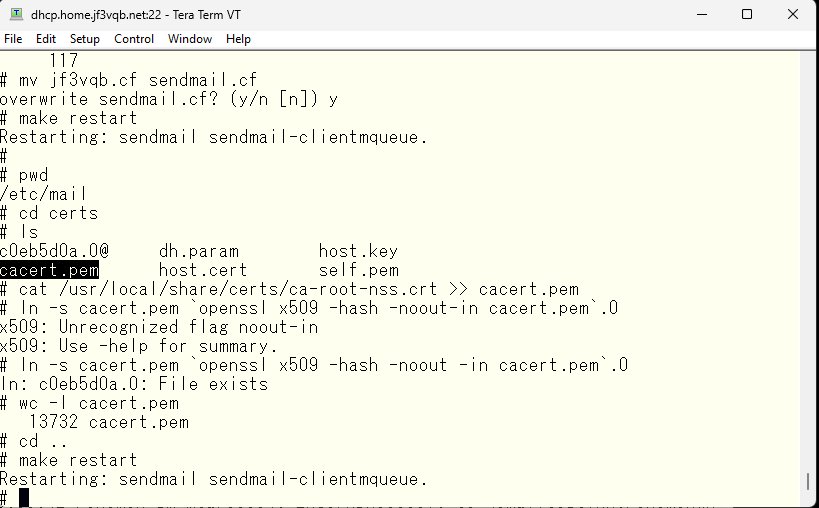
Now I will perform the final test.
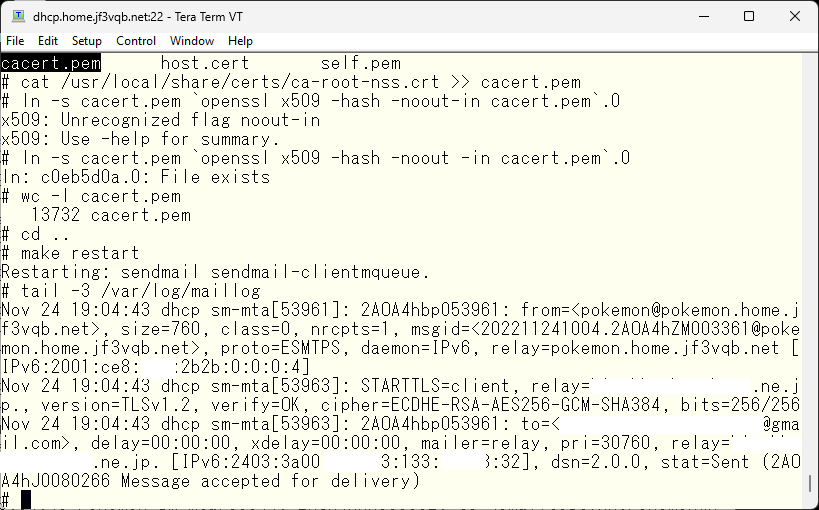
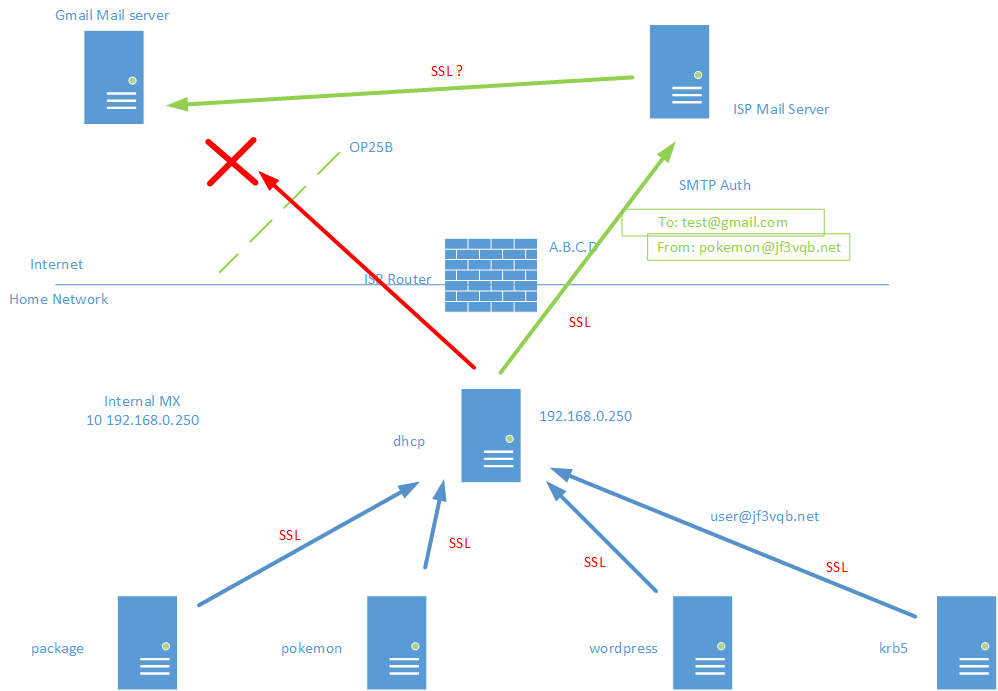
私の管理下にある部分は全て OK のようです。gmail.com で受け取ったメールのヘッダを見てみます。と、思ったのですが、モザイクをかけると何が何だかさっぱりわからなくなりますので、結論だけを書きます。ソース側のメールアドレスは envelope from も含めて全て pokemon@jf3vqb.net に書き換わって届いていました。ただ一点、ISP のメールサーバでの STARTTLS の verify は FAIL になっています。ナンチャッテ証明書は対外的には効力を持ちません。期待通り暗号化されているので問題は無いと思いますが、ここまで気にするのであれば正規の証明書を買いましょう 🙂 因みに、SMTP プロトコルの標準に暗号化はありません。サーバーは暗号化のオプションがあることを示すだけで、強要はできません。あくまで暗号化を行うかどうかはクライアント側のオプションです。次回は DKIM の署名を付けてみましょう。因みにここまでのメールフロー図はこんな感じです。
Everything under my control seems to be okay. I’ll take a look at the header of the email received at gmail.com. I thought about doing so but the mosaic makes it completely incomprehensible, so I’ll just write the conclusion. All source side email addresses, including the envelope from, arrived as pokemon@jf3vqb.net. Only one thing, the STARTTLS verify at the ISP’s mail server was FAIL. The self-signed certificate doesn’t have any external validity. It’s encrypted as expected, so I don’t think there’s a problem, but if you care that much, buy a regular certificate 🙂 By the way, encryption is not standard in the SMTP protocol. The server only indicates that the encryption option is available, and it cannot be forced. Whether or not to encrypt is only an option on the client side. Next time, let’s try signing with DKIM. By the way, the mail flow diagram so far is like this.
Advertisement below

