The original Japanese version is available here.
Hi all ! What operating system do you use ? Probably you use Windows on your laptop PC. And many of you use Windows for servers as well. I used 4.2BSD, so called UNIX, just after I joined to Japanese company. Hardware I used at that time is huge and we couldn’t use it on our desks. Then later Linux was introduced and it can run on computers on our desks. In my desktop PC at that time, I used VMware workstation for Linux on Linux emulator in FreeBSD and it has been working very well for years. And I used this environment for daily work. I can’t remember what version of Windows I was using. Anyway windows was running in FreeBSD.
We almost always see 64bit OS nowadays. The size of memory is not KB nor MB but GB. TB can be seen on servers. Of couse they are SMP system and multiple TB of disk system is common. I couldn’t imagine this situation at that time 🙂 The things I keep using since then is Windows and FreeBSD only.
I used 32bit FreeBSD until years ago. But our company made decision and we start using M$ Azure data centers. That’s why I needed to use 64bit FreeBSD since then. As you may know, Azure only provide 64bit environment.
Now we are about to install FreeBSD on a computer which you can delete everything in disk drives. Yeah ! I don’t have such a computer with me !. No worries. We can use virtual computer environment in your laptop environment. Windows OS support Hyper-V environment. But I like VMware environment. On our on-premise environment, we use VMware vSphere and lots of virtual machines are running on it. But this is personal experiment. So we use VMware Workstation Player. If you want to sell any services on VMware player, then you need to buy licenses. But you can use it freely if you use it personally. You can see the description here. Please read this carefully and download your own copy. You just need to register yourself before you can get it. I believe you can install it very easily on your Windows computer.
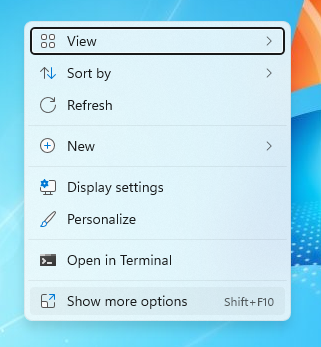
Right click on your desktop. We see all options in Windows 10. But we can see many in “Show more options”. I’m newbie for Windows 11. Sorry 🙂
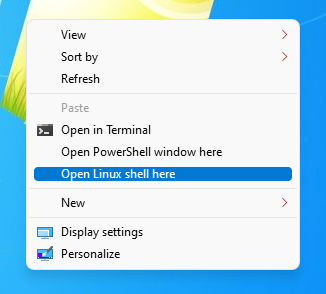
The command prompt or power shell can be used alternatively. But I use Oracle Linux 8.5 on WSL.
The ftp command is not installed as the default. Just install it from the network.
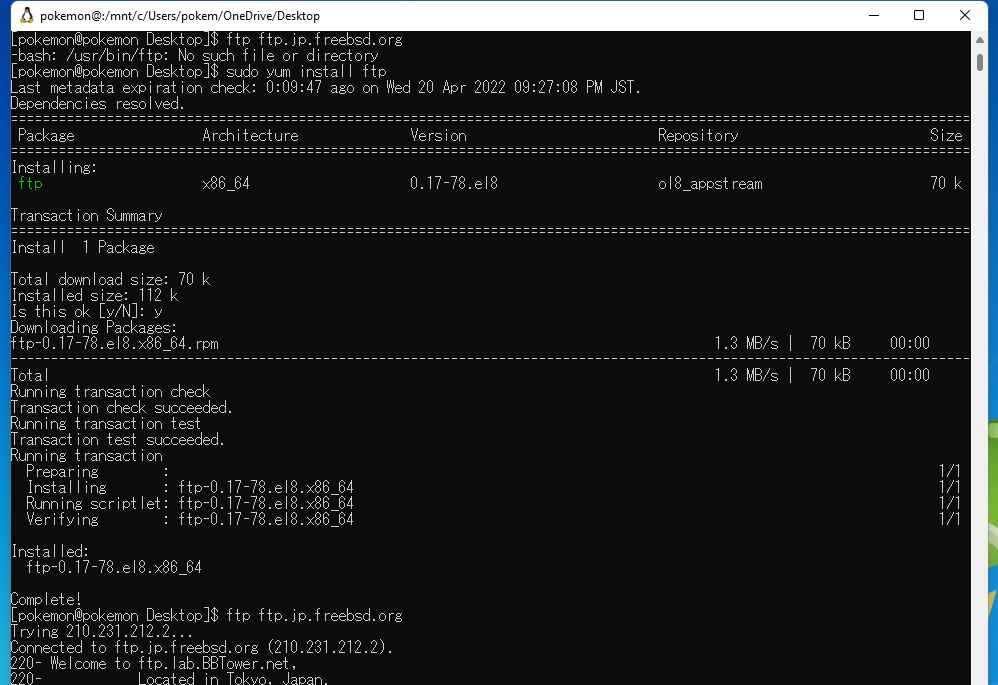
Connect to the closest ftp site and get appropriate ISO image for your environment. Some applications may require 32bit OS. Some other software may require 64bit OS. If you are not sure, then please use amd64, 64bit OS. If you have old computer and want to install FreeBSD on it, then 32bit OS may be required. This just depends what CPU you have in your physical machine. If this is the case, then get i386, 32bit OS.
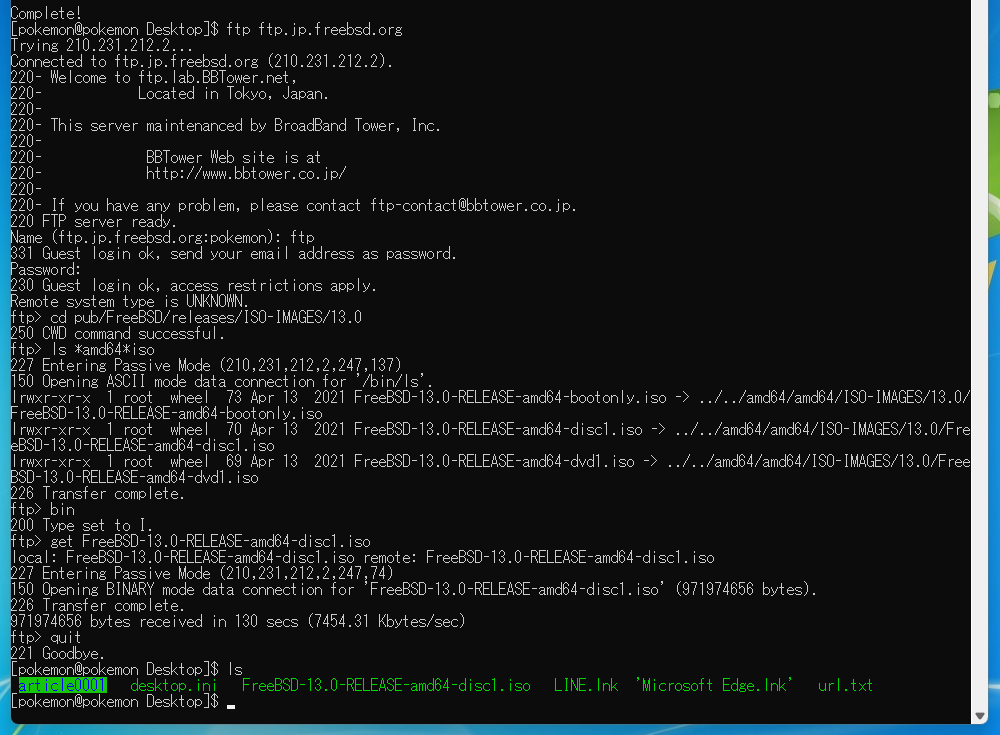
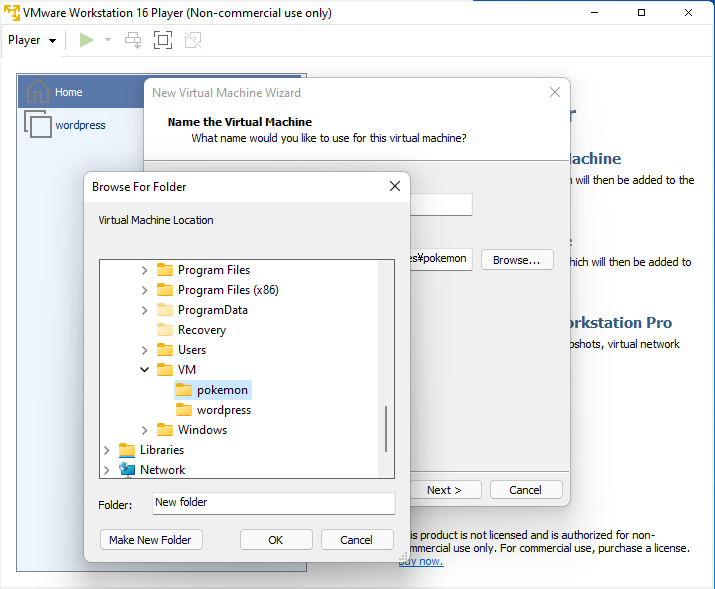
The target ISO image is on my desktop now. I have to move it to a folder where we will make virtual machines in. The VMware Player try to make virtual machines in your Documents folder as the default. Then you will see an alert telling you about storage is full. The free version of M$ OneDrive keep backup files from your Documents folder. The default available storage size is only 5GB for free. You need to move files from Documents folder or buy more storage in M$ OneDrive.
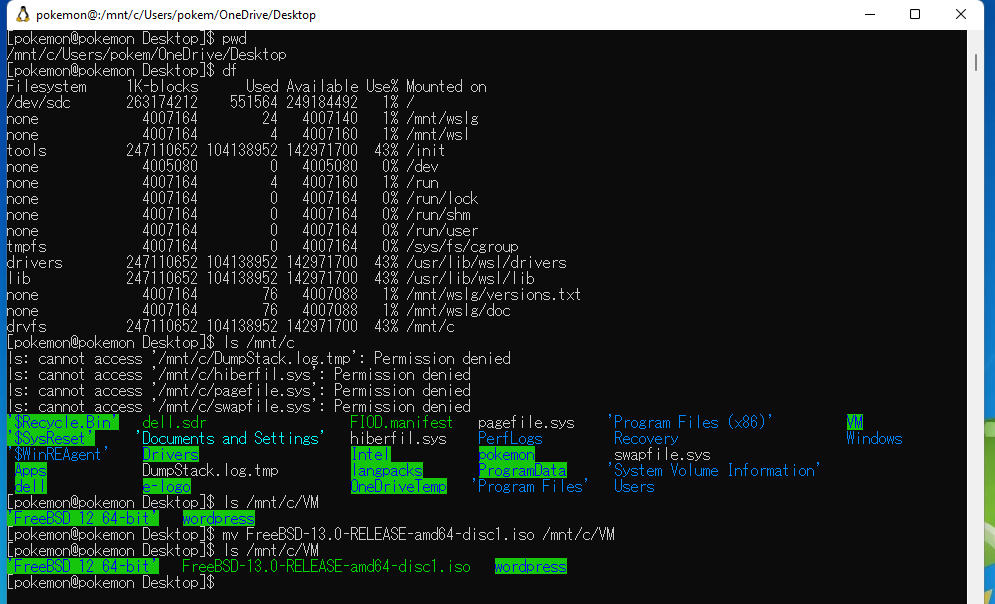
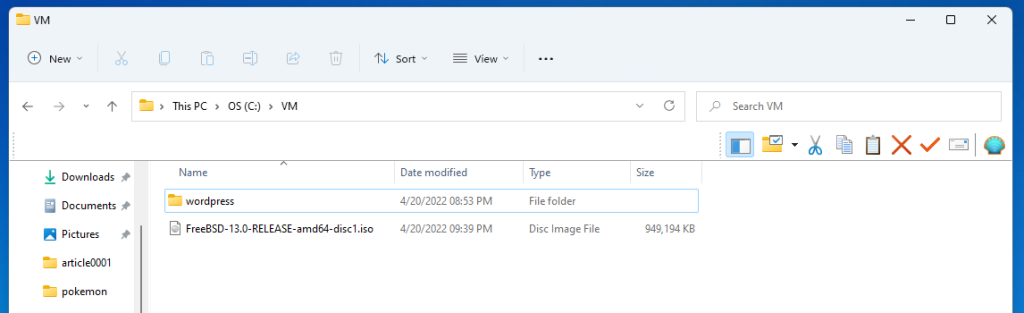
In my case, I made VM folder in root folder of C drive.
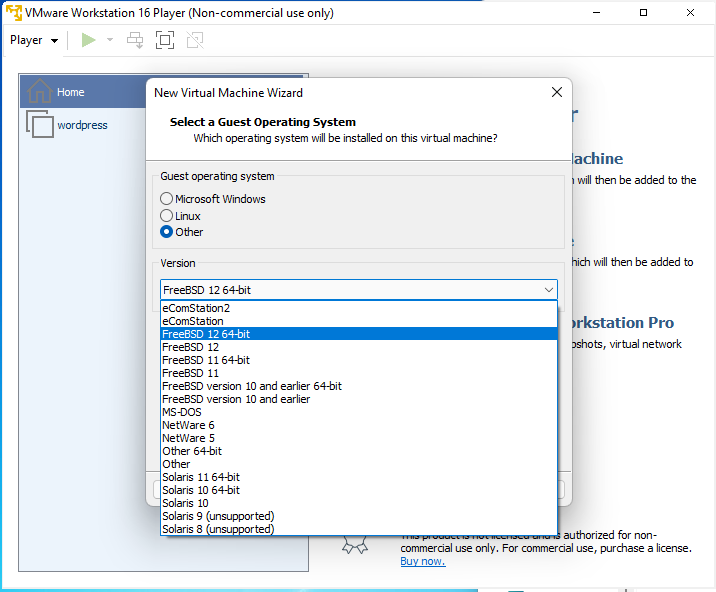
Let’s make a virtual machine. Launch the VMware Player and select “Create New Virtual Machine” Then you see like this.
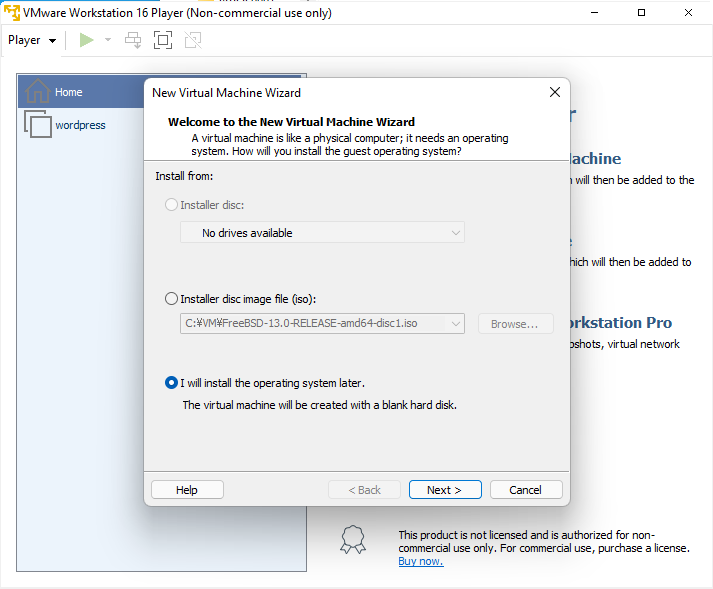
We can choose the 2nd option in the previous step. Then “FreeBSD version 10 or earlier 64-bit” will be selected. This is wrong as the version is 13. So we want to select it manually. I see “FreeBSD 13 or later 64-bit” option in vSphere ESXi. I don’t see the same option in VMware player. But I don’t think there is so many differences. Windows still insists “Built on NT Technologies” 🙂 ? You don’t know what this means ? sorry … never mind it now … 🙂
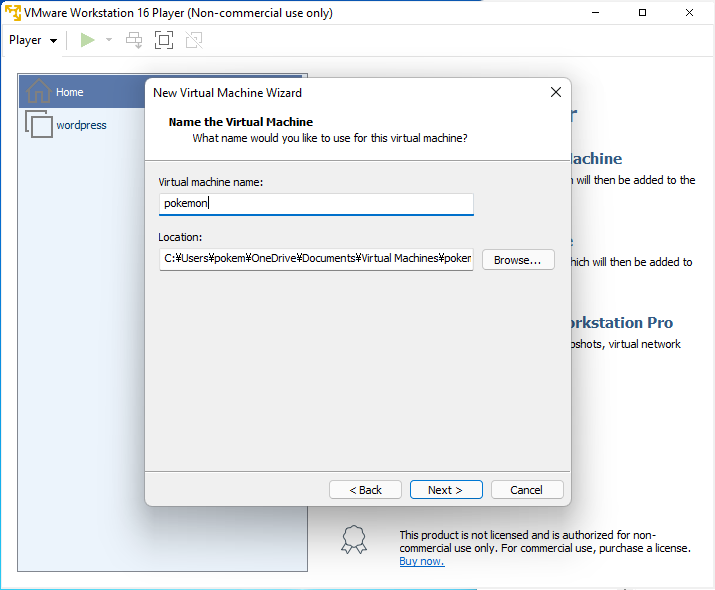
Let’s give it name. As you can see the default location is in OneDrive.
Let’s make a new folder for new virtual machine.

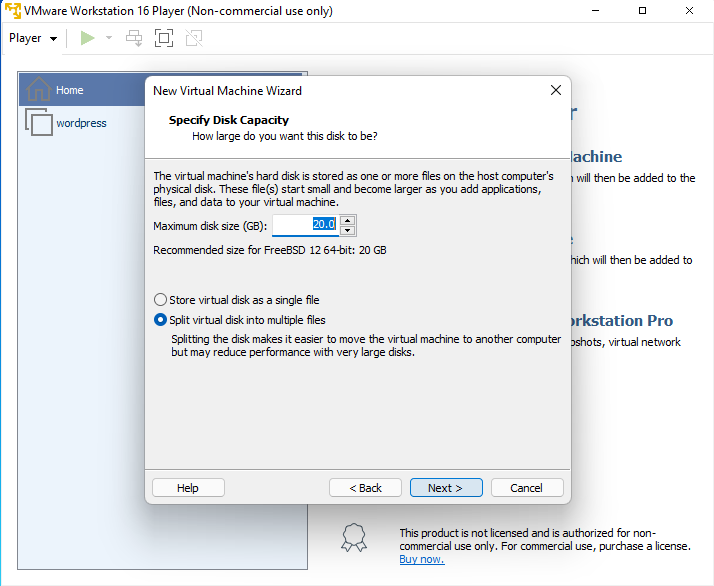
Let’s accept the default value now. If you have a plan to have many software packages installed or want to compile software from the source codes, then you may need to have more disk space. We can change it afterwards. But if you know what you will do on it, then preperation is important.
You need to change some of options. The customization is required if you want to use this virtual machine as the server.
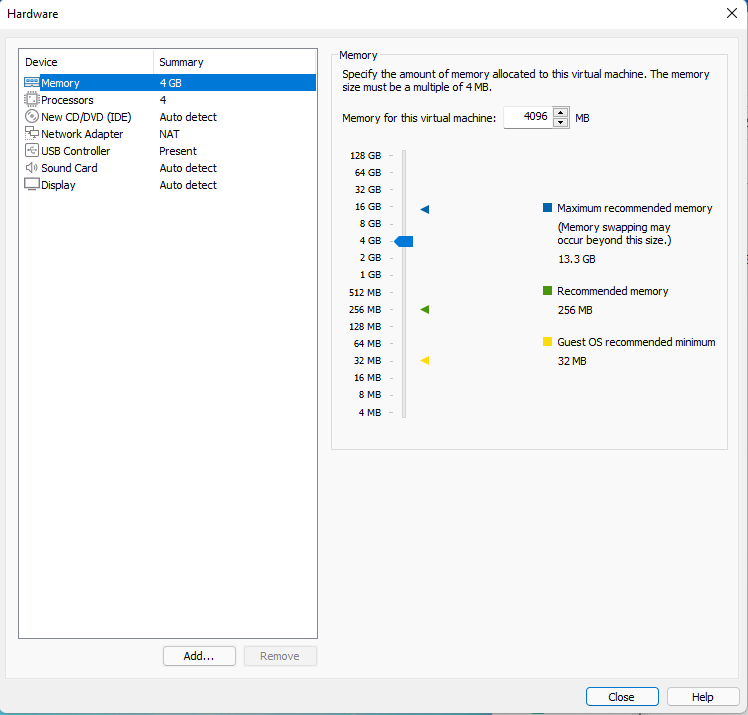
At first, let’s assign more memory. PCs nowadays should have 64bit OS installed and they normally have 8GB or more than 16GB installed. Assign enough memory.
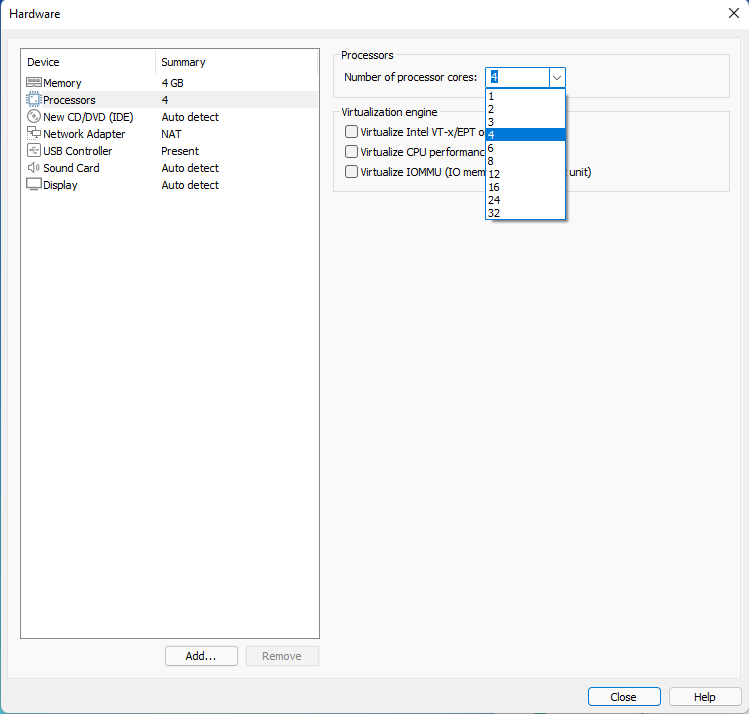
Let’s increase the number of processors, too. My DELL Latitude have 8 logical processors on it.
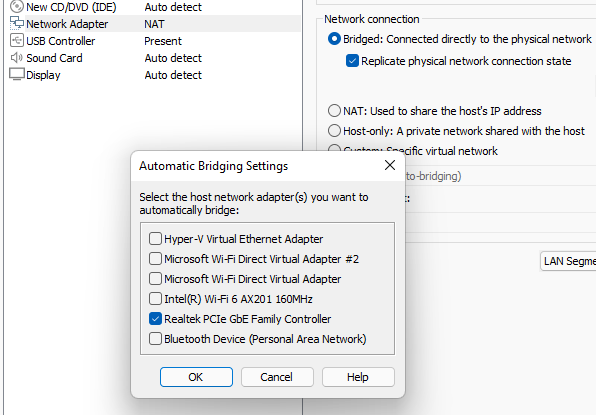
Change the network configuration next. NAT will be used as the default. But this virtual machine can’t be a server if you use NAT. This is because this virtual machine won’t have direct network connection to your home network. In other words, this virtual machine works like your laptop PC just behind home router. Any devices in the internet don’t have access to your laptop. This means your laptop PC can’t be a server for devices in the internet. To avoid this situation, we need to use “Bridged” setup.
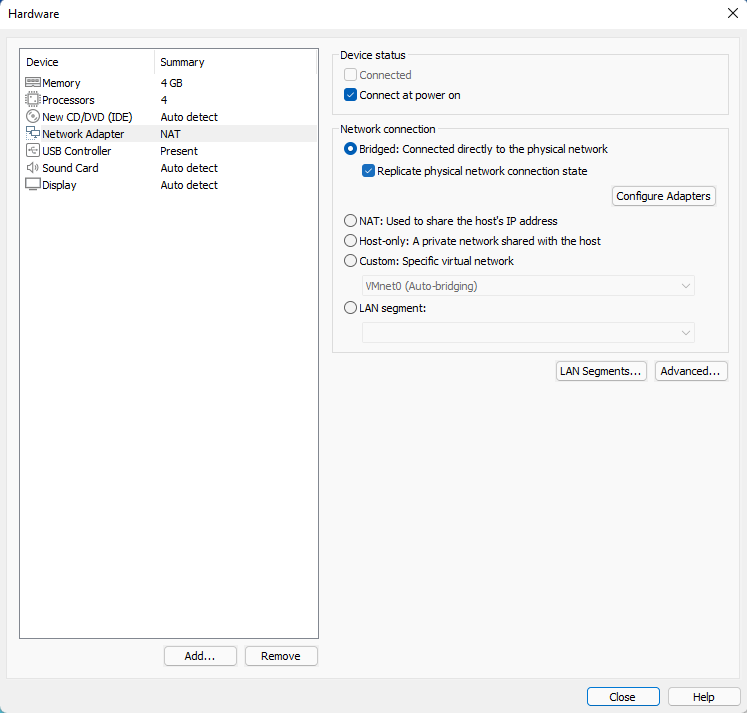
Any computers nowadays should have LAN and WiFi. And if it is Windows OS, then many virtual xxxx network adapters will be appeared automatically. So we need to specify which physical interface we use for bridging. If you want to use this system as router, then we need to create one more network adaptor in VMware and assign another physical interface. Then this virtual machine is prepared to use as a router. We use only LAN interface this time.
The last preperation step is DVD drive we install the OS from. This time we will install the OS directly from ISO image. So we need to choose “Use ISO image file” option. Of course, we can create physical DVD disc and mount it in a physical drive on VMware host OS, and can install OS from this physical drive. But the most of computers nowadays don’t have physical DVD drives. So we can’t burn DVD disc or can’t read anything from physical discs. So we had better to use ISO image option here. My Latitude has no physical DVD drive either 🙂
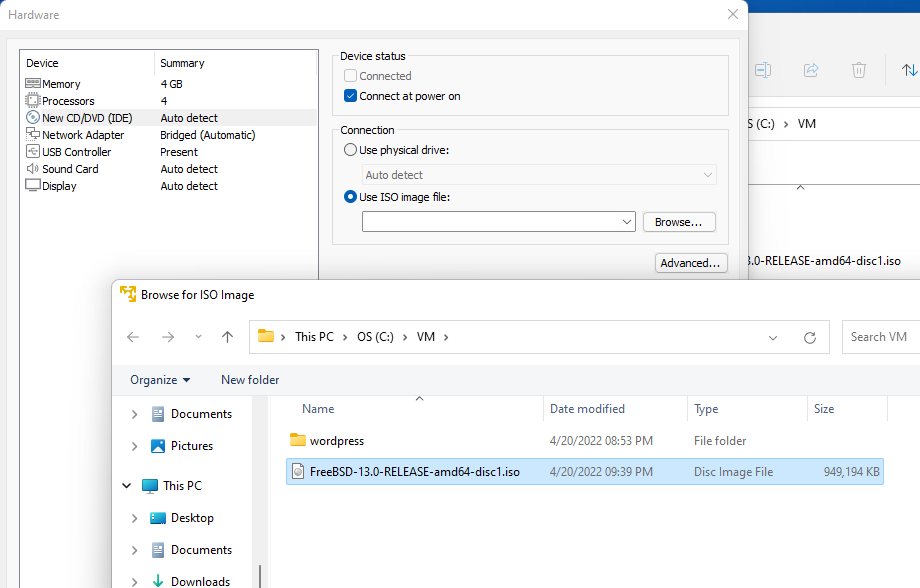
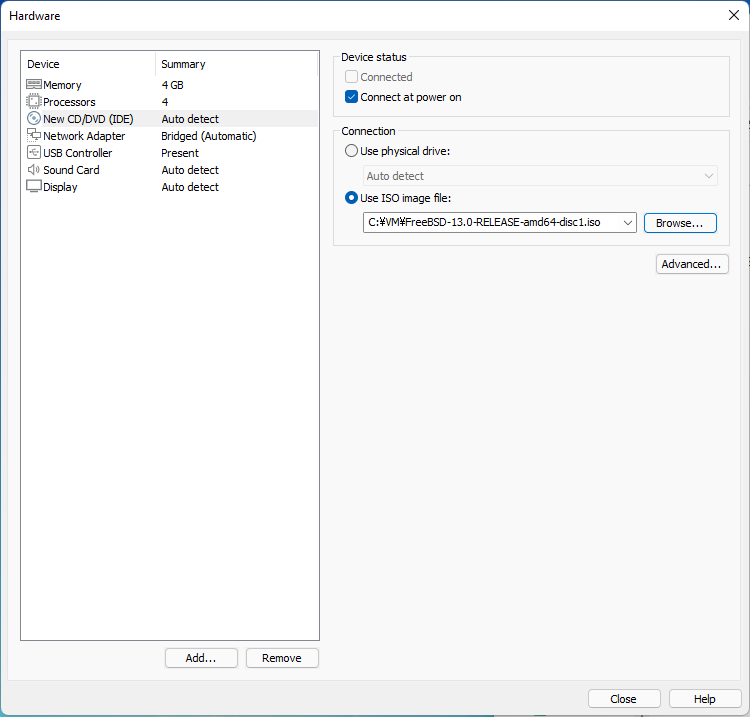
like this. This DVD logical drive will be mounted automatically when power up and can install OS from this ISO image directly. If this virtual machine couldn’t find the OS image in DVD drive, then NIC try to boot up from the network. We can install OS using this function. Let’s talk about it in the near future.
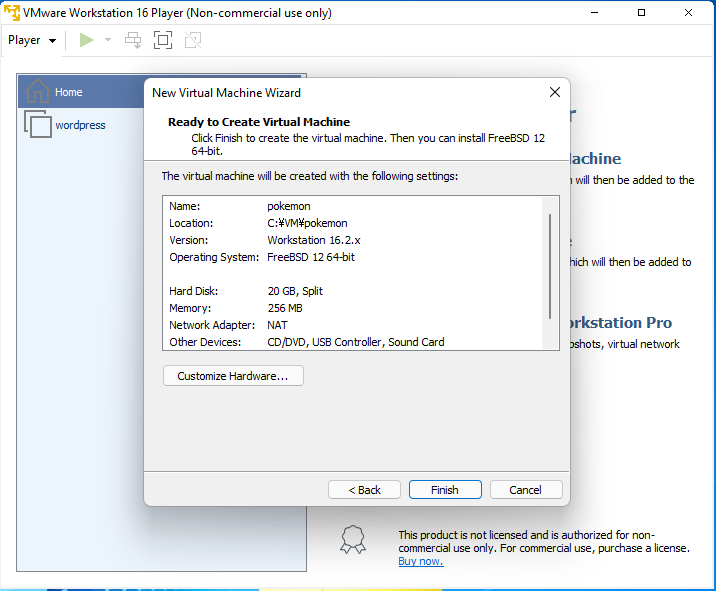
push “Finish”. Then new virtual machine will be created as specified.
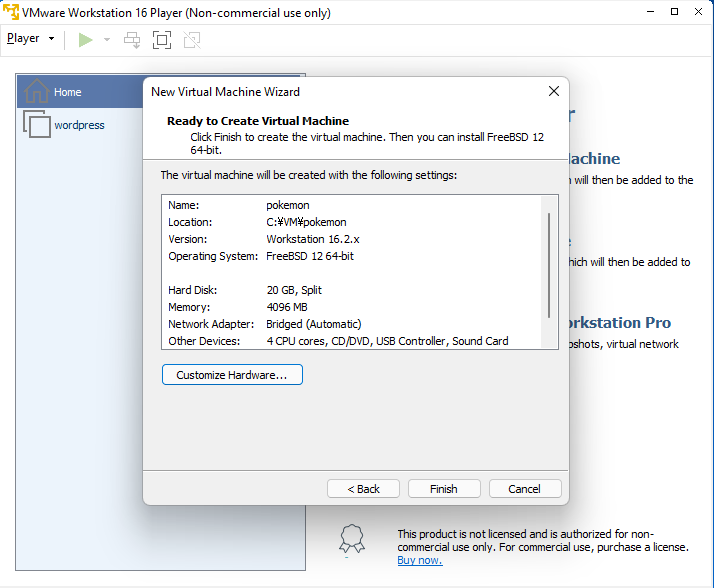
The new virtual machine hardware is ready to use. Power it up and start OS installation.
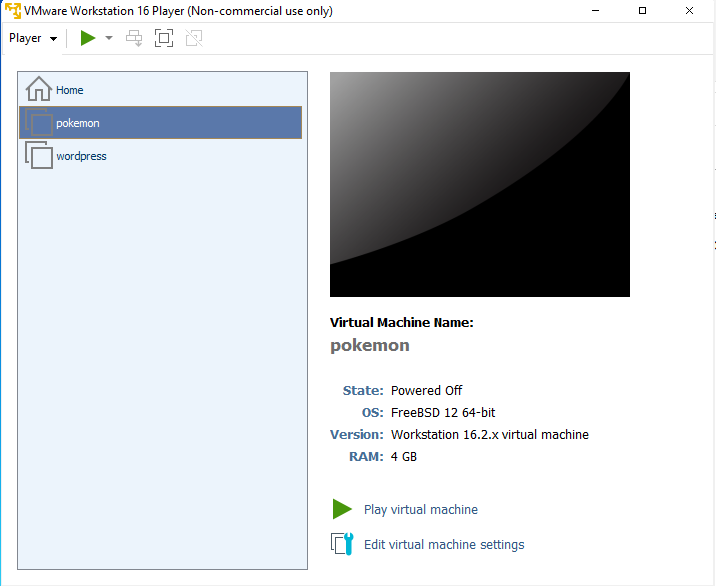
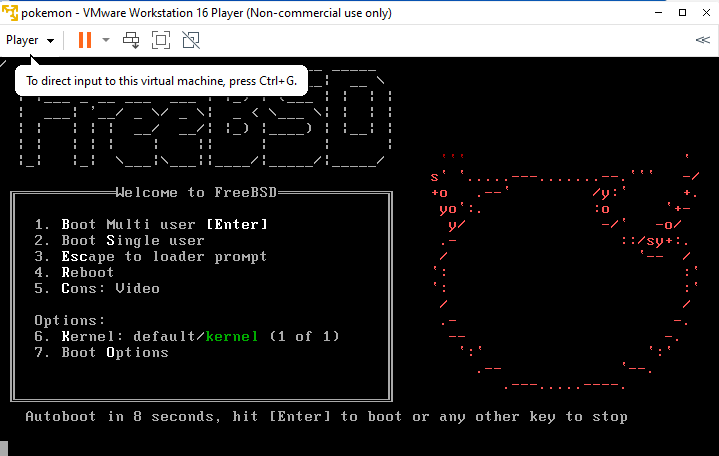
When you push “Play virtual machine” button, then you see the Daemon image and can change some boot options. Other options other than the default can be used when you debug the syetem. Just leave it as it is and go to installatiion.
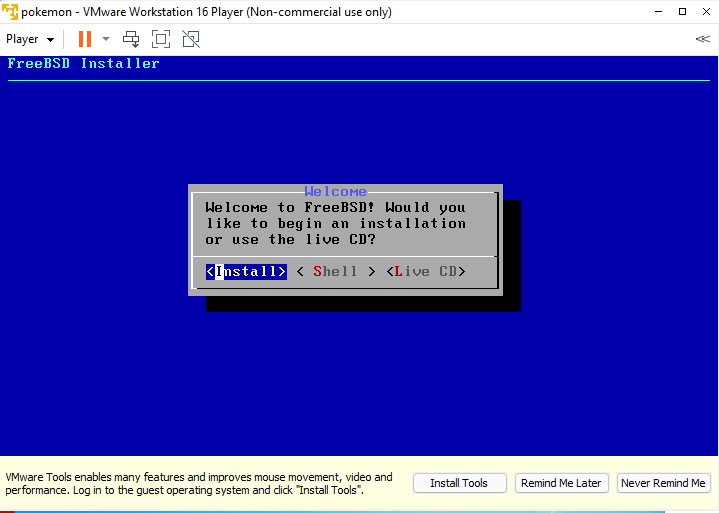
This is the very first menu in the installer. We need to select <Install> as we are installing the operating system 🙂 We can execute the menu with pushing “enter” key.
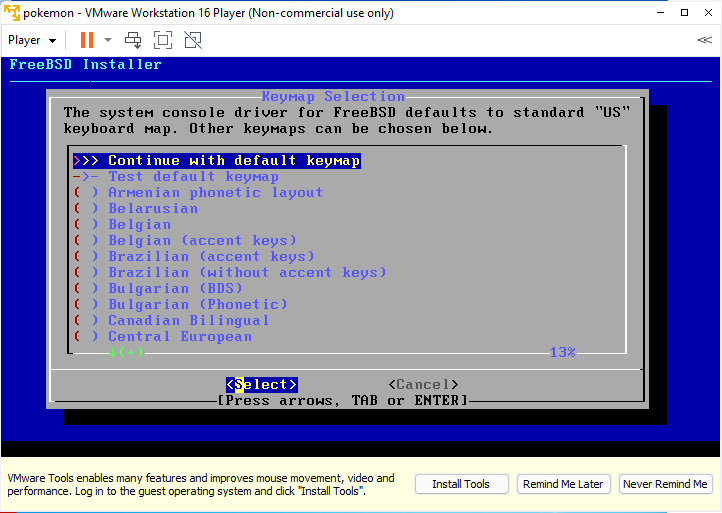
The very first setup in the installer is for your keyboard layout. The most of the keyboard layout is available. If you want to use your own keyboard layout, then scroll down and find out yours. Otherwise just use default keymap at the top. My company is global company and we have administrators in many countries. So if I use Japanese 106 keyboard layout, then all others have problem 🙂 So we should be able to use touch-typing for US keyboard on JP keyboard layout.
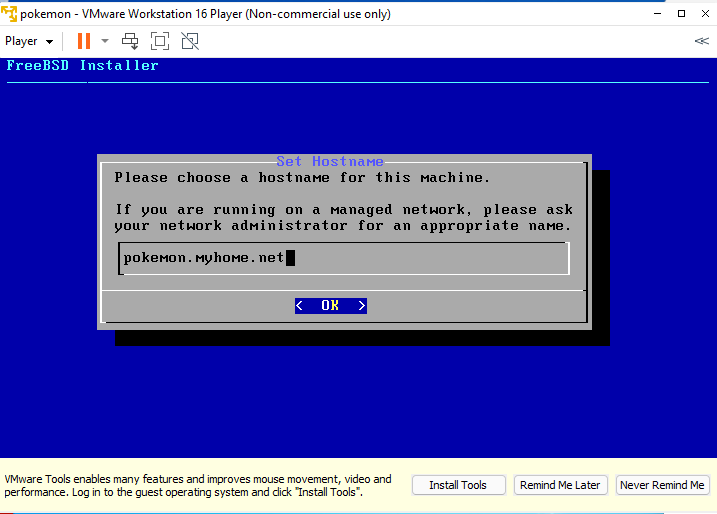
The next setup is setup host name. I don’t have my own domain name yet. The most of companies in the world have their own unique domain name such as cisco.com … whitehouse.gov … yahoo.co.jp … google.com etc etc. We normally need to create unique host name based on the unique domain name. If you are not sure, then you cam set simple machine name without domain part. In this case you can set only “pokemon” without myhome.net. Needless to say, you need to use your own favorite machine name. The “pokemon” is mine 🙂
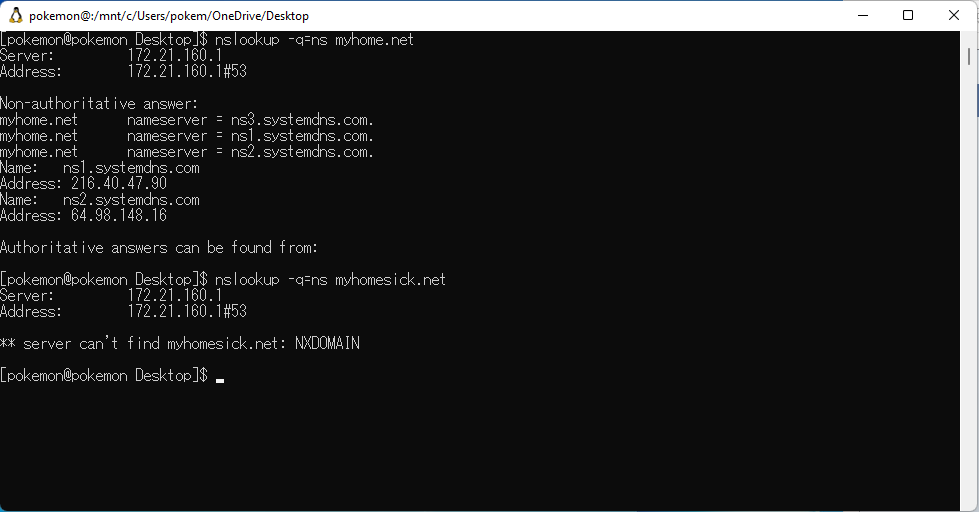
You can check none existing domain name like this. In the above case, myhome.net exists and valid IP addresses are returned. But myhomesick.net doesn’t exist and error is returned. JFYI..
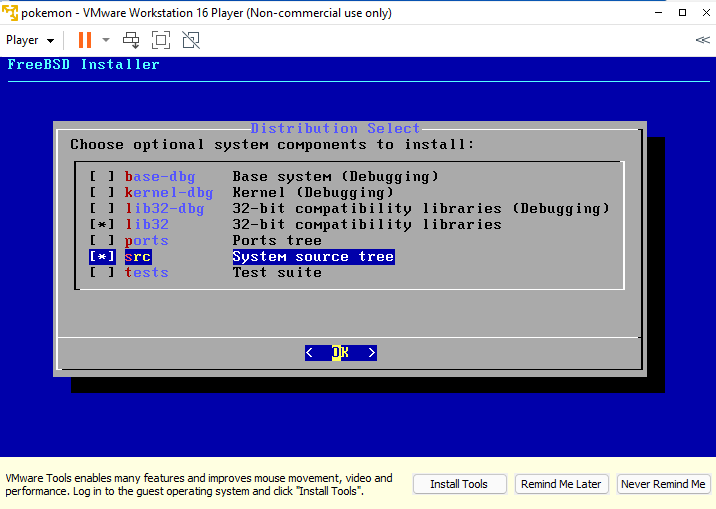
We need to specify which file set should be installed. I’m not developper. So I don’t need debug symbols. I just need to have 32bit library for compatibility and source codes for entire operating system.
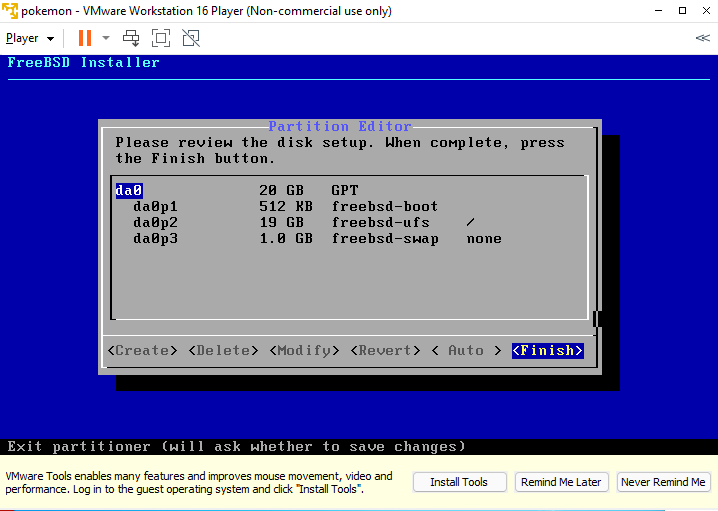
Next setup is file system and we need to specify how the file system and partitions should be. Actually ZFS is newer file system. But I prefer to use UFS as we can use already-known commands and consumes less memory. We use the default partitioning ( boot, swap and root ).
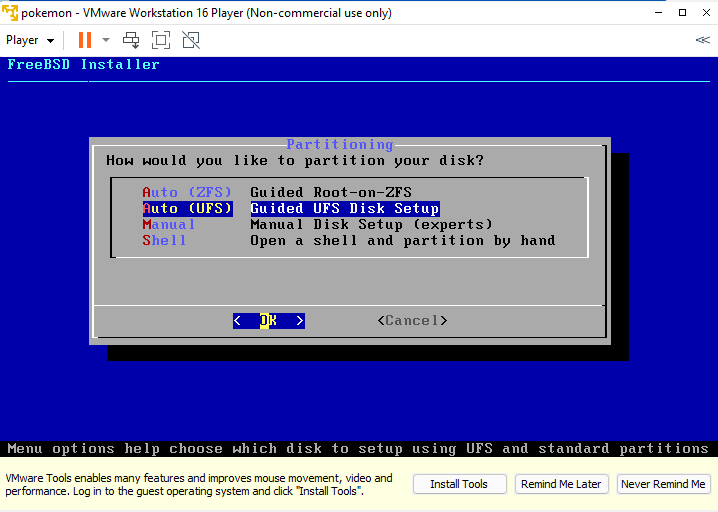
We normally need to protect operating system and it should run properly when file system for application is full. With this partitioning above, everything is located under the root file system and there is bad affection when file system is full. However, we are using virtual environment and we can make any changes ( increase the capacity or add more disks ) to the file system afterwards. We have only one thing we need to consider about this partitioning. The swap partition prevent increasing the capacity of root file system continuously. We may need to use some tricks when we extend the root file system later on.
This is the final confirmation. Nothing is changed on your disk drive until now. But everything will be deleted just after you push <Commot> option.
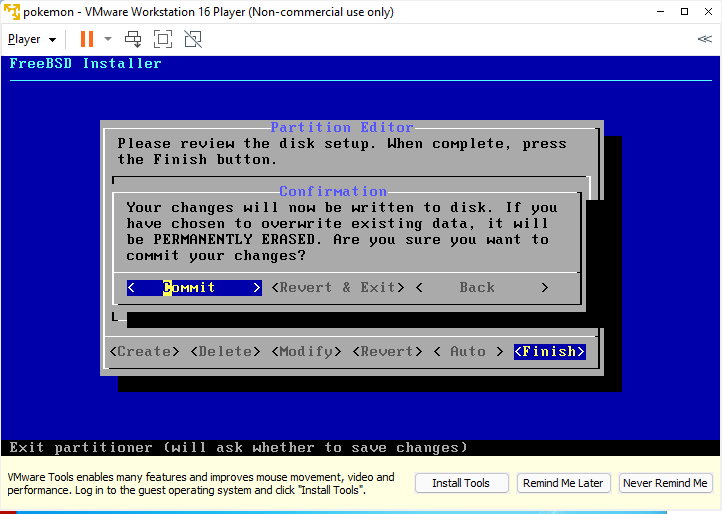
Once you push <Commit>, then installation goes as you specified.

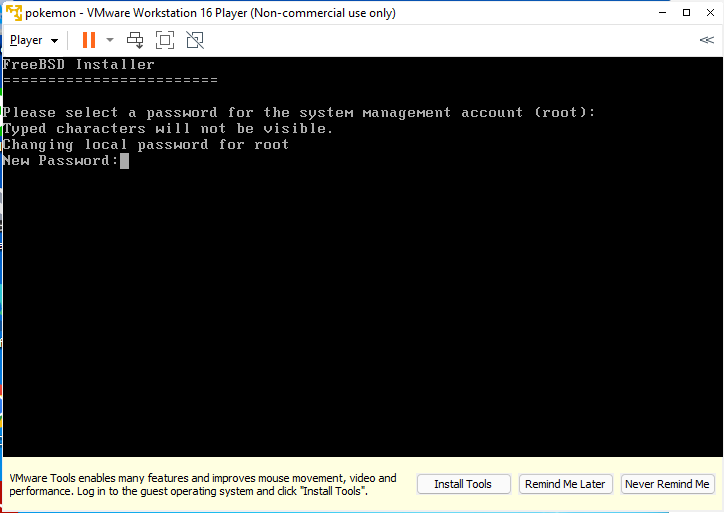
We need to set a password for root user.
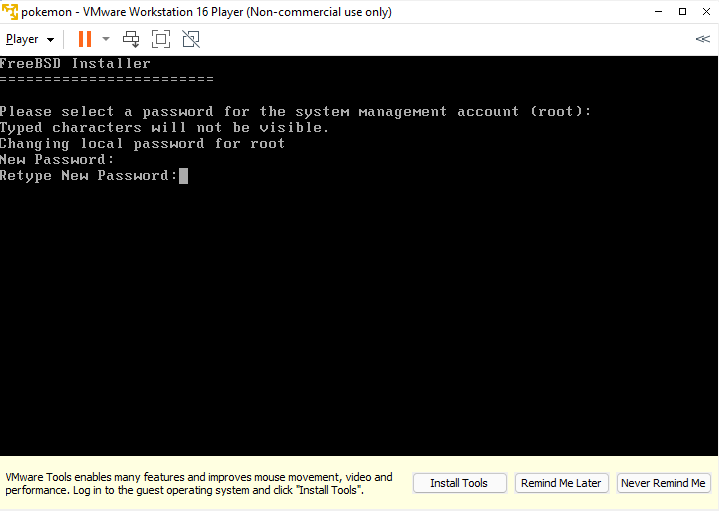
The same password twice. Only one thing we need to be careful is that the password you type is invisible. Do you remember what keyboard layout you specified before ? If you use symbols in this password, then you may type unexpected characters. For example, ” key on JP keyboard generate @ in US keyboard. This is because I selected US keyboard layout but I use JP keyboard. You may not be able to logon to the system later. Be careful 🙂
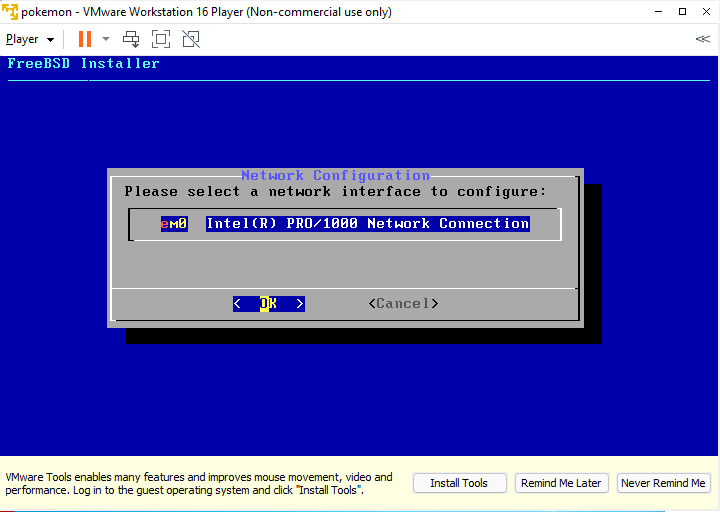
Then network configuration next. The Intel E1000 network adapter is used as the default in FreeBSD virtual machine. Actually we want to use VMXNET interface to get the best performance. I guess there is other normal way to change the network adapter in VMware player. But I normally edit the virtual machine template file directly. I can show you how to do this in another article.
I want to use IPv4, of course. We see many IPv6 sites. But IPv4 is still main IP addressing for almost all stes in the world.

To make it simple, I use DHCP option this time.

Then IPv6 next.
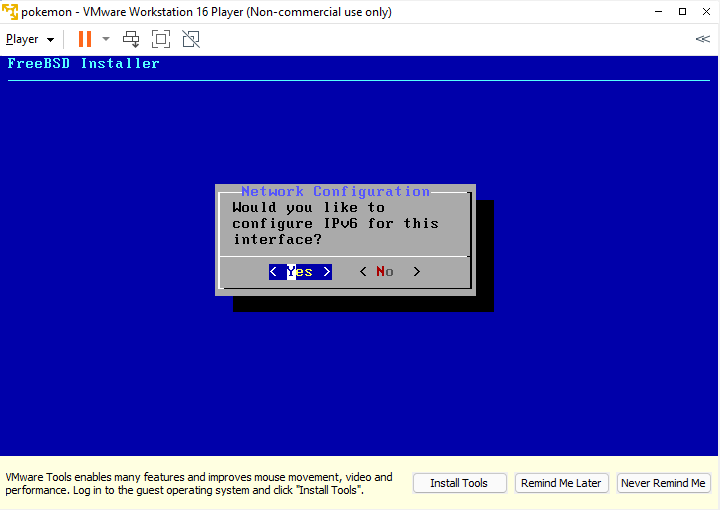
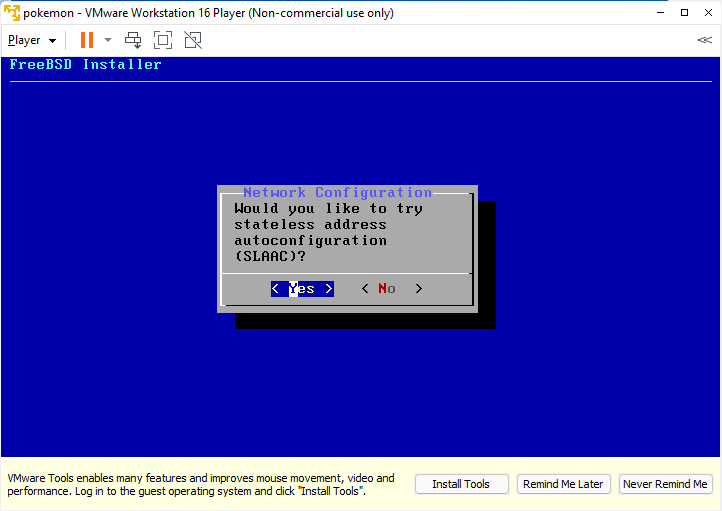
Let’s accept IPv6 automattic address assigning here too. This is my personal opinion. I think IPV4 addressing is used at home network everywhere. And IPv6 just depends how you have contract with your ISP, even you have contract, IPv6 may not be configured in your home router. If IPv6 is not available at your home network, then you can disable it in the previous step. The FreeBSD operating system is true dual stack IP network OS. You can use one of them or both.
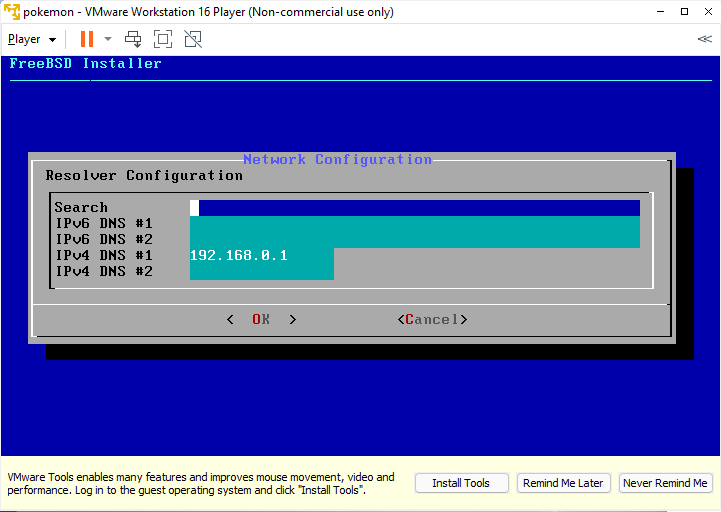
This is just an example at my home. You may have 2 IPv4 DNS servers. You may have IPv6 DNS servers. Also you may have search domain if you have your own domain at home. This is just an example at my home.
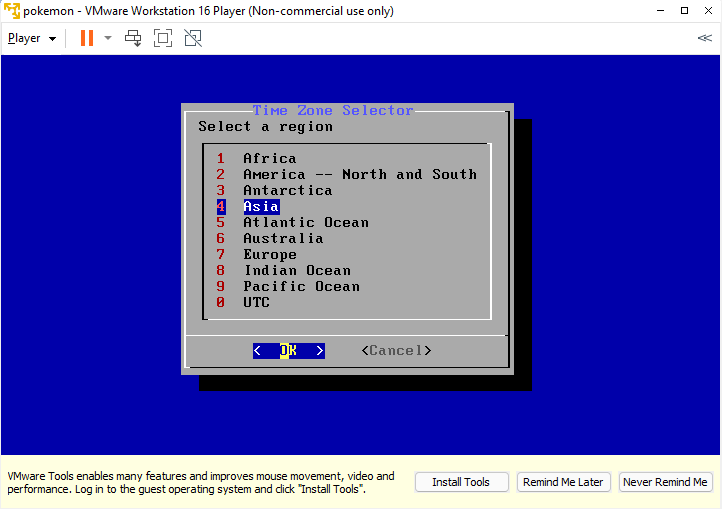
Time zones next. Basically PC clock is adjusted to UTC ( GMT ).
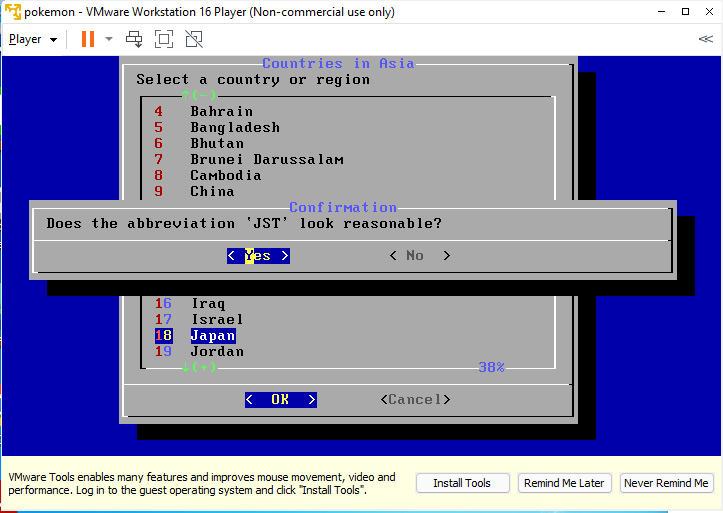
If you are in Japan and time offset is 0. then your clock in the operating system will be 9 hours behind. So you need to tell OS that you are in Japan ( JST ). Then your time in the operating system will be correct even if the clock on the mother board is set to UTC. I used JST because I’m sitting in Japan. But if you are sitting in France, for example, then you can use CET or CEST. The difference between CET and CEST is summer time. I’m working for a global company and have global meeting often. Then regular meeting just begin 1 hour earlier or 1 hour later suddenly. We don’t have summer time. We are not familiar with this system. But majority of the countries have summer time system. I hate summer time system !!!
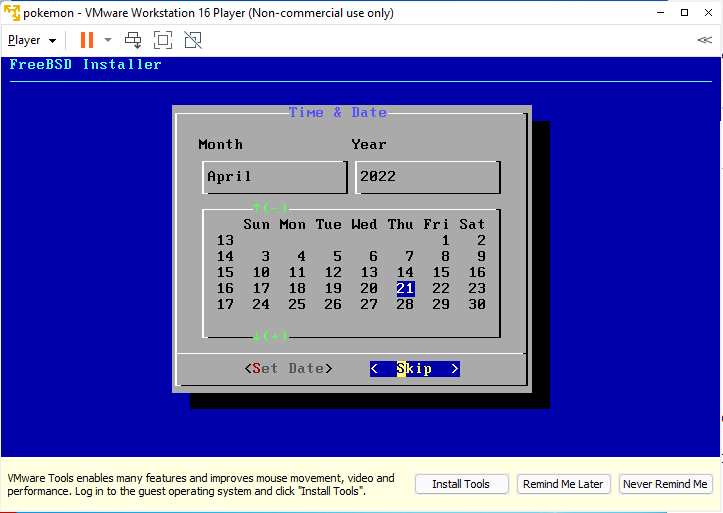
We need to set date next. It is important to set time and date correctly. But we have plan to use NTP. We can jist skip it here.
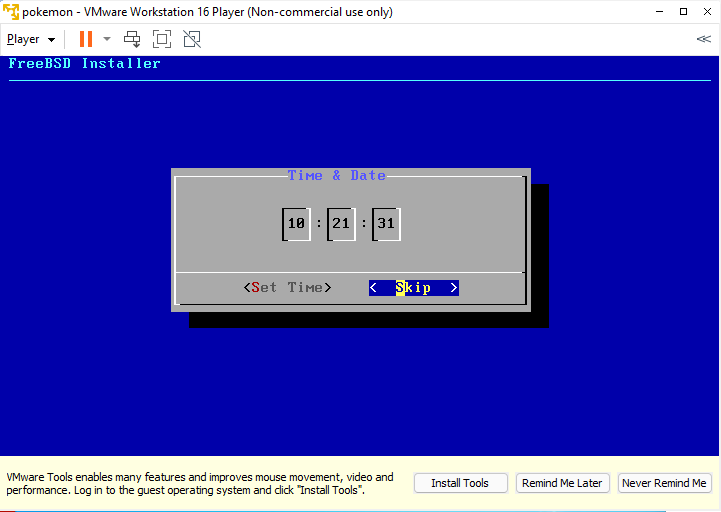
Then time next. Normally you should see almost correct time here. So you can skip it. But if you see totally incorrect time here, then your clock on your host OS ( your laptop PC ) may have incorrect time. if you often see incorrect time even after you set correct time and date in your host OS, then battery on your mother board may be dead. You may need to replace it with new one.
Some of fundamental services can be enabled here. I don’t like to use console if everything is working fine. So I enable SSH here. Also correct time should be set using NTP.
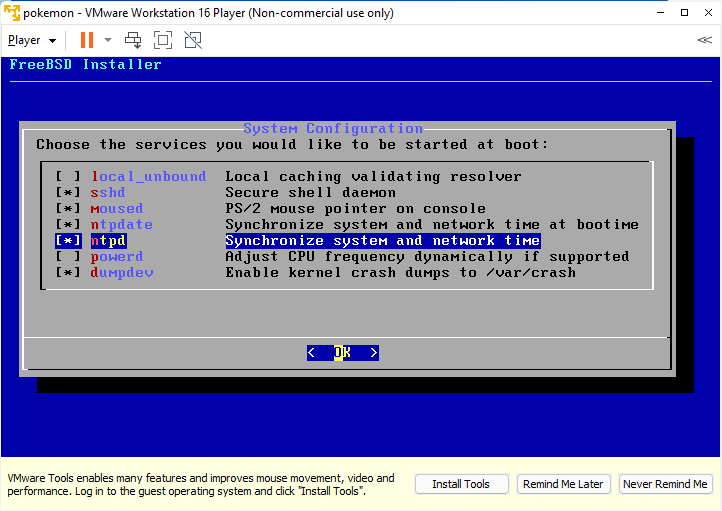
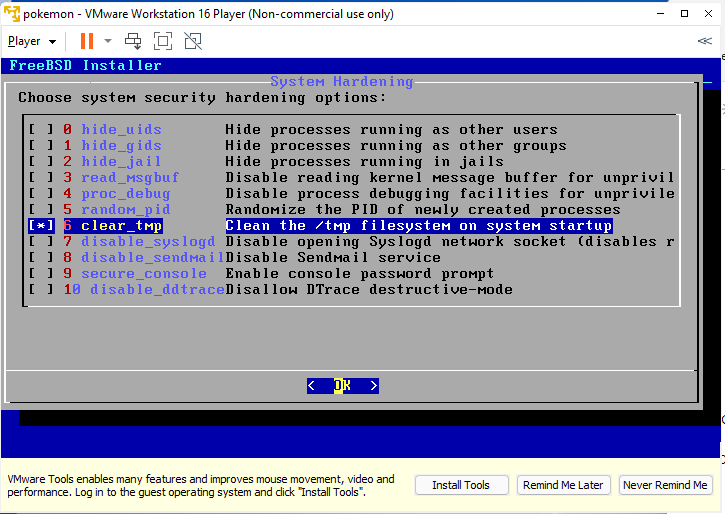
If user A shouldn’t see user B in the same system, then we can activate this function here. If we don’t want normal users to read system configuration or log files, then we can enable it here too. This is a server only for me, So I just want to clean up /tmp directory when sysyem boot up. This is more than enough for me 🙂
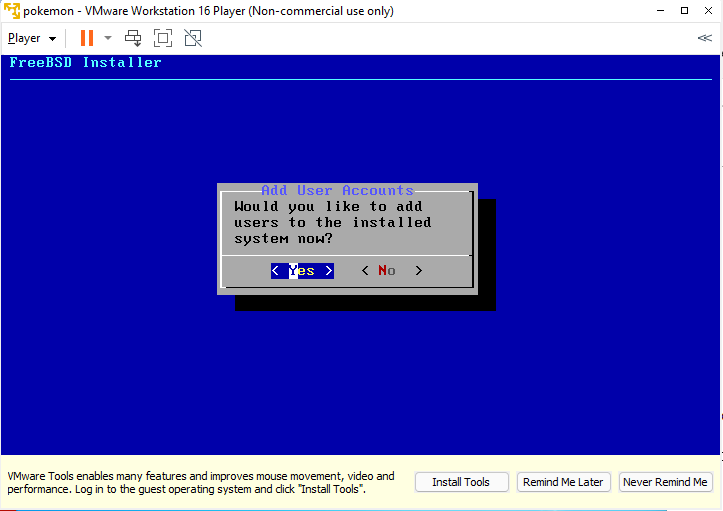
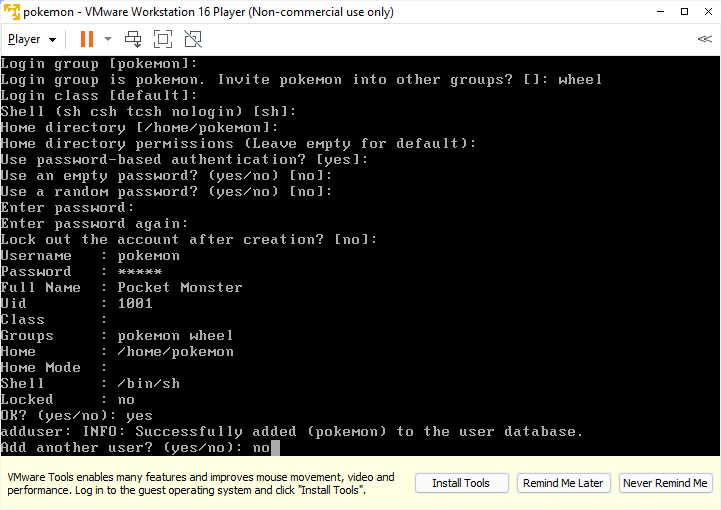
Now I have to create an account for me myself.
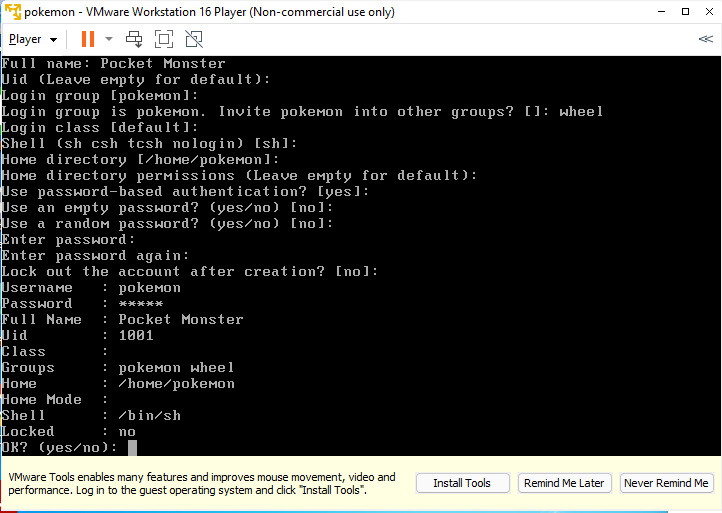
Enter necessary information one by one. The most important change is that you should be in wheel group here. If this is Linux system, then sudo is available as the part of base operating syste, But we historically use su command to switch user to root and do management tasks. You will not be able to use su command if you are not in this group. If you want to restart the system with your normal user, then you need to be in operators group as well. But you can do anything as long as you are in the wheel group. You can adjust the membership in /etc/group file afterwards.
You can create any other users on a operating system you are installing right now. Just quit from the menu with “no”.
Now the basic configuration is done. Let’s finish up the installer.
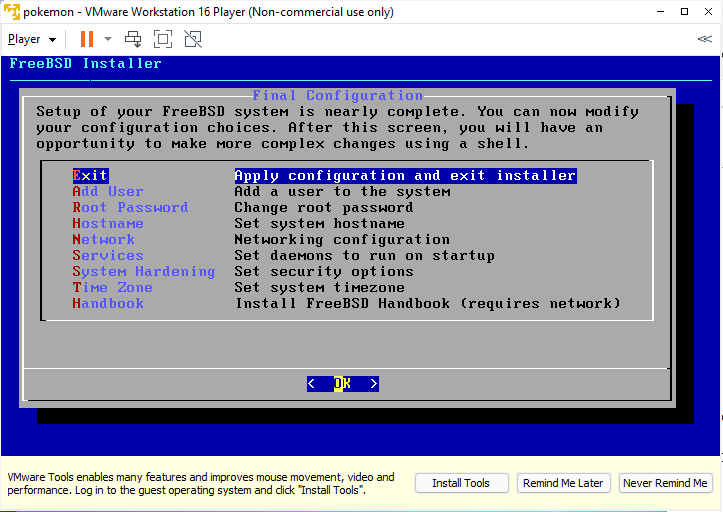
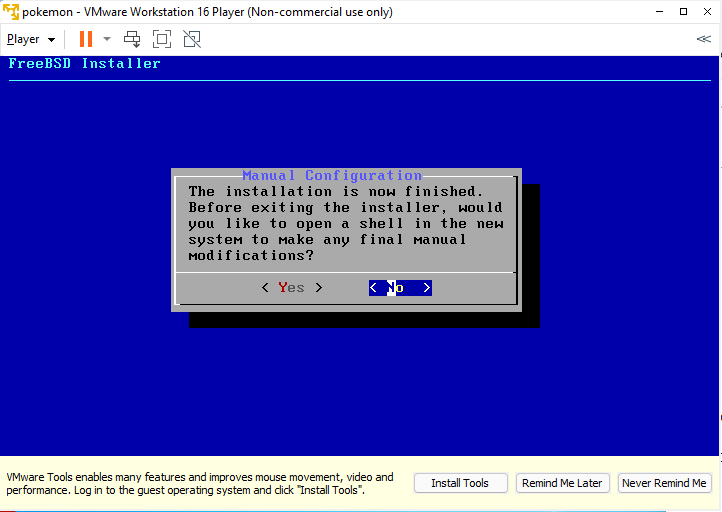
Before you close the installer, you can adjust the configuration and can modify the file system directly. For example, if you forget to set something in the installer or you want to have none standard setup etc. If this is the case, you can choose <Yes> and launch shell , and edit any files on the file system. Otherwise, quit from the installer with <No>.
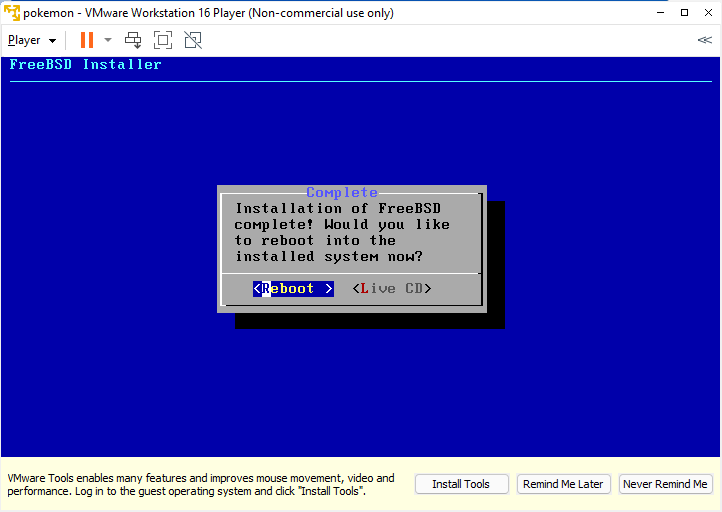
Reboot it !
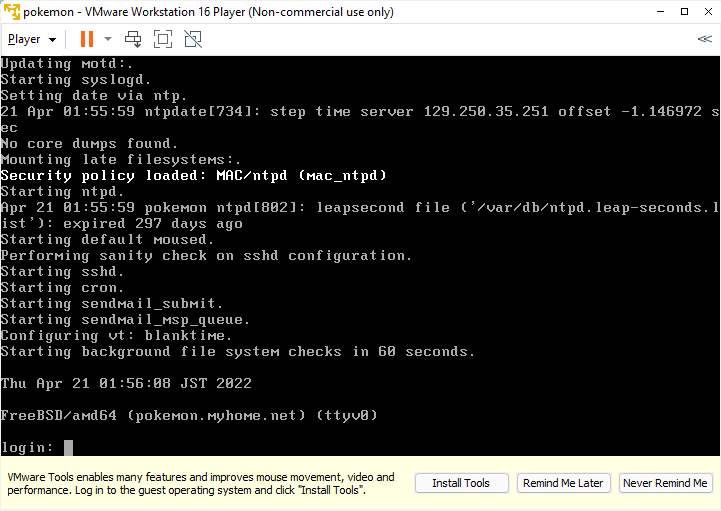
You will see something like this when the reboot is done. Let’s logon to the system.

Login to the system with your account. You are in the wheel group.
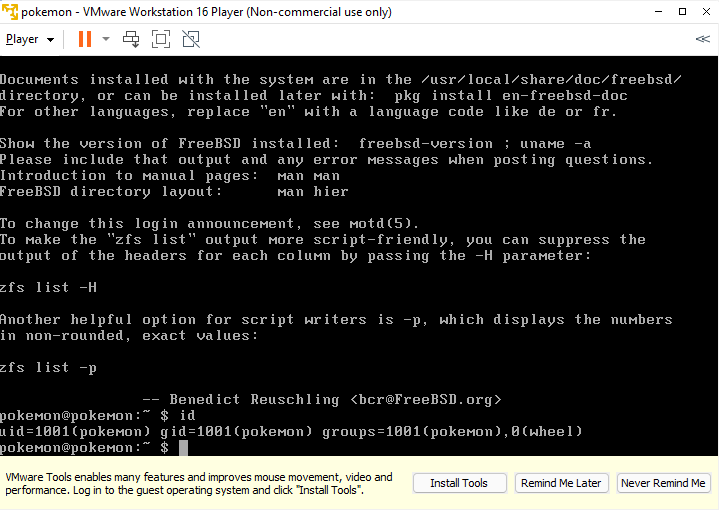
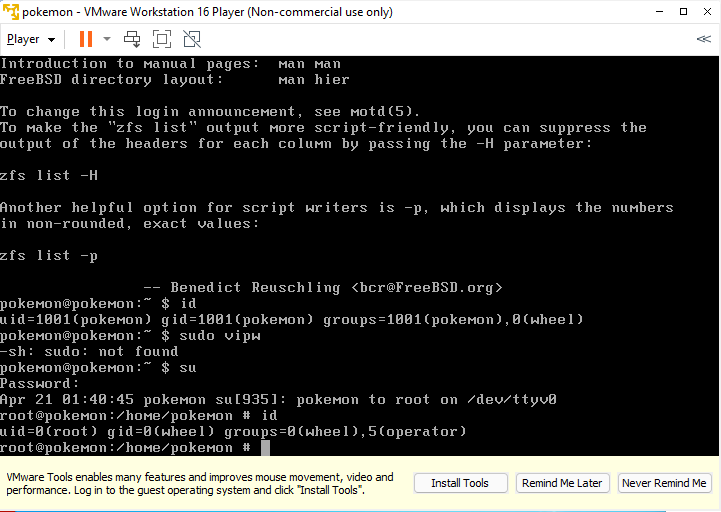
As you can see below, sudo command is not available in the base operating system. We switch user to root with su command.
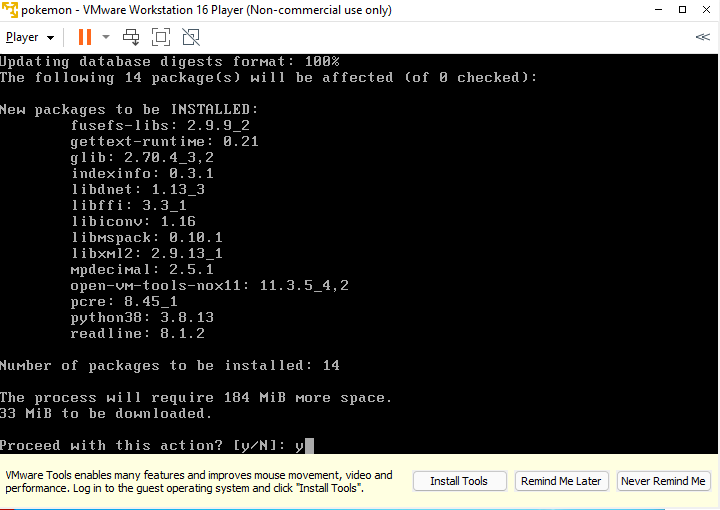
The last thing we need to do is applying the latest patch to the system. But we need to install vmware tools as this operating system is running on vmware infrastructure. I use CLI only to manage system. So I prefer to use vmware tools without X11.

These packages related to the vmware tools will be installed. Just type yes and continue.
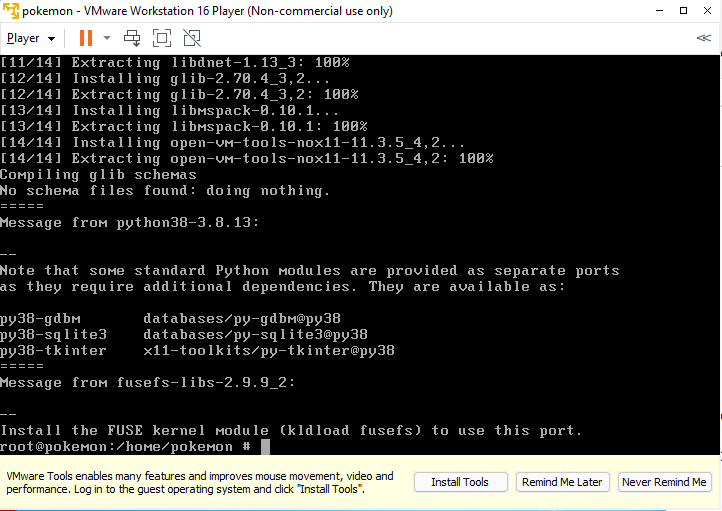
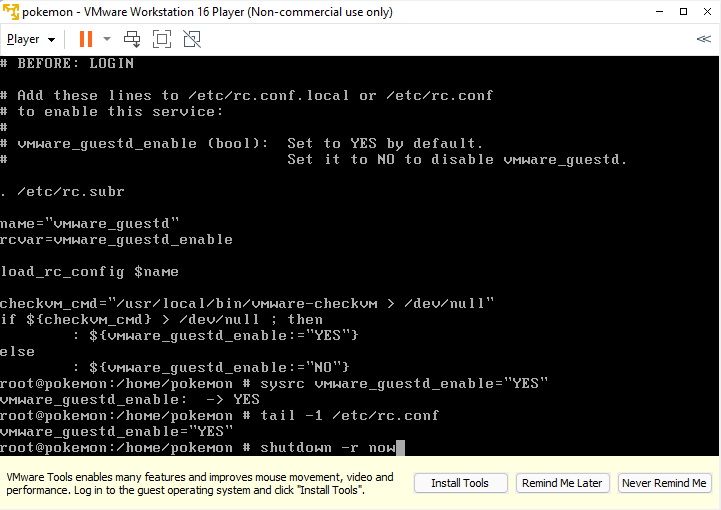
The vmware tools need to run automatically when system boot up. We can check the startup file to see what variable need to be set. As you can see, vmware_guestd_enable variable should be set to “YES”.

We have an option to edit /etc/rc.conf or /etc/rc.conf.local directly with vi editor. But sysrc command is prepared for you to make changes in those files. So let’s use this command here. All pre-defined system variables are stored in /etc/defaults/rc.conf file. So you can set different value to system variable or want to create undefined variable only in /etc/rc.conf or /etc/rc.conf.local files.

Restart the system to see if vmware tools can run as expected.
Check the process status and kernel modules. The kernel modules related to vmware tools is vmxxxx.ko.

Let’s install the latest OS patch as the last step.
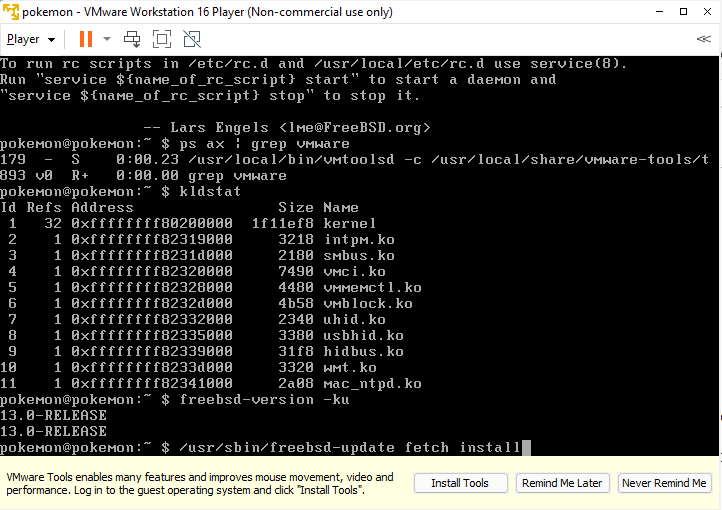
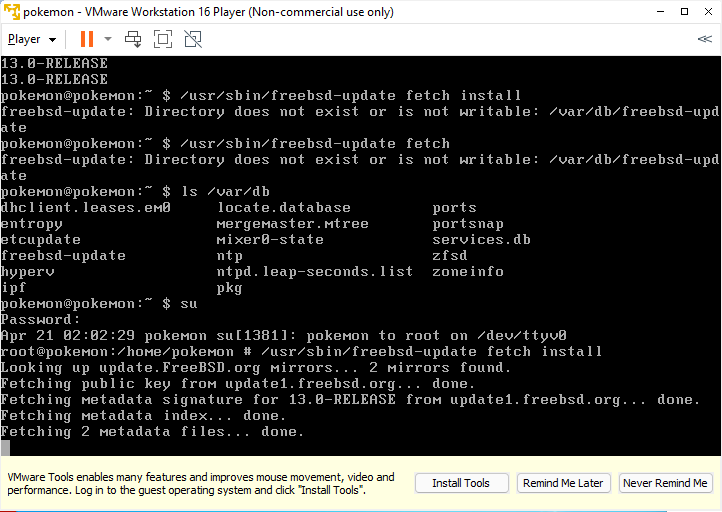
Sorry, this can’t be executed by normal user. We need to be root user. The patch files will be downloaded from the geographically closest site in the world based on the IP address you use.
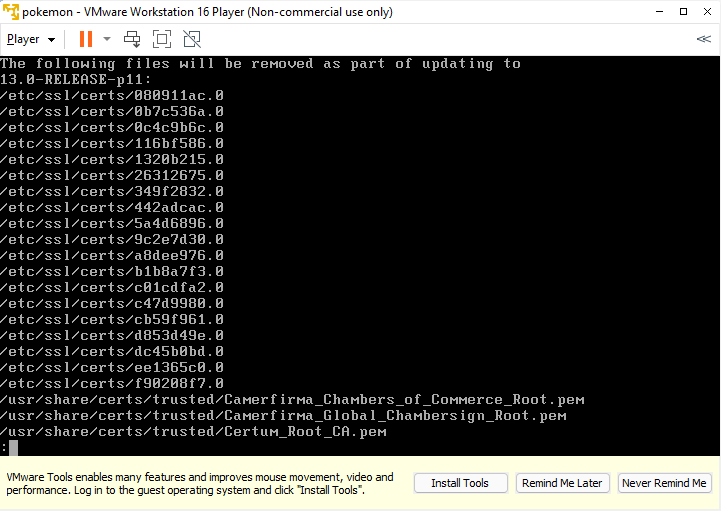
You will see what files will be updated. Just type ‘q’ several times and quit the pager. The latest patch level will be FreeBSD 13.0-RELEASE-p11.
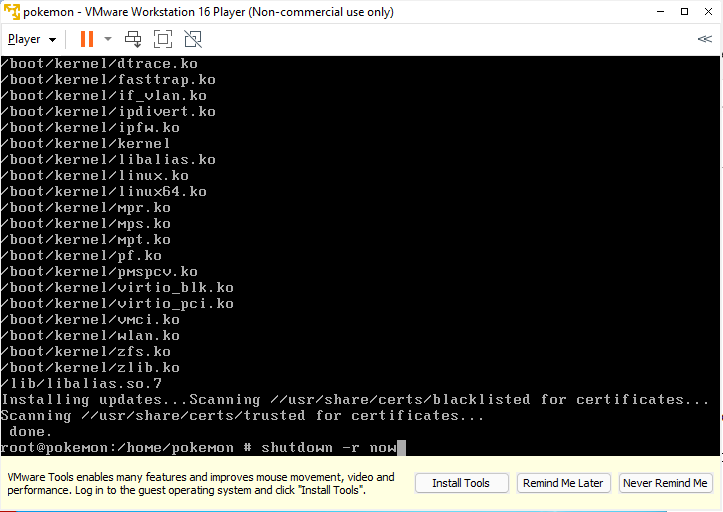
The patch installation begins automatically after you see the list of files to be updated. The kernel module files are updated. Just reboot the system to get it effected.
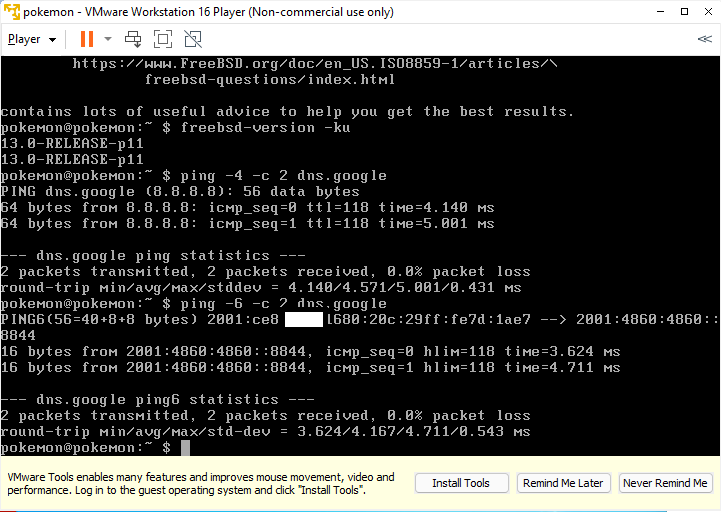
Let’s confirm OS version, IPv4 networking, IPv6 networking. The DNS resolver seems to be working fine too.
We don’t need to have ISO image mounted. We can remove it now.

Uncheck “Connected” and “Connect at power on” options. If your physical machine have DVD drive, then you can change the connection option from “Use ISO image file” to “Use physical drive” accordingly. This is up to your system configuration.

Now all basic FreeBSD installation task is done. You can install optional software and can provide any network services to other systems on your home network. According to the page here, more than 36000 ports are available. All those ports can be compiled from source codes. If you don’t like some part of an application, then you can modify the source code and rebuild it as you like based on the license agreement. Of course, you can modify and fix the bug by yourself. This is totally different from M$. You don’t ned to wait them at all 🙂 Currently nothing is ready as the service on your newly installed server. But I will write more articles about network services on FreeBSD system. See you soon !
advertisement below