The original Japanese version is available here.
I have written about network services using FreeBSD so far, but this time I would like to write a little about Cisco devices away from FreeBSD. Since the coronavirus, the way to use internal resources through VPN connections called remote from home or other locations has become very common. However, there are still many offices that are working with only office managers, delivery staff, people who want to work from home for a change, and those who cannot withstand the piercing gaze of their wife 🙂 Nevertheless, the company network is still necessary, and wired switches and WiFi are provided. The wired switch uses two VLANs, one for the internal network and one for the guest network, to divide devices. Radius with Active Directory and OpenLDAP as the background is used for the allocation, dynamically assigning the VLAN that can be used. Although AD itself is LDAP, it is necessary to use OpenLDAP separately as a dedicated LDAP to prevent entering strange data and ruining the mood. AD is responsible for authenticating domain PCs, and OpenLDAP is responsible for authenticating devices other than domain PCs. Authentication and authorization are performed on the switch through Freeradius, which combines these. There is no particular authentication for the wired guest network segment, and it is assumed that they have passed authentication by being able to open the office gate with a card key and connect to the company LAN. WiFi is not enough for this, so authentication is also set for the connection to the guest network to avoid becoming a free provider. Of course, access from the guest network is limited to the internet only.
Today, I would like to introduce TACACS, which is one method of controlling access to the switch itself, rather than the authentication and authorization that was introduced before. RADIUS can also perform password authentication, but there are two main differences. TACACS communication uses TCP and everything is encrypted, while RADIUS uses UDP and only the password is encrypted. Also, while RADIUS can only perform authentication, TACACS can perform both authentication and authorization. Many network vendors, including Cisco, support TACACS. Although there are some subtle (sometimes significant) differences, they can be considered the same in basic terms. However, based on my experience, the implementation of vendors other than Cisco is not up to par. TACACS itself was a Cisco-exclusive service, so there may be some unavoidable parts.
In a previous article, I talked about the Cisco Catalyst switch, but so far I have only used it as a hub. This time, I would like to secure the minimum security on the Cisco Catalyst Switch and enable access management by AAA as preparation for using TACACS. The articles about switches only wrote about IPv6’s RA, so the way to use TACACS will be a bit long. So I would like to make it a three-part structure. The initial setting of the switch, the AAA setting of the switch, and finally the management by TACACS, in that order.
Let’s start with the initial setup. Note that the switch configuration has been reset, and only the host name is defined. It is almost in the default state. First, log in to the console and become an administrator. In the past, RS-232C interface connections were often made via a well-known Cisco blue cable, but recently, USB interface connections have become more common. The Catalyst 2960G is quite old, so we will connect the console via a blue cable through a USB-SERIAL converter device on the PC. The Cisco side of the transfer speed should have a default of 9600bps, 8 bits, none-parity, 1 stop bit. If nothing is displayed on the screen or if you see characters that you do not understand, please check this. In this example, the console connection is made directly by opening the serial device in Tera Term on the PC. You can also add a serial device to VMware and handle it from FreeBSD, which we will introduce in the end. When the connection is complete, it will look like this.
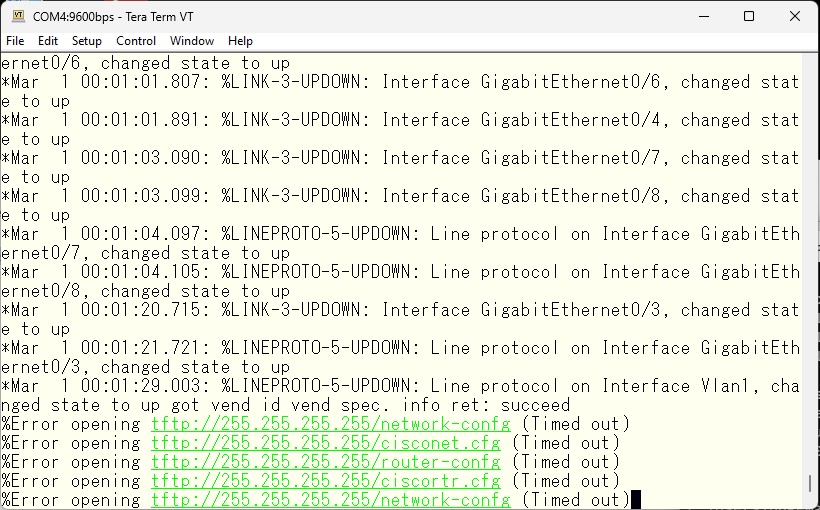
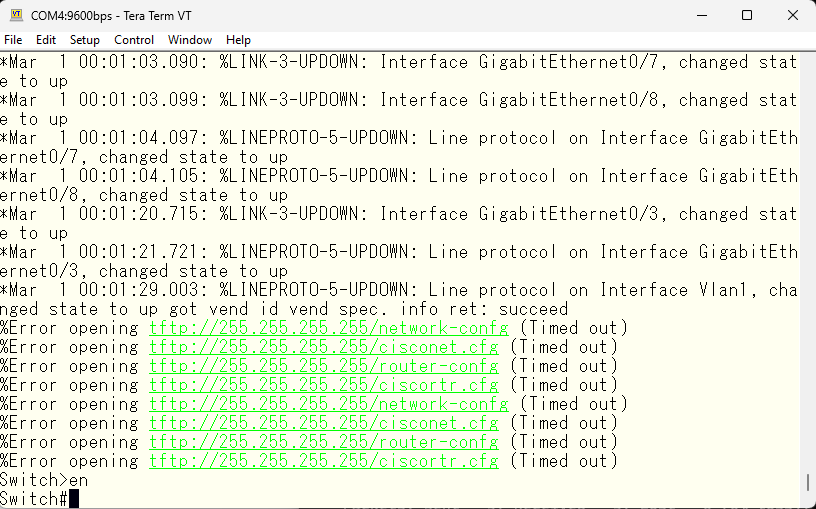
The default behavior is being performed and the log is displayed. For now, let’s press enter. Then we were able to log in without any privileges. Enter the ‘enable’ command to obtain administrator privileges. You can get priviledged access without a password.
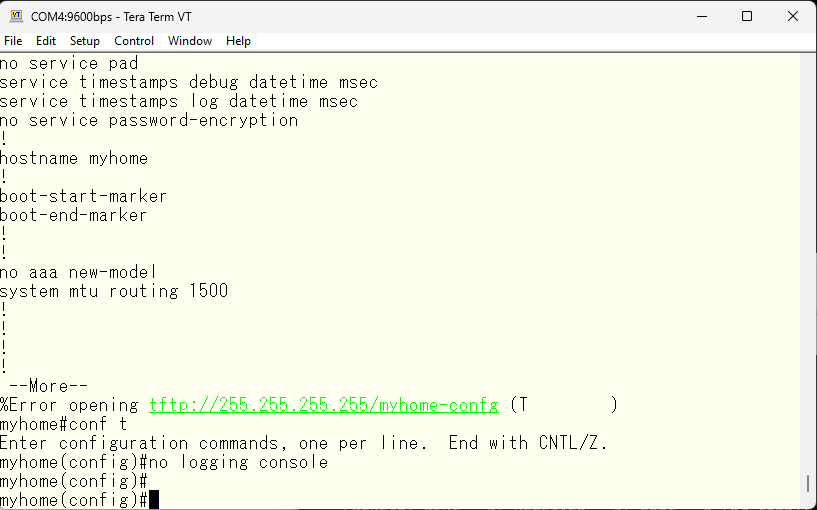
This is the default. Anyway, to make it easier to work, I’ll turn off messages from being output to the console. If logs are displayed while entering long commands, it becomes unclear what’s going on.
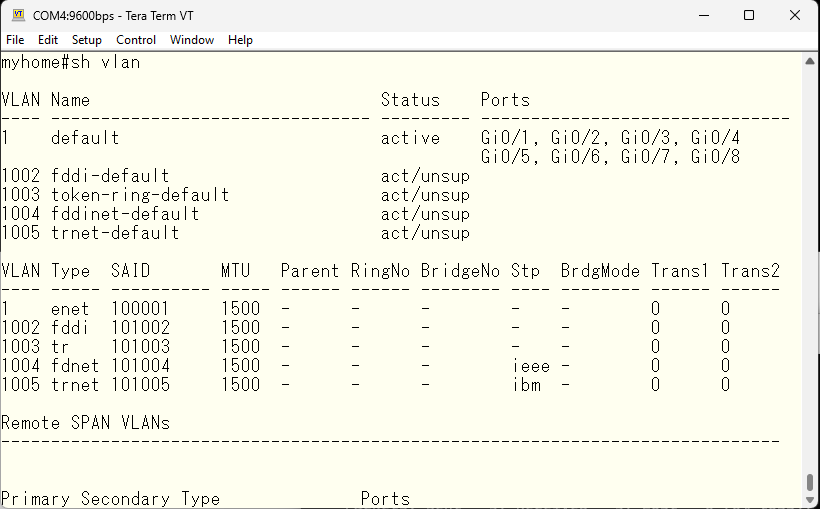
I have reset the configuration, so there is only the default vlan 1 for vlan as well.
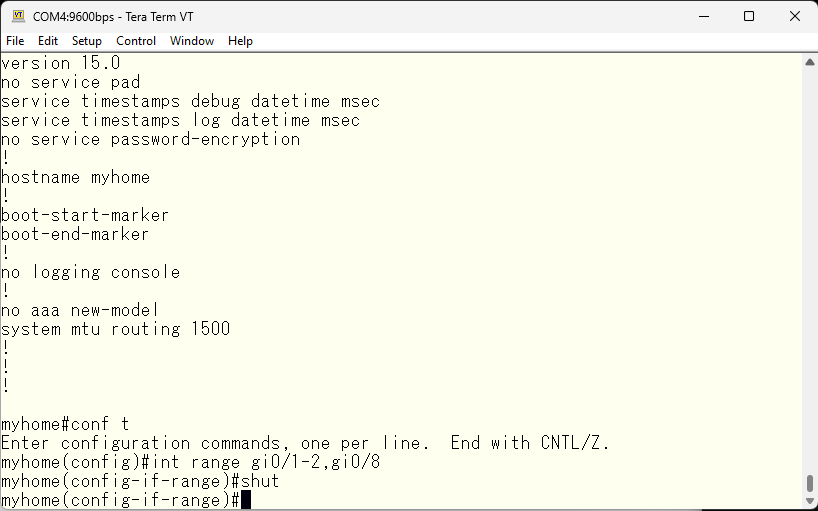
First, let’s shut down unused interfaces.
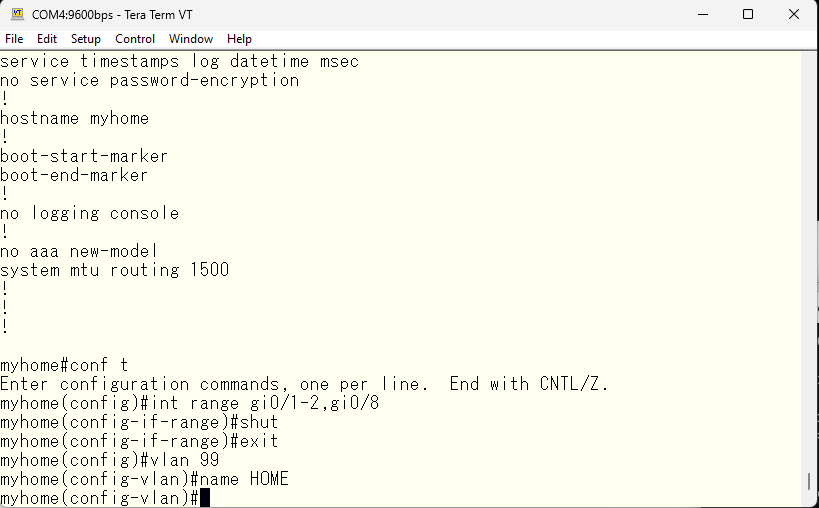
The default vlan 1 is used by the system for various things, so for security reasons we will create a different vlan as the main network.
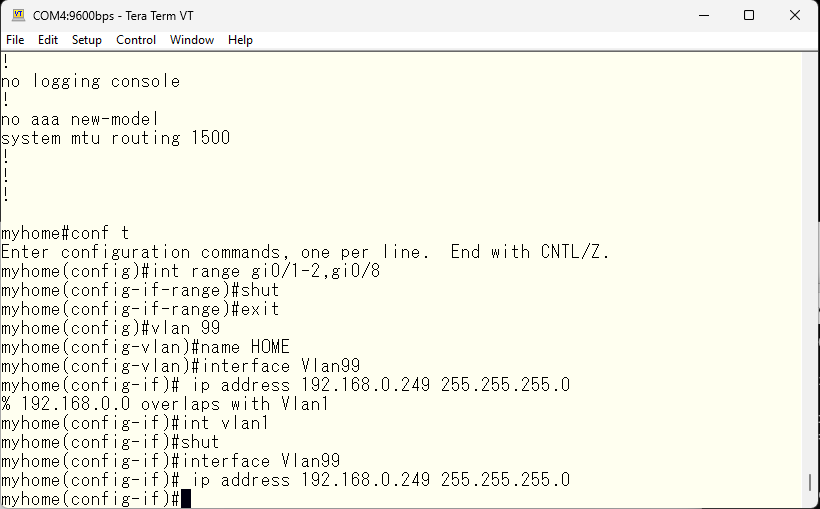
We will make the newly created vlan 99 as the main layer 3 interface, so we will assign an IP address to the vlan99 interface. The default IP address of vlan 1 will be obtained via DHCP, so we will shut it down to avoid duplication.
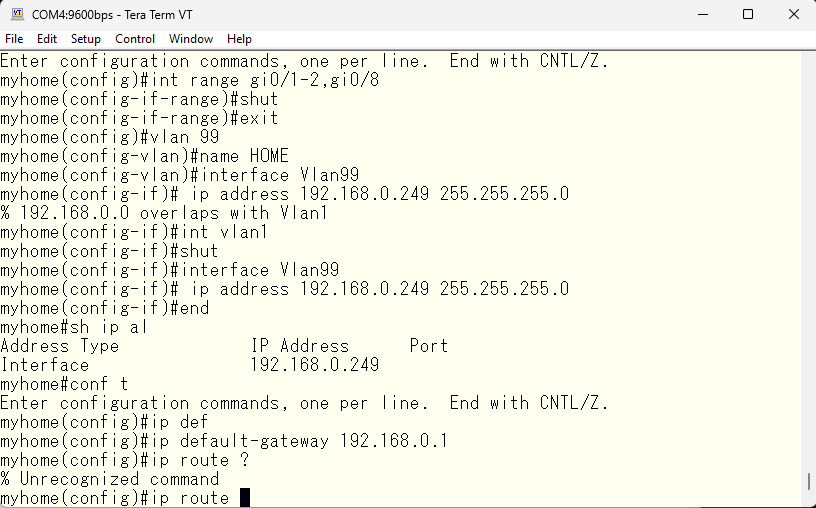
A gateway address is also required for connecting to the internet.
All active interfaces will be assigned to vlan 99. Since only PCs are connected, specify the spanning-tree portfast.
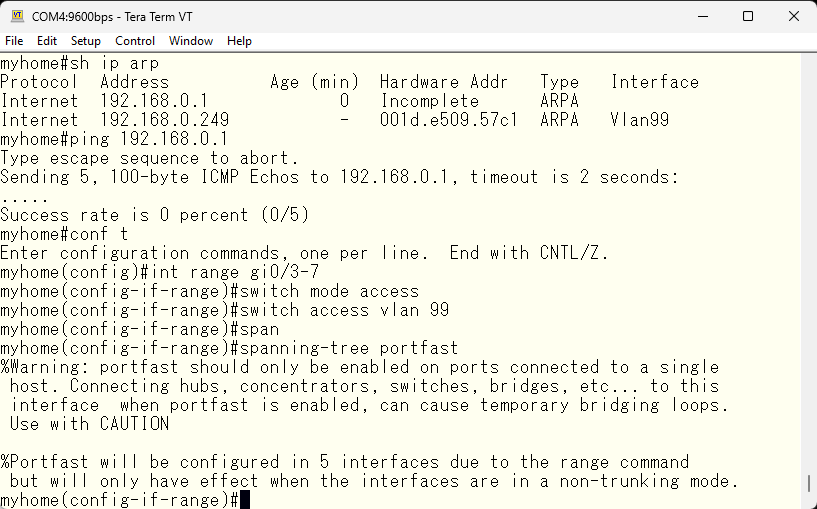
Next, we change the spanning tree mode from the default pvst to rapid-pvst. The difference between these is the convergence time in case of a change in the topology. As the name suggests, rapid-pvst converges in less than a second. And to make sure this switch always becomes the root bridge, we increase its priority.
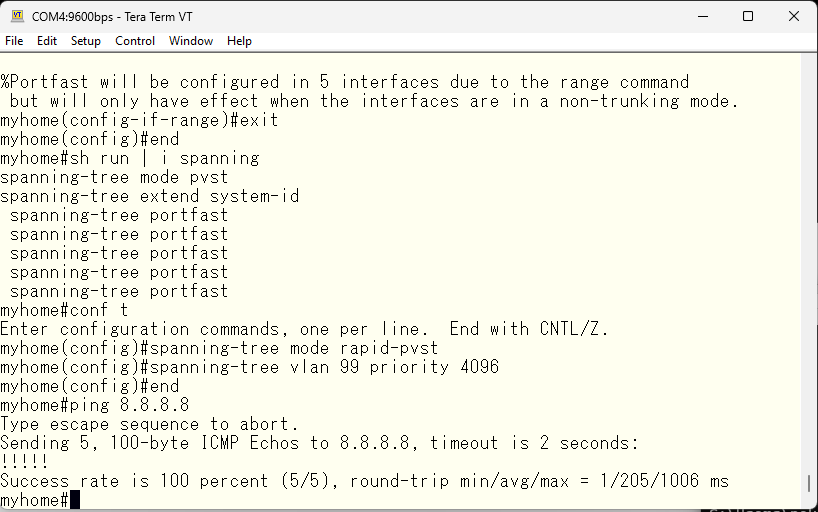
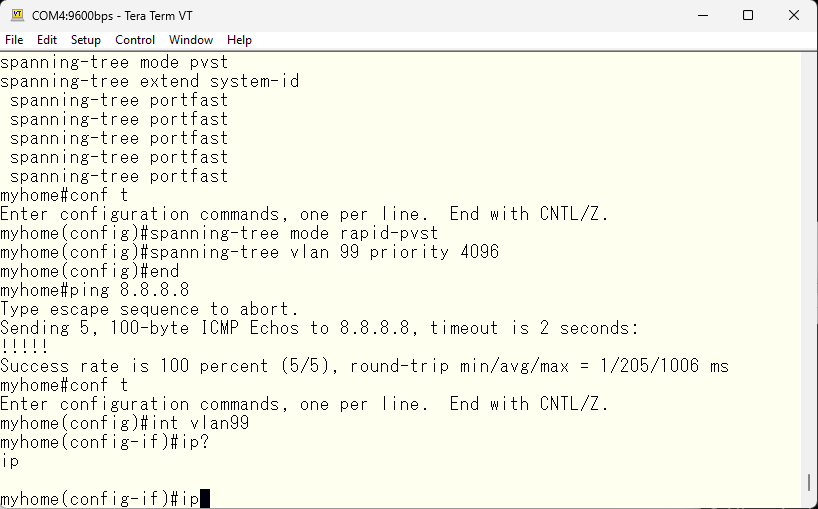
Next, I would like to set the IPv6 address as well. However, it seems that only IPv4 related commands are accepted in vlan99.
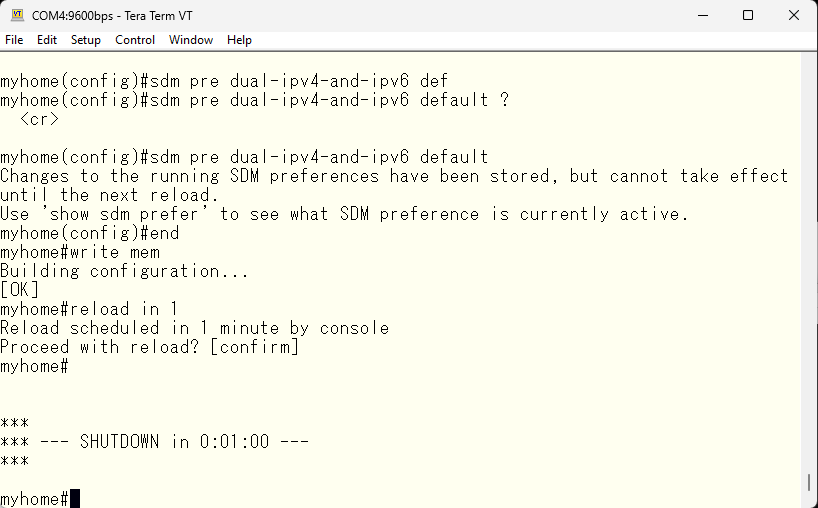
So, I will change the switch’s profile to IPv4/IPv6 Dual Stack. And, as the message says, I will restart it.
Upon attempting to log in after the reboot, I started generating RSA Keys with the default values.
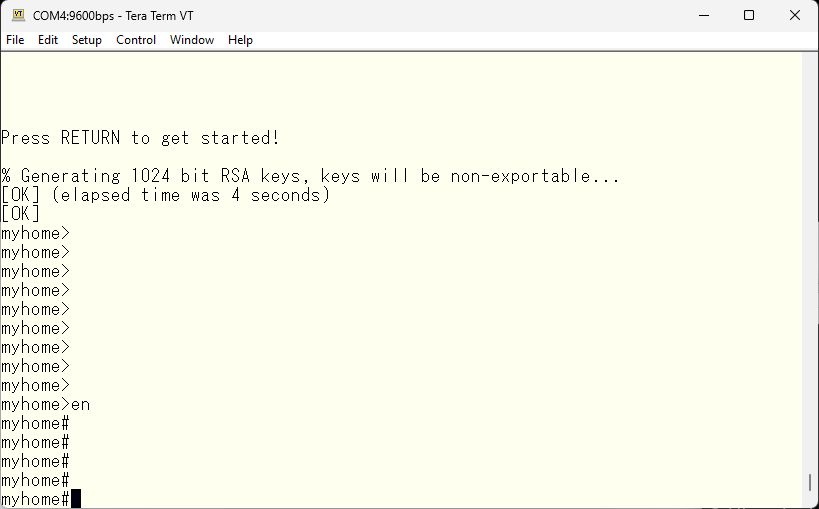
As I mentioned in a previous article, the longer the bit length, the stronger the key becomes. On the other hand, the default key is 1024 bits, which is a bit short. So, I will delete it and create a new longest key.
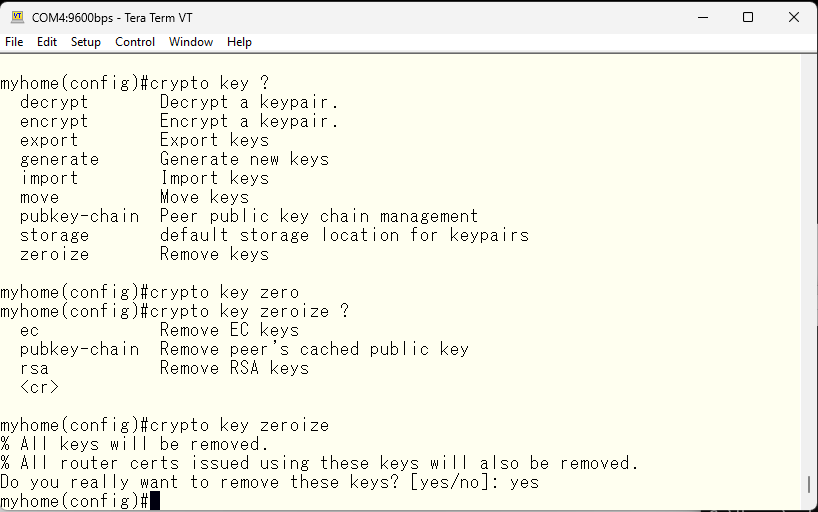
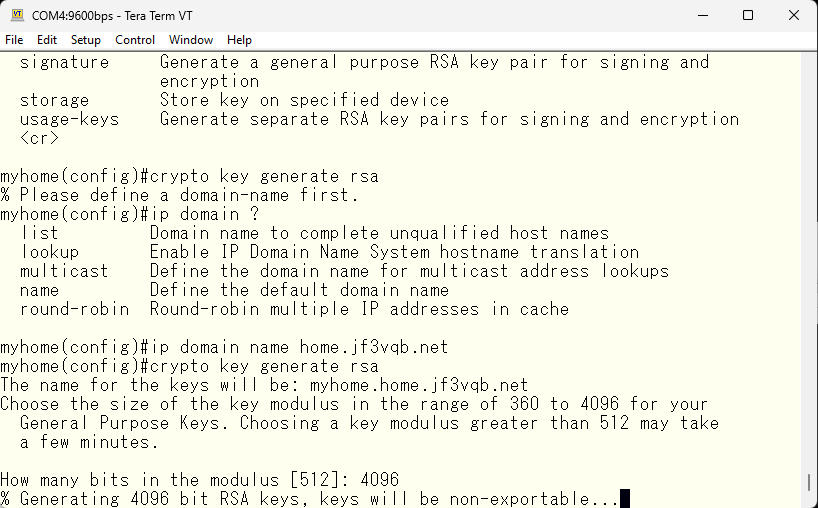
The key length can be up to 4096 bits. To manually create the key, a domain name must be entered, which is necessary regardless of whether DNS is used on the switch. Of course, you can enable DNS as necessary.
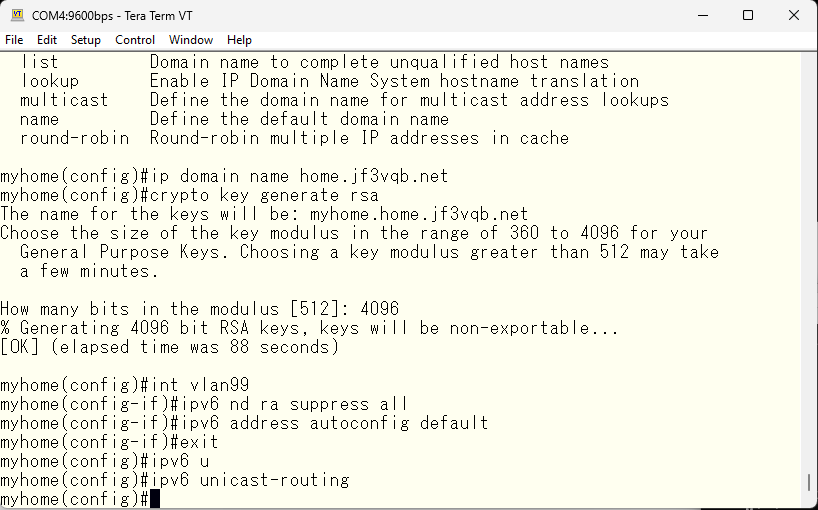
Having selected the IPv4/IPv6 Dual Stack profile, we should now be able to use IPv6 addresses, so we will set the switch to use the IPv6 address and default gateway assigned by the router. Of course, if you have a fixed IPv6 range, you can also set a fixed IPv6 address and gateway address.
Since we are not using DNS, we will obtain the IPv6 address on the PC and paste it to test connectivity.
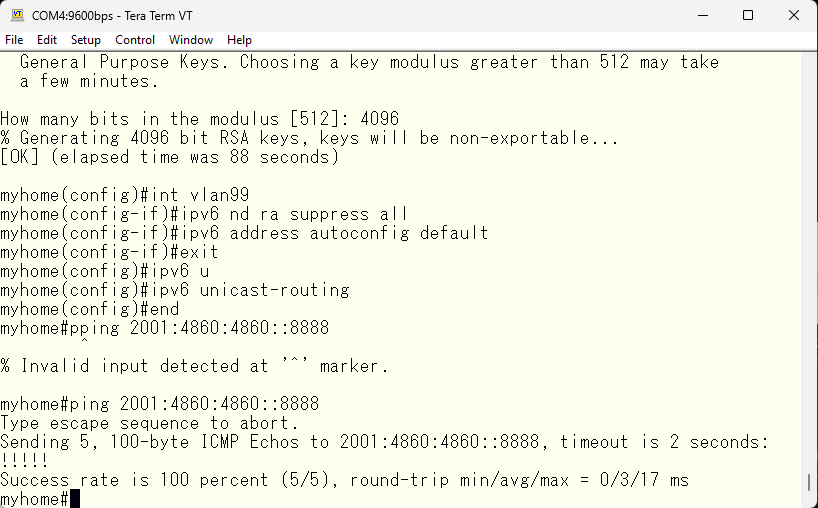
Earlier, we turned off displaying logs on the console, so the logs only exist in memory and will be gone after power outaget. Since the logs contain useful information, we will set it up to be sent to a syslog service on the server dhcp.
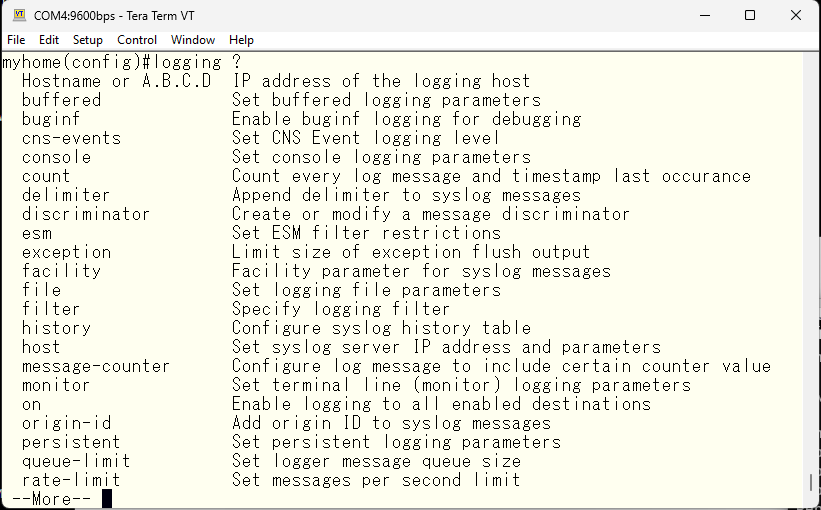
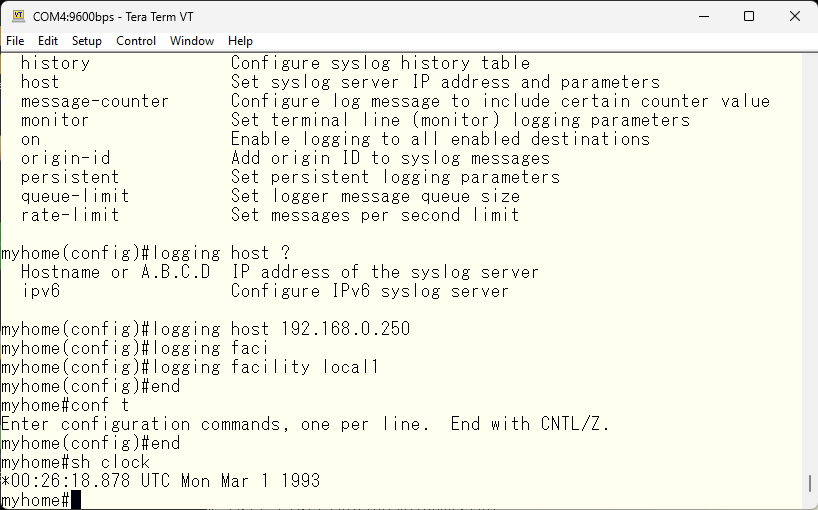
Specify the IP address and the facility required for allocation.
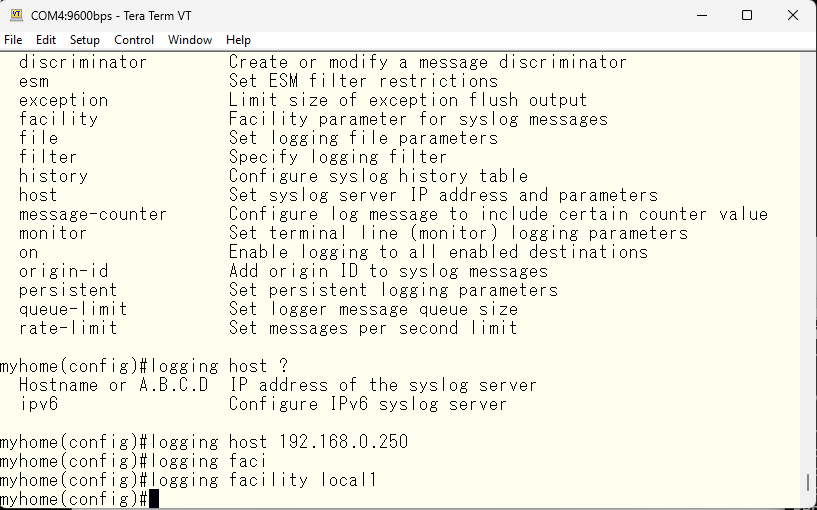
However, the server dhcp can’t receive the log by default, so we need to configure it to be able to receive it.
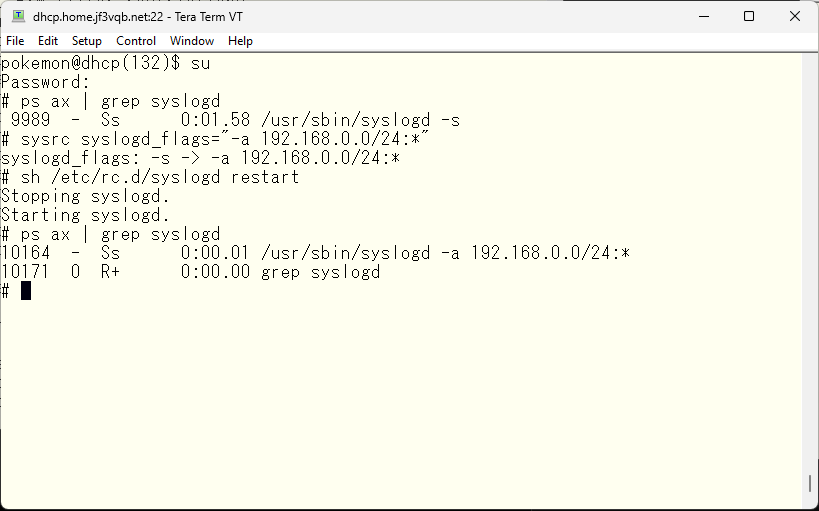
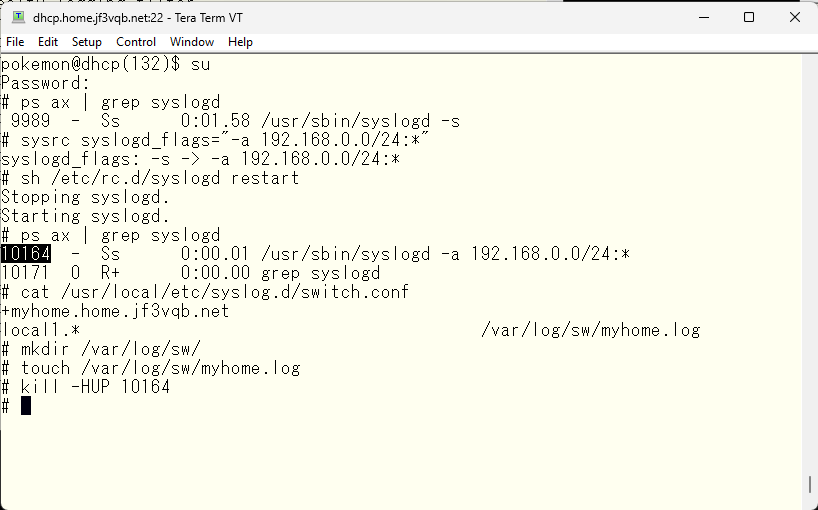
In order to avoid mix with other messages in the default /var/log/messages, we will make it output to a dedicated log file. And then we will send a signal to reload the configuration.
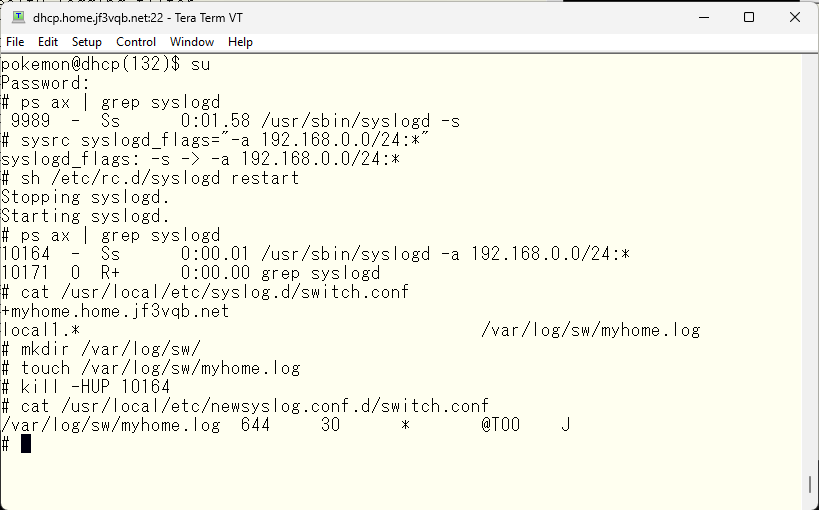
Moreover, if left as is, this log file will only continue to grow larger, so we will set up rotation and archiving. We will compress and save the logs for 30 days.
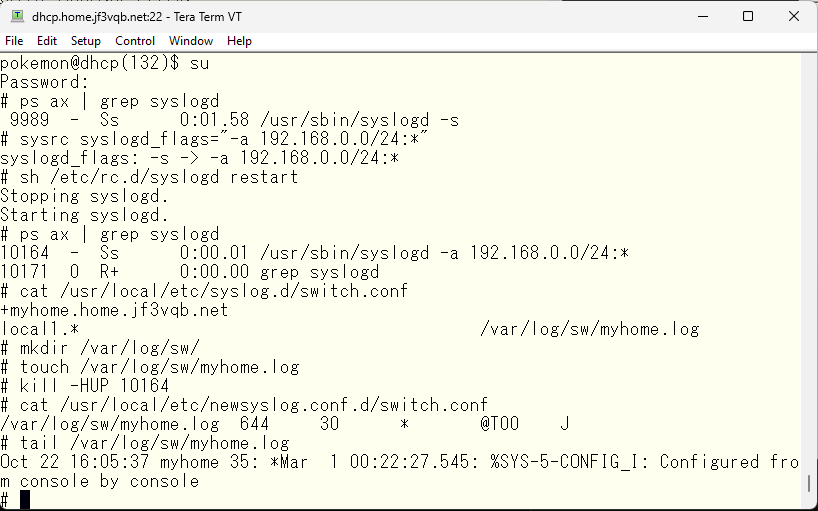
Now, we will test sending logs. Afterwards, you can process the logs in any way you like on FreeBSD.
It is also important to know the time when things happened in order to understand when they occurred. Some high-end equipment has a battery-backed clock, but cheaper equipment requires obtaining the time from an external source, especially since the time is set to the period when the Japanese bubble economy collapsed 🙂
So, to keep accurate time, we will synchronize with an NTP server. After setting up, it will take a little while for the time to synchronize and return to the present.
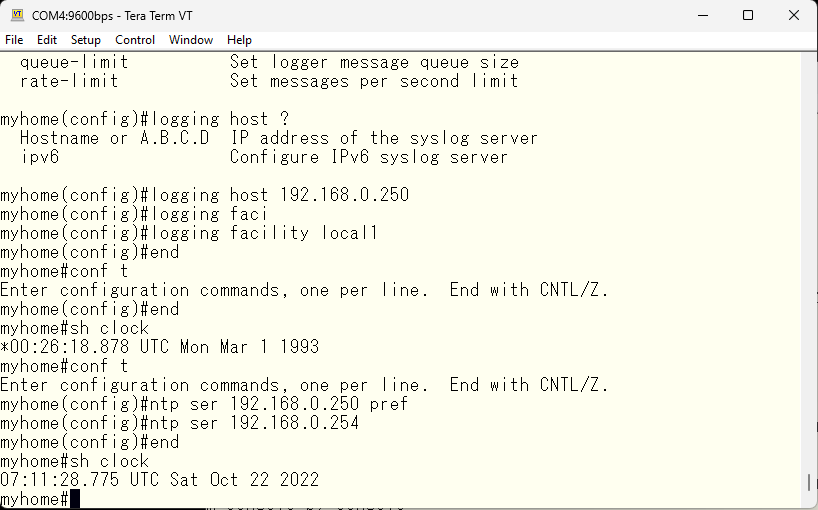
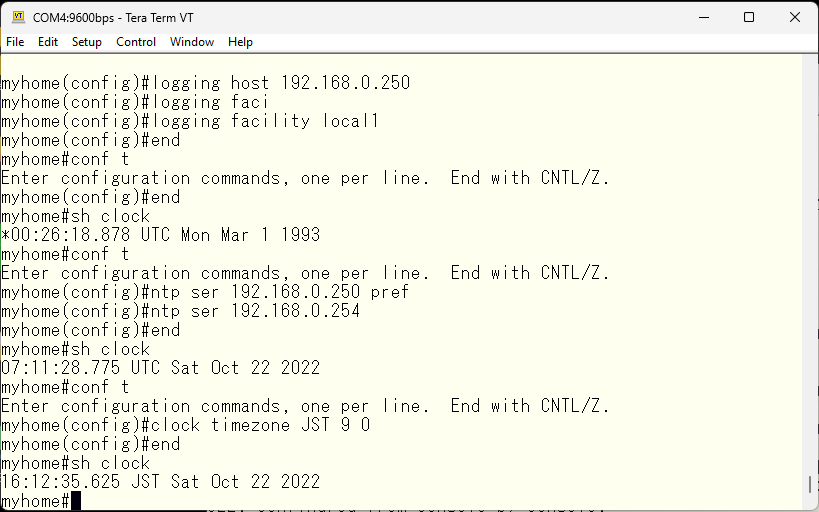
In my company, all the switches are set to UTC (GMT), but since this is Japan, I will set the time zone to JST, just like other FreeBSD.
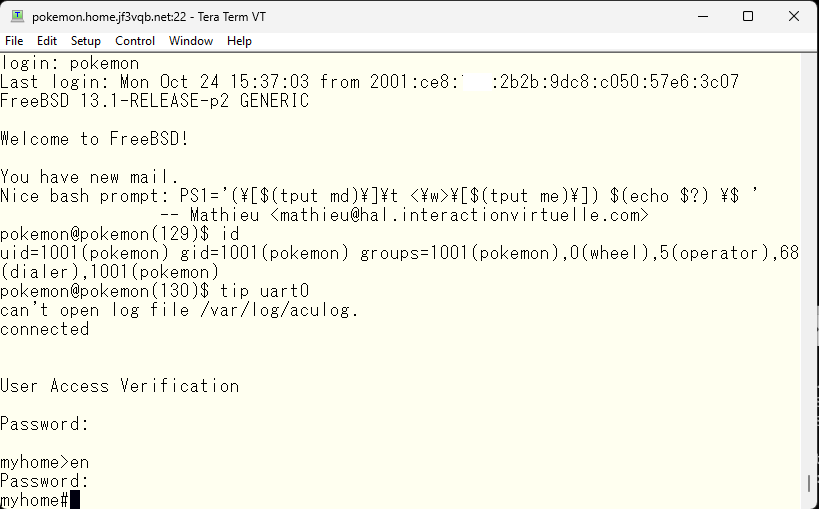
The basic initial setup is done. If you prefer not to access the console from your PC, you can access it from FreeBSD like this, but the necessary hardware is the same as directly from the PC.
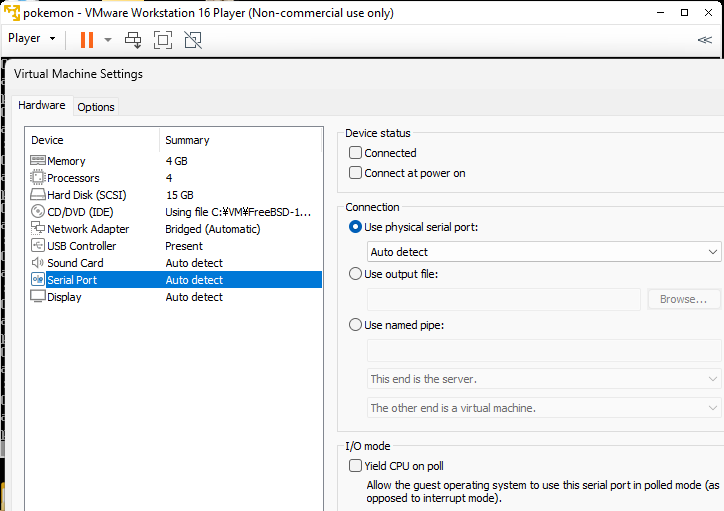
Adding a device to the Virtual Machine and restarting will result in the creation of such a file.
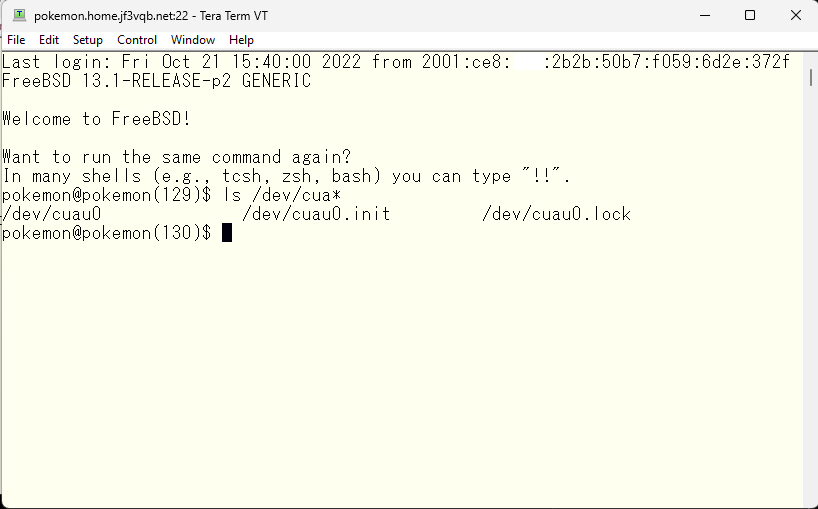
The connection method using those files is described in the /etc/remote file.
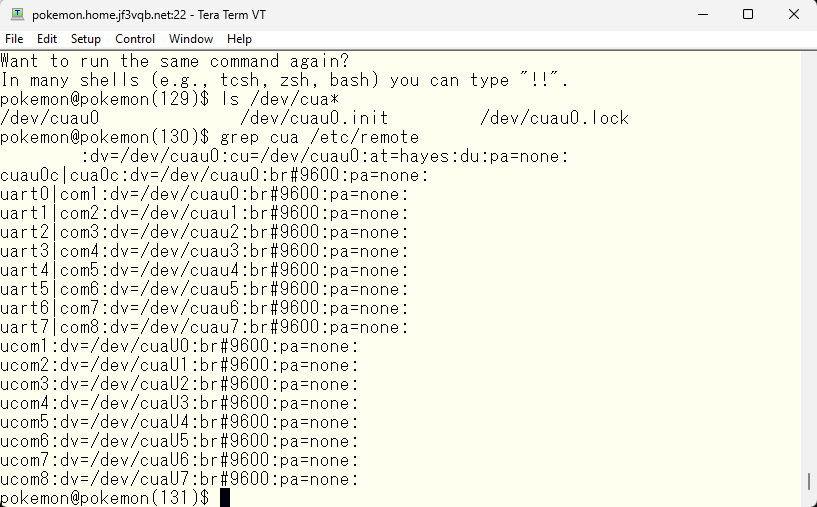
When I look at the ownership information of the device file, I don’t have access rights.
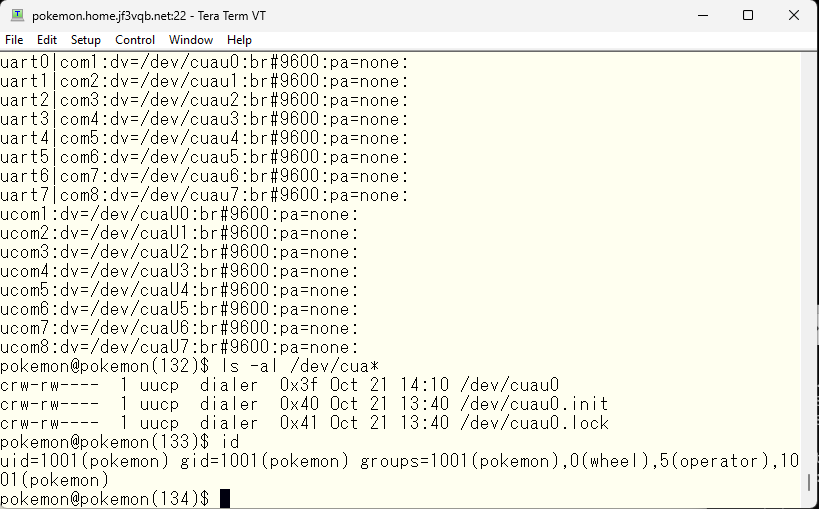
As the root user, it should be okay to use, but I will try to use it as the pokemon user. I will edit the /etc/group file in the NIS master, dhcp, and add pokemon to the dialer user, then push it to the NIS server with make command in /var/yp. After the push is complete, I will log in again. I will confirm that I am in the dialer group.
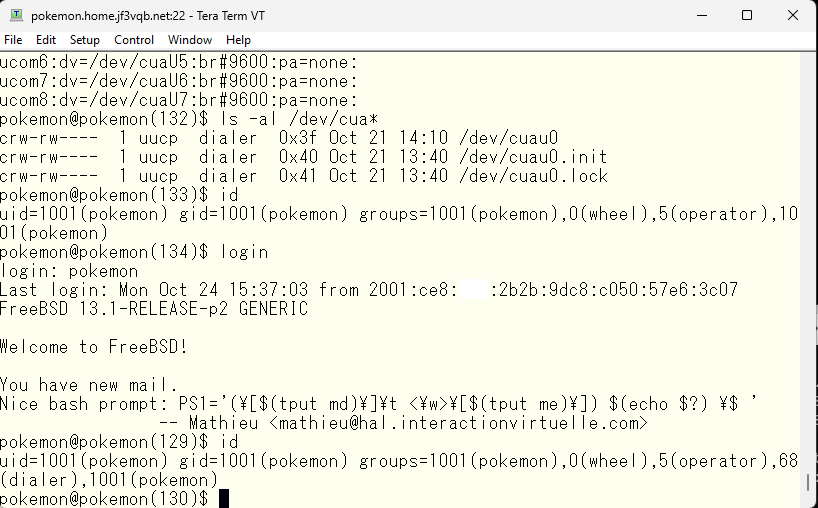
Once confirmed, you can connect to the device using the tip command.
The domain name I am using was obtained through my hosting provider. This was a technique that I was able to use because my server is hosted there. For example, setting up your own server in your home or just needing a domain in a company’s network, there has been a trend lately to acquire domains as needed, and easily recognizable domain names are already in use by others. That’s right, first come, first served. In Japan, the TLD is .jp, so it is very clear that it is a Japanese website and it is easier to access from the side of the access, giving a sense of security and unconsciously clicking. Recently, more local TLDs such as .tokyo, .osaka, .kyoto have appeared, and in more extreme examples, company names such as .google are used as TLDs. Well, this domain name, I think there are quite a few misunderstood parts, so I would like to talk about it as an appendix.
The most famous TLD is the .com domain, which can be acquired by anyone and in unlimited quantities. Because it has become so well-known, it is almost impossible to acquire a favorite short name as a new registration, and a likely domain name is traded at a high price. In other words, the domain has already been acquired by someone, and when you open the website of that domain, you might find links related to domain purchases, such as “selling for how much.” This situation is one of the reasons why TLDs other than those of countries have been created according to their purpose. For example, if the TLD of .kyoto is used, the psychological preconception that something about Kyoto can be seen will work. So, for those who write articles about Kyoto, there is a big advantage. In the case of the .kyoto domain, the examination is relatively strict and it seems that they are pursuing the original way of domain names, and they are trying to keep a clean image. However, not all TLDs are like that.
Another preconception is that a site using a .jp domain is physically located in Japan, but this is a big mistake and the site may actually be located in China even though it has a .jp TLD.
As network administrators, we often receive consultations from users asking “Can this site be trusted?” In these cases, we check the domain registration information and tell them “Well, it looks safe.” There are also websites that provide this type of information on the web. On FreeBSD, you can also check using commands included in the base OS. For example, if you want to know how .jp domains are managed, you can type the command “whois .jp” and the publicly available information will be displayed. This is what it looks like. The information continues, but we are only displaying the top part using the “head” command.
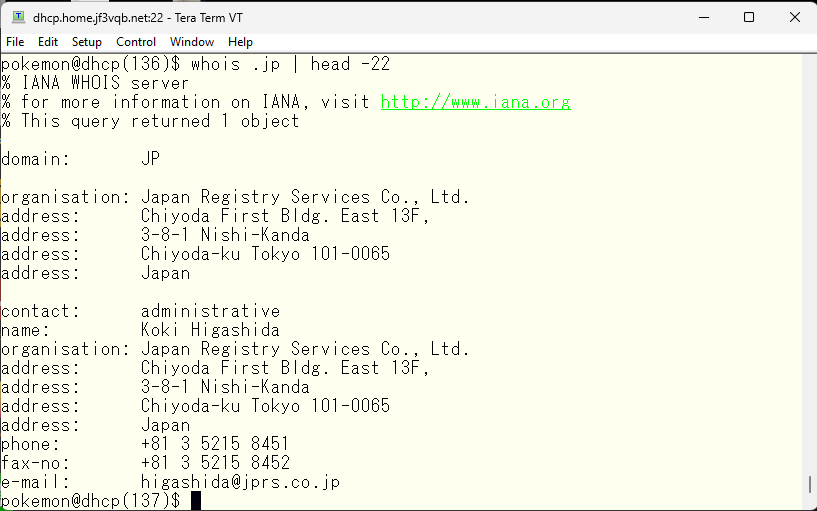
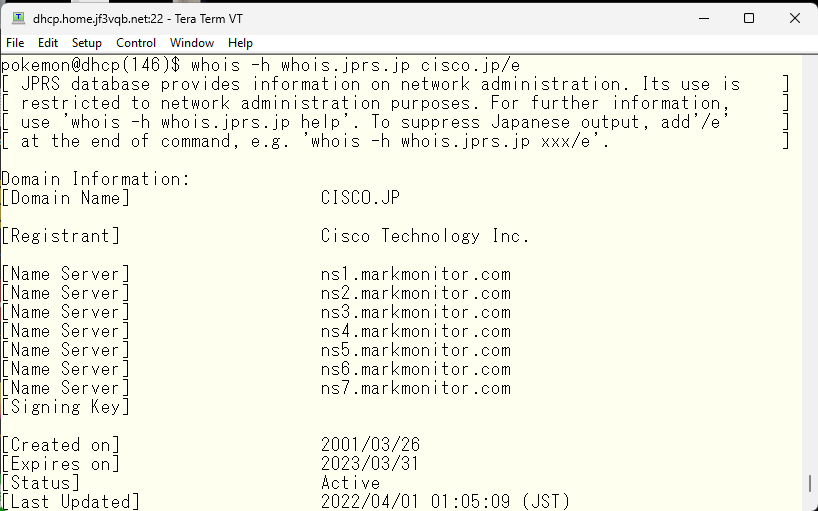
The “whois” command is not meant for obtaining this information, but rather to find out who to contact when there are network connection issues. For example, if you send an email to user@none-existent-domain.jp, you might receive a message saying that there is no such user, even though you know they exist. In such cases, you can use “whois none-existent-domain.jp” to look up the administrator information and ask them to fix the problem. This is the original purpose of using the “whois” command. In this case, since we are discussing a page on Cisco switches, we checked “cisco.jp”. Looking at the end of the output, we see that it is located in US San Jose at Cisco.com, which seems trustworthy. 🙂
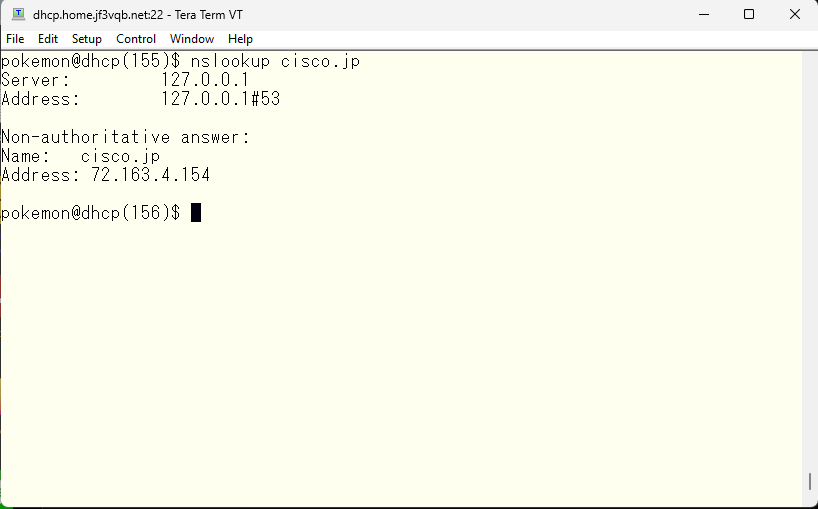
Since cisco.jp seems trustworthy, I want to try opening the web page, but the computer can’t connect without converting the domain name into an IP address. Let’s take a look at the IP address assigned to cisco.jp, and we can see that such an address is assigned.
The IP address, like the domain name, can also be checked using whois. By checking this address, you can get this kind of information.
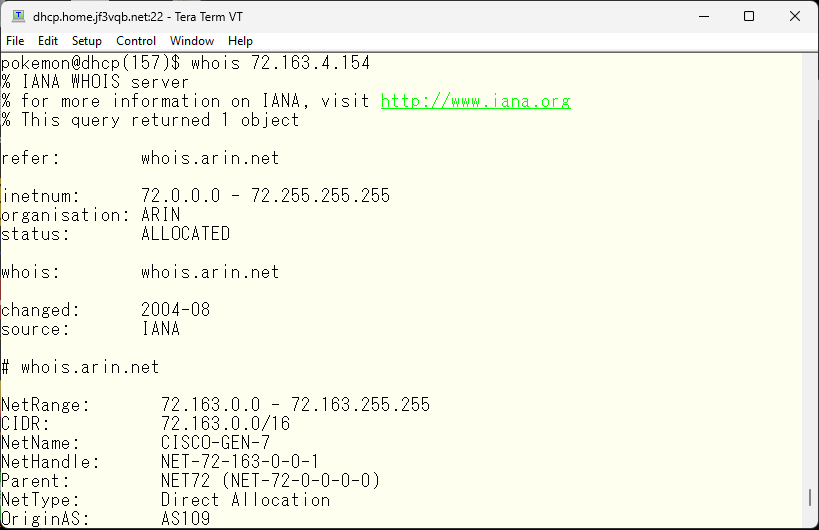
The IP address range 72.0.0.0/8 is assigned to the US and specifically, 72.163.0.0/16 is directly assigned to Cisco.com, so it is highly likely to be located in the US. However, there is BGP peering with AS number 109, so it is not possible to exclude the possibility of a more finely divided address range being located outside the US. However, since the address range is owned by cisco.com, it is also likely to be reliable. So let’s take a look using traceroute.
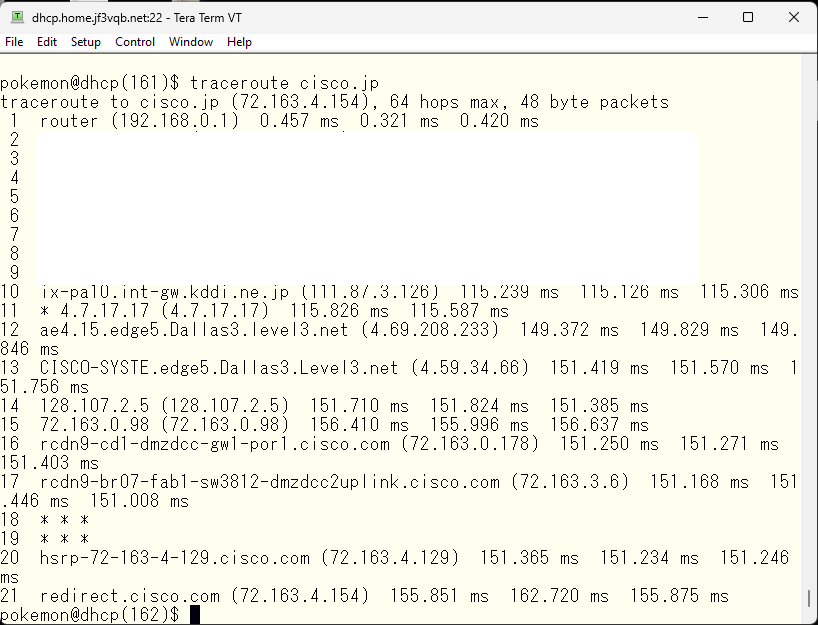
It appears that I am connected to Cisco.com via an ISP in US Dallas through my home internet provider.
A domain name is an important piece of information that represents the identity of a website, used for various research purposes. There is a high demand for easy-to-remember domain names, and there are many registrars available. Although the goal of registering a domain name is the same, registrars may offer discounts or free rental servers through different promotions. It’s advisable to research the features of each registrar and choose one that best fits your needs. Domain names are first-come, first-served, so if you have a new project in mind, it’s recommended to get the domain name early. Speed is key in obtaining a domain name:) Hurry up !
Advertisement below

