The original Japanese version is available here.
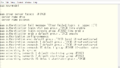
Continuing from last time, this time I will be talking about the Cisco Switch. Last time, I introduced how to make the switch work as a switch from a state where nothing is configured. In a standalone network of switches, there is not many configuration task to do. Although it works as a switch, there is no security setting is done. So, this time let’s enhance the security in the device locally. This is the configuration part related to access to the device. I reset the configuration completely clean, so I think it is in default state. This state is, so to speak…
- console: login without any password.
- vty 0-4: login with the default transport protocol.
- vty 5-15: login with the default transport protocol.
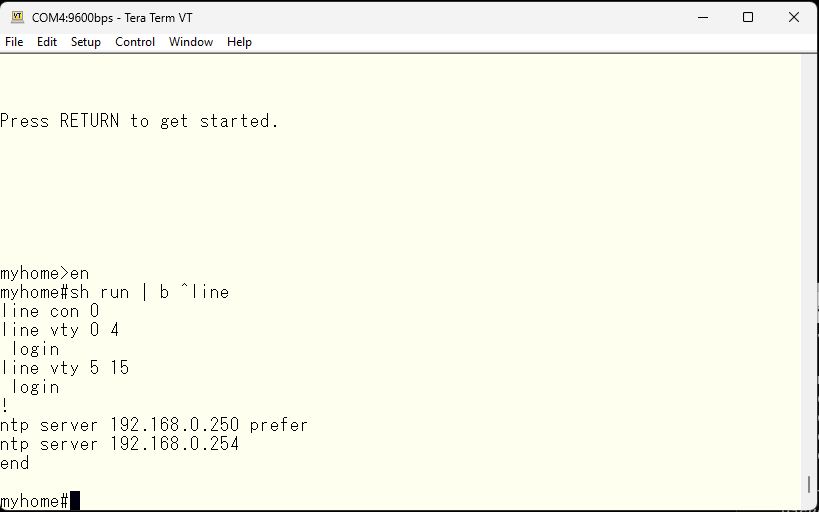
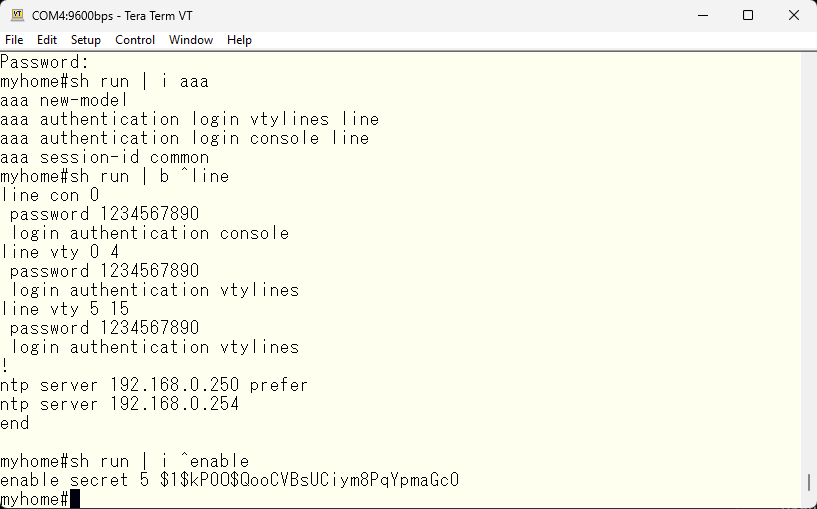
Switch to the new model of AAA. Once switched, it is basically impossible to revert back.
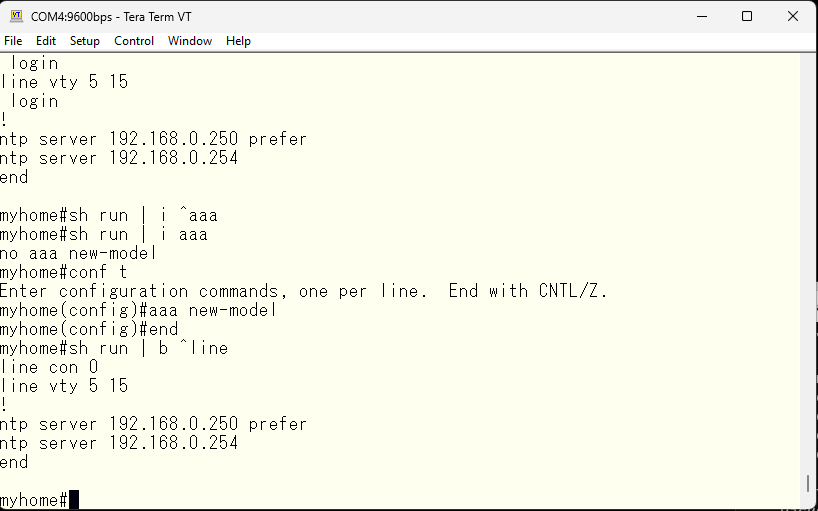
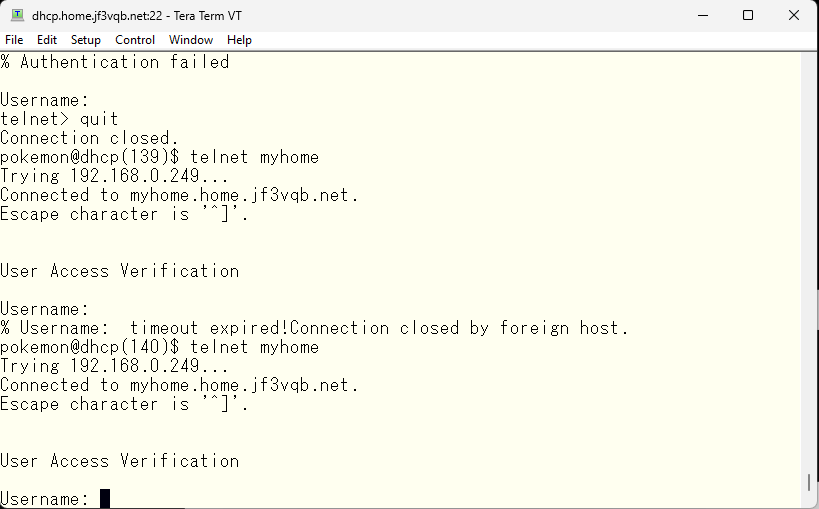
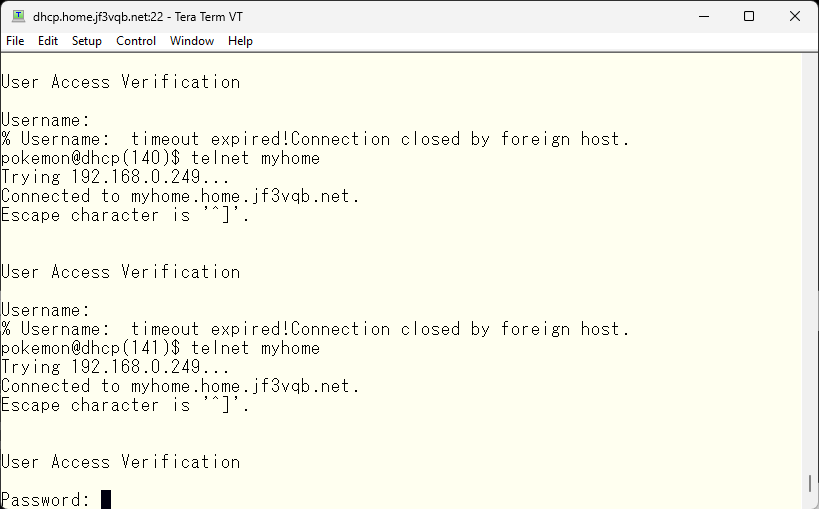
Let’s try logging into the switch using telnet. When connecting using telnet, it will ask for the username. Since there is no user created in the switch locallly, login is not possible.
So, we specify which login method to try using the aaa command.
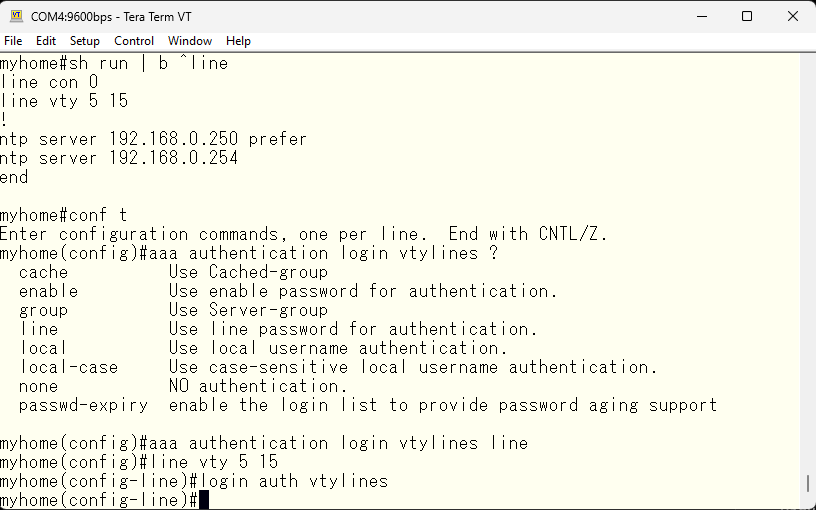
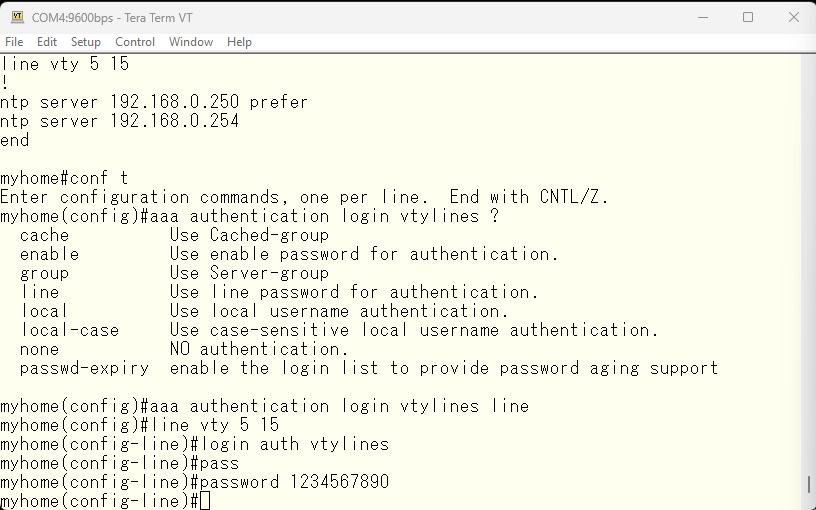
Next, we set a password for the vty line, so that it will be used for authentication. The aaa command can take arguments such as local, group, enable, etc. If multiple options are specified, authentication is performed using the first available option by checking the options in order. One common misunderstanding is that if the first option fails, the second option will be used, but actually if the first authentication fails, that’s the end of it, and the second option won’t be tried. Therefore, if the option is specified as “line enable”, only authentication with the password set for the vty line will be attempted. However, if this line password is deleted, line password authentication won’t be attempted and only enable password authentication will be tried.
Now let’s try to login via telnet and see if it works as expected. It still asks for the username.
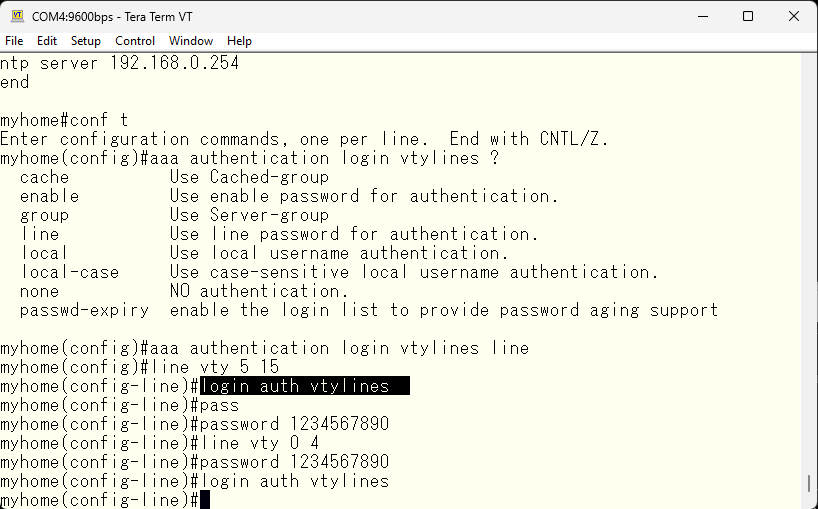
Actually, the first session number for the vty line is 0, so numbers 0 through 4 are missing. Put the same configuration as for 5-15 into numbers 0-4 as well. By the way, even if you specify line vty 0 15, it will be saved separately for 0-4 and 5-15.
Let’s verify it again using telnet. This time, only password input was required. I will enter the line password as specified by the aaa command.
Authentication was successful, and the prompt was visible. However, we were unable to obtain administrative level privileges.

Unlike the console, it is not possible to obtain administrative level privileges without a password. So, set an enable password.

Let’s try to gain administrative privileges using the enable password set in the console through telnet.
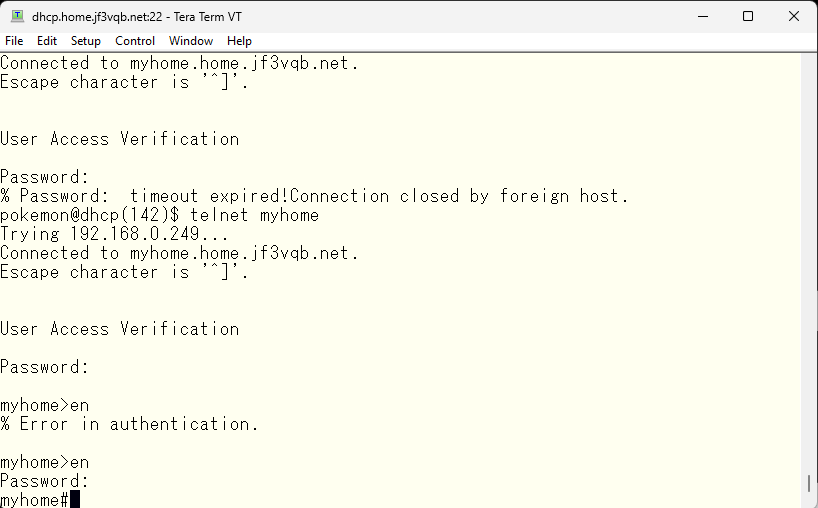
Now it has been confirmed that we can also obtain administrative privileges from the network connections. Next, let’s change the configuration of the console. If you can’t become an administrator by tweaking the console setting, you will have to rely on connections from the network : )

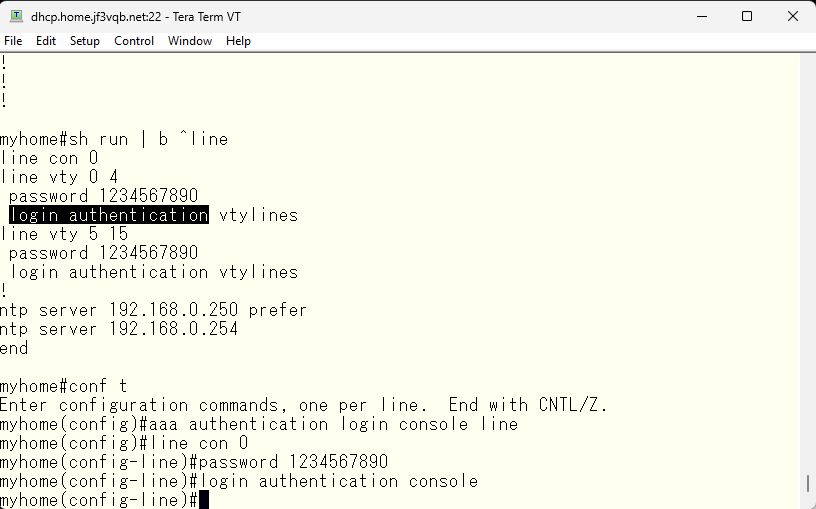
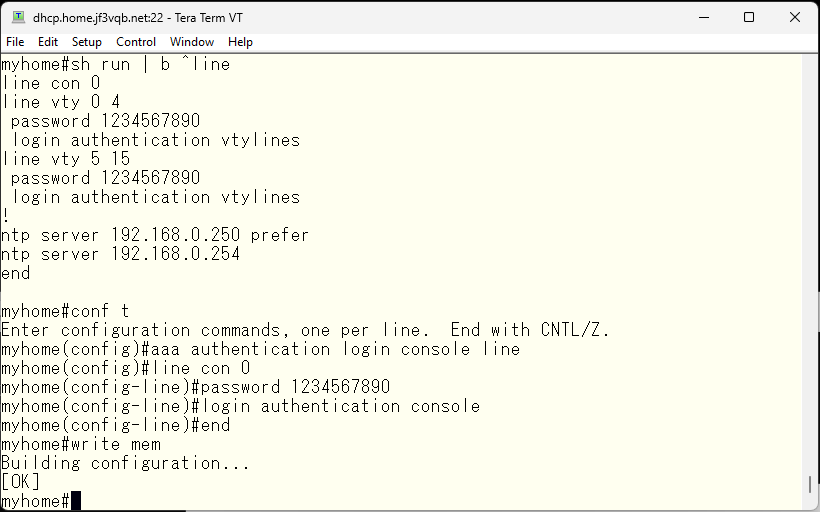
Let’s set the same password as the vty line for the console configuration, which is still empty. Then, create a login method “console” and specify the authentication for the console line to be “console”.
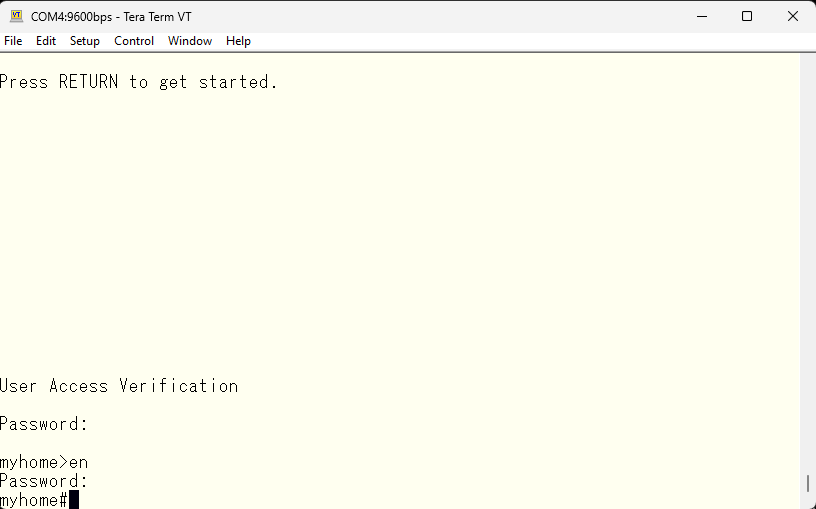
Let’s log out and log back in. This time, it asks for a password. I will input the line password as specified by the aaa command. It works as expected. The enable command also works as expected.
Now that we have minimum security setting for both console and network, let’s save the configuration.
Next, we will configure SSH. Telnet sends everything in clear text, so the use of SSH which we can use encryption is recommended. First, let’s try connecting with SSH.
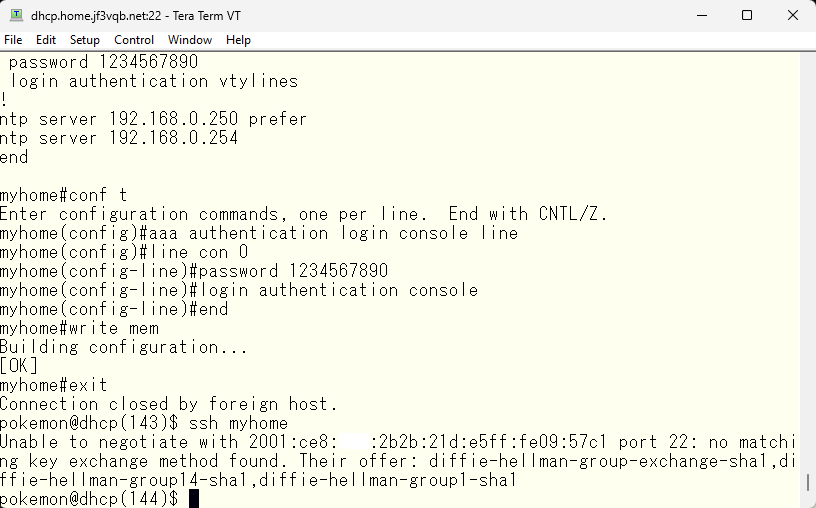
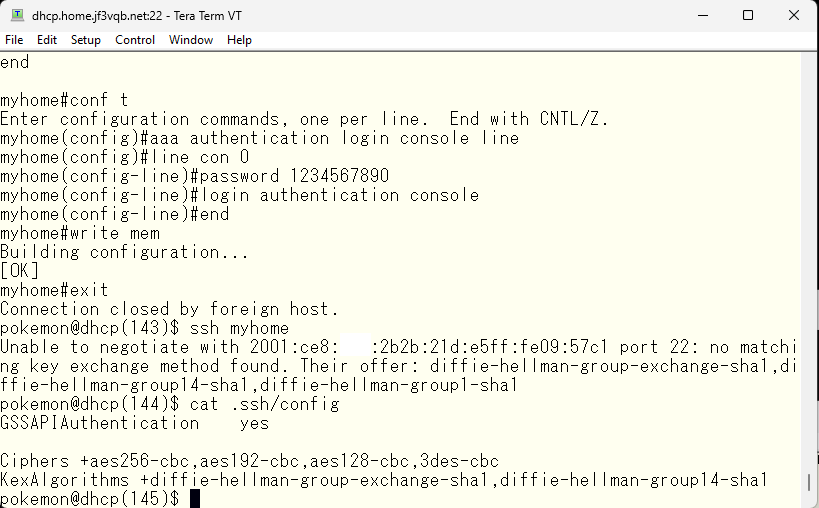
There seems to be a problem with the ssh handshake. As there doesn’t seem to be a common key exchange method, I’ll add the method that can be used on the Cisco device to the FreeBSD ssh client configuration. I could change /etc/ssh/ssh_config, but I’d rather keep it for my own configuration only as I’d like regular users to use normal ssh.
The first time connecting to the ssh server, a message is displayed saying that the fingerprint has not been seen. However, there is no problem, so accept it.
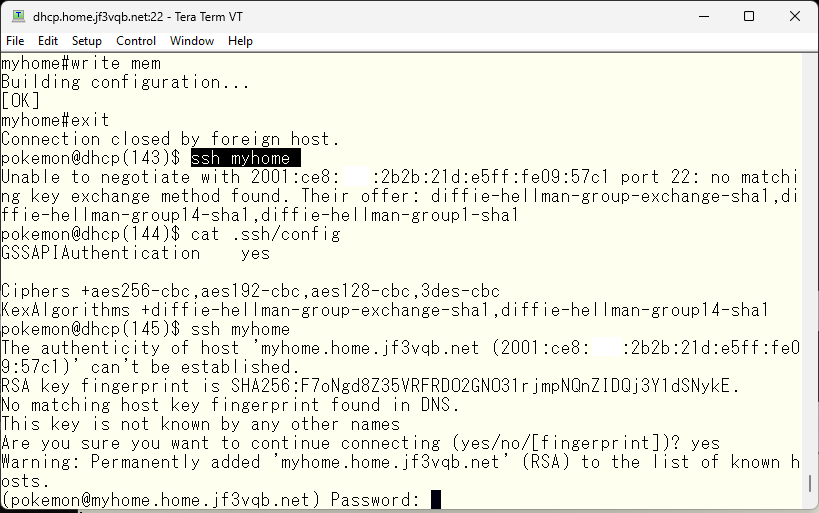
The connection protocol has changed from telnet to ssh, so the password used in the telnet connection can be entered as is. The aaa command was changed during the telnet connection setup to expect the input of a line password, which is the same for ssh.
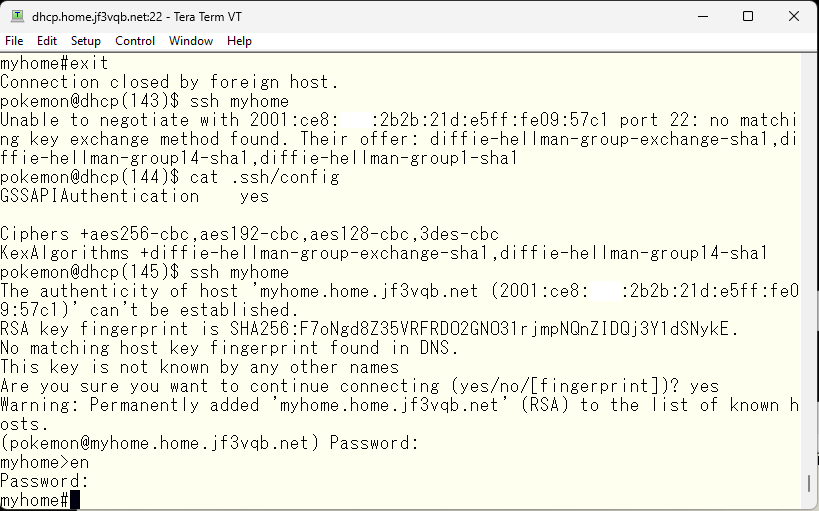
With the enable password accepted, it should be okay in terms of configuration. This is how the AAA related configuration should look like.
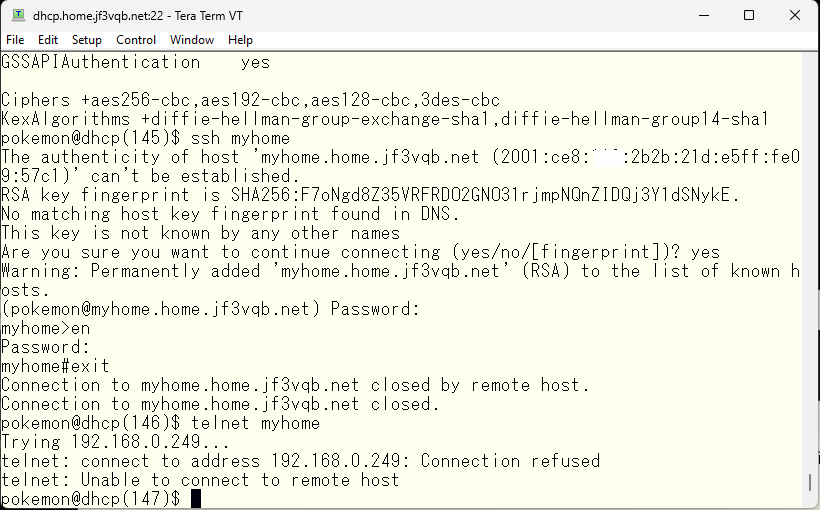
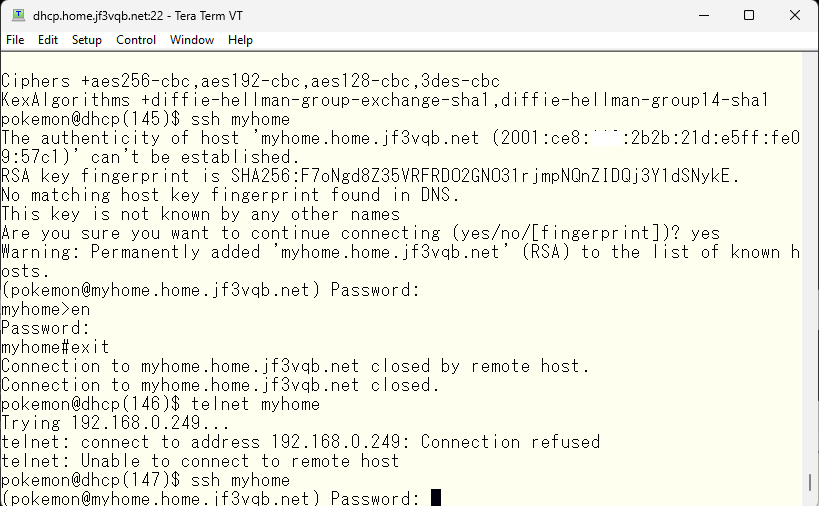
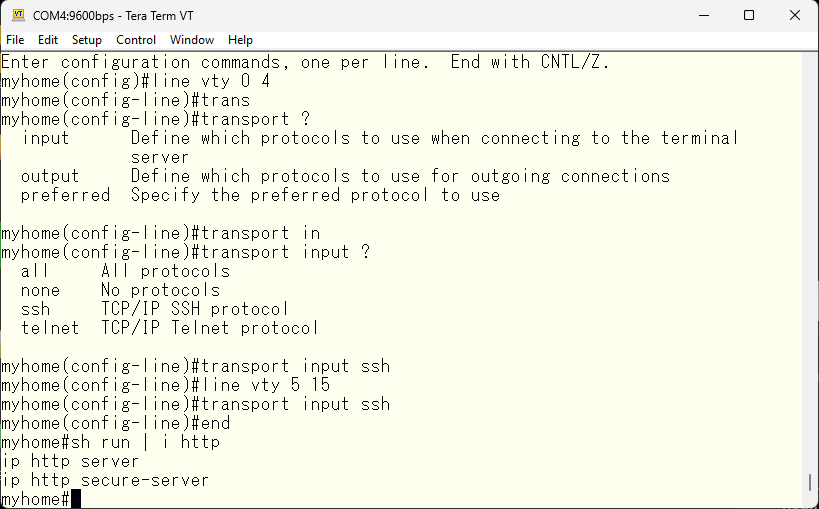
With this, we have confirmed the ssh connection, so we will stop using telnet and only use ssh for CLI access.

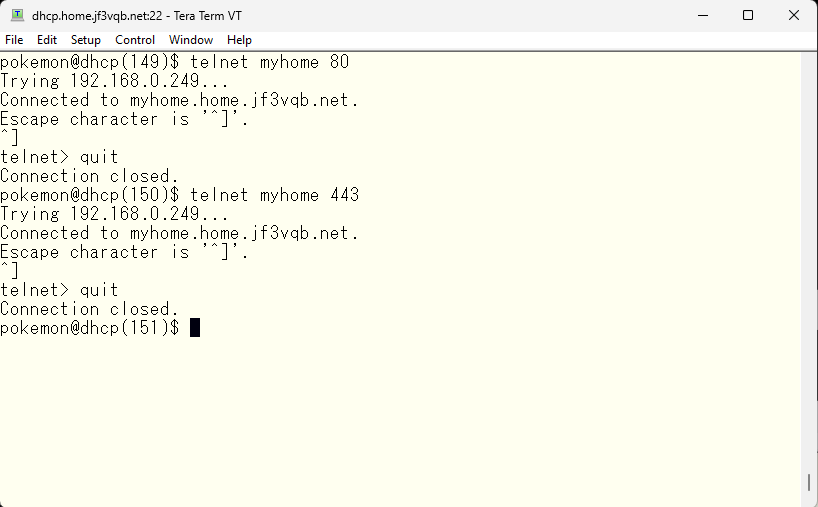
Checking. I will try to connect using telnet. It works as expected.
Just checking, let’s try connecting via ssh. It should be fine, but let’s make sure it works, and that we’re not missing anything silly :).
Finally, a web interface is also provided for beginners, and it is set to be usable by default.
As we are not beginners, I’ll stop it 🙂
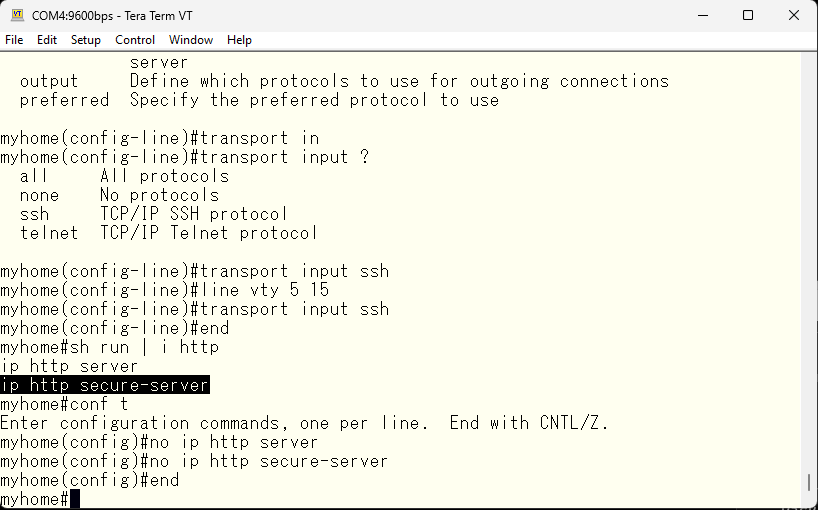
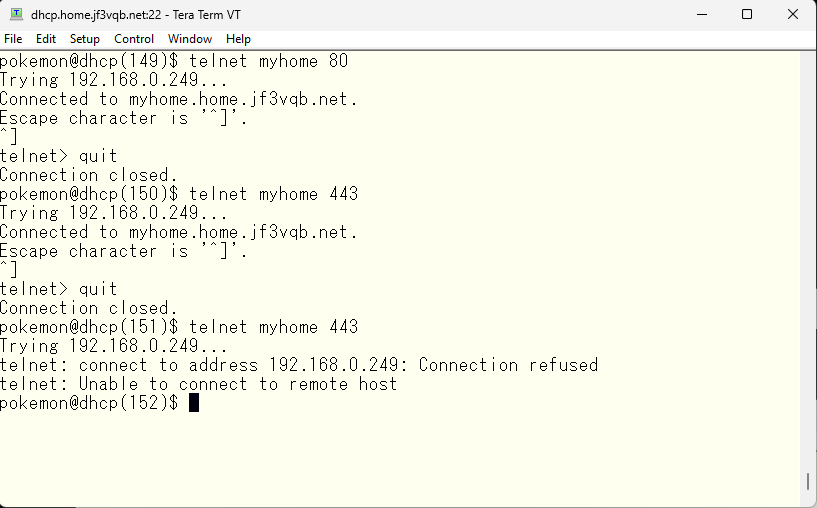
Let’s also verify that these have been stopped.
Lastly, I will check the TCP/UDP connections to the switch. Port 514 for syslog is known. Port 123 for NTP is also known. Unfamiliar ports are 10002 and 2228, but after reviewing the switch manual, it is stated that 2228 is used for L2 traceroute and 10002 is used for cluster configuration.
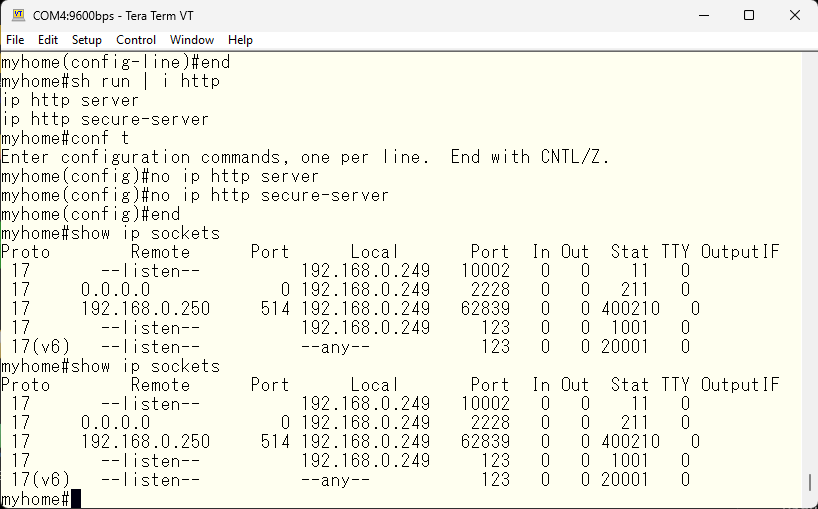
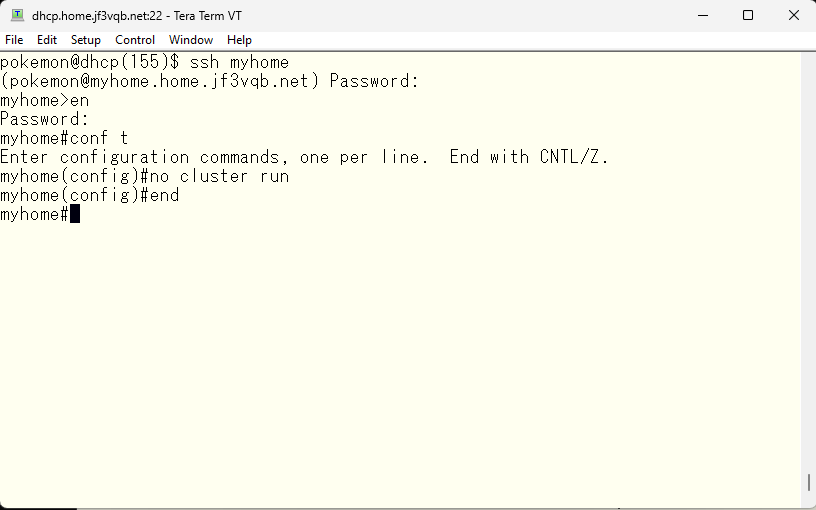
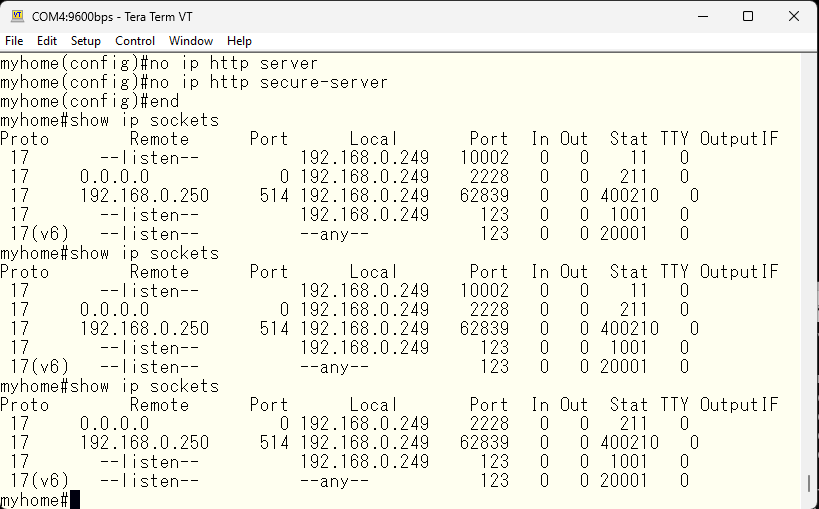
According to the manual, it seems that port 2228 cannot be closed. Port 10002 should disappear if the cluster is stopped.
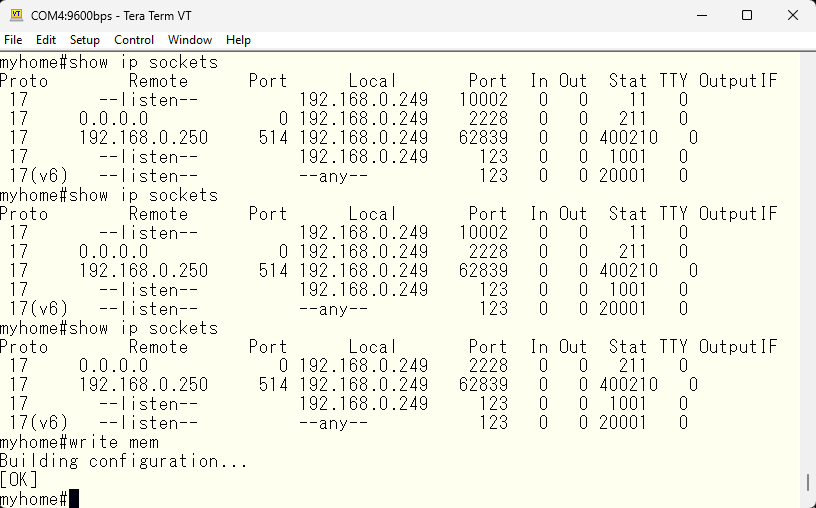
As far as I can tell, there are no suspicious ports open, so everything is good to go! 🙂
Save the configuration and finish.
I originally started using WordPress for a diary server I made on a FreeBSD system in my home. As I had root privileges to make any necessary changes on my own FreeBSD, I was able to increase the number of diary pages without any stress. However, the diary contained very personal content, so it was not suitable for public viewing. But I thought that if I wrote about FreeBSD, Cisco devices, and Linux, it might be useful for those who are interested when they visit. That’s how this blog started. I had considered hosting it on my home fiber, but eventually decided to rent a server. I also wrote about this in another article. Before using Microsoft Azure data center, I rented a rack at a certain domestic data center and provided services to offices across Asia using a VMware server. The network and OS were fully flexible, but to have the same flexibility anywhere abroad, I had to use cloud data centers like Azure or AWS. On the other hand, when considering whether it is necessary to publish a personal website, I concluded that a server is sufficient and a shared server is enough for niche content, so I rented a server from a certain ISP. If you read the previous article, you can easily figure out which rental server I am using 🙂 There is no need to keep it a secret, but there is no need to reveal it either. I think it’s okay for people who know to know 🙂
When renting a server, the main criteria were the OS, the geographical location, and the ability to access the shell through SSH. The OS must be BSD or Linux, and no Windows. This is a occupational disease, as I don’t use OS where the source code is not visible. I can’t see what’s going on behind the scenes 🙂 The location is within Osaka city, preferably in the Kita-ku area with a network distance that is close. Basically, I chose a location where I can comfortably update. This is because the NSPIXP-3 used to be located in a data center, and I thought that even if I connected across ISPs, it would still be comfortably usable. In fact, according to the measurement by ping, both IPv4/IPv6 have a distance of about 3ms, which is very comfortable. Finally, the OS I am using is FreeBSD 13 amd64, and I can log in through SSH to retrieve logs and manually edit files such as .htaccess and robots.txt, so it is also satisfying as a WEB server. The only complaint is that I can only use csh as the login shell, so I have to manually change the shell to ksh, which I compiled myself :)”
When I first started using a rental server, I was looking around various websites to decide where to use it. There were many options to choose from, ranging from all-in-one sites that anyone could use even without any knowledge, to average rental servers that allowed for some access to the server, to dedicated servers, and even cloud servers with load balancers. Of course, I knew that if I wanted a more advanced server, it would cost a lot of money, but there were also options for free. Sometimes I wondered where they were making a profit and became worried, but it was also fun to decide which one to use based on the content, target audience, and volume.
Advertisement below