The original Japanese version is available here.
Sending emails from the server dhcp to other email addresses should have been done without any issues so far. This time, I would like to enable the sending of emails from the email client. There is an OP25B issue that came up in the previous sendmail Setup Part 3, so I would like to send emails by accepting the smtp connection on the submission port and passing the authentication. The blocking of the smtp port occurs only when the outgoing smtp session is blocked from the edge of the provider I’m using right now, so the connection to the smtp port on the server dhcp from other ISPs should be able to pass without any problems. However, it is prone to blocking at the edge of other ISPs, so it is limited to connecting from the regular mail server of the relevant ISP. What needs to be done is to support SSL connection to the submission port on the server dhcp and to be able to authenticate using SMTP AUTH. First, I will check the status of the sendmail on the server dhcp.
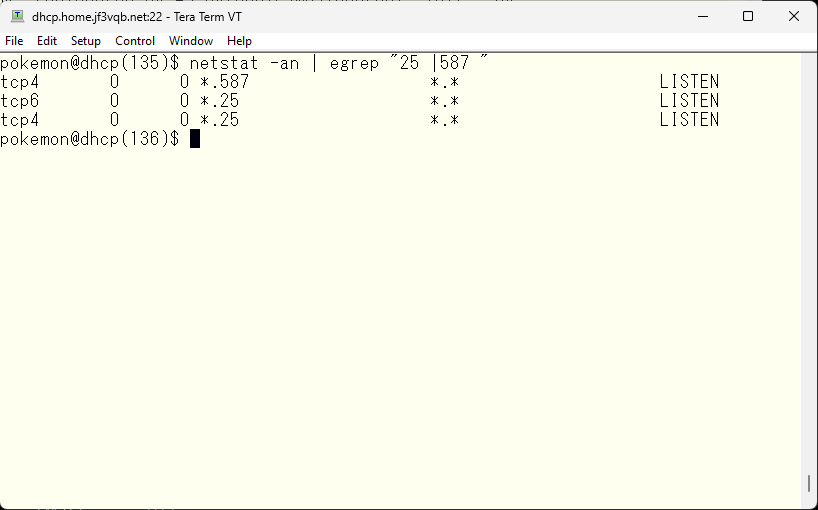
According to the results of this netstat, both the smtp port and submission port are open in IPv4, while only the smtp port is open in IPv6. By looking at the README, it seems that by default, only the IPv4 smtp port and submission port are open, as written around 95% of the way down. So let’s take a look at the jf3vqb.mc file.
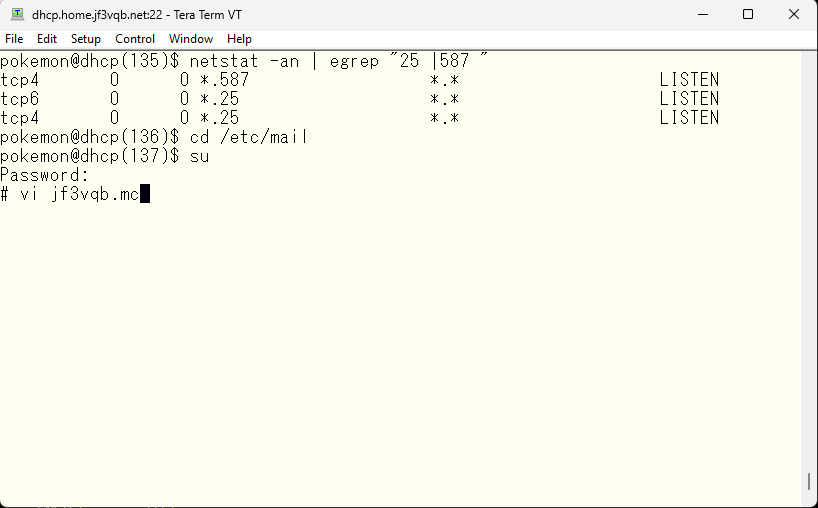
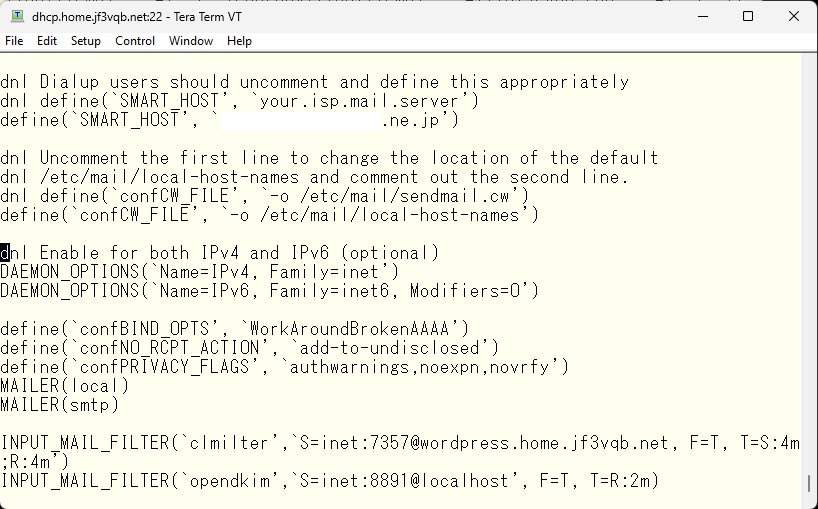
Both IPv4’s smtp and submission ports are opened, and IPv6’s smtp port only in the jf3vqb.mc file. As a result, only IPv4’s smtp and submission ports, and IPv6’s smtp port will be open.
So what to do is to open the IPv6 submission port. This method is also written in the README file. Around 30% of the README file, we use no_default_msa to remove the default submission port configuration and redefine it. The reason is that the default submission port only behaves the same as the smtp port. There are two things that are necessary: encryption by SSL and authentication by SMTP AUTH. As I wrote before, encryption is not standard in SMTP, so it cannot be enforced and can work without it. For authentication, you can make it so that nothing can be done without passing authentication. These behaviors can be changed from the default using the Modifiers options. Although the options are scattered in the README file, it is a bit difficult to understand, but the configuration of the submission port with the necessary options specified would look like this.
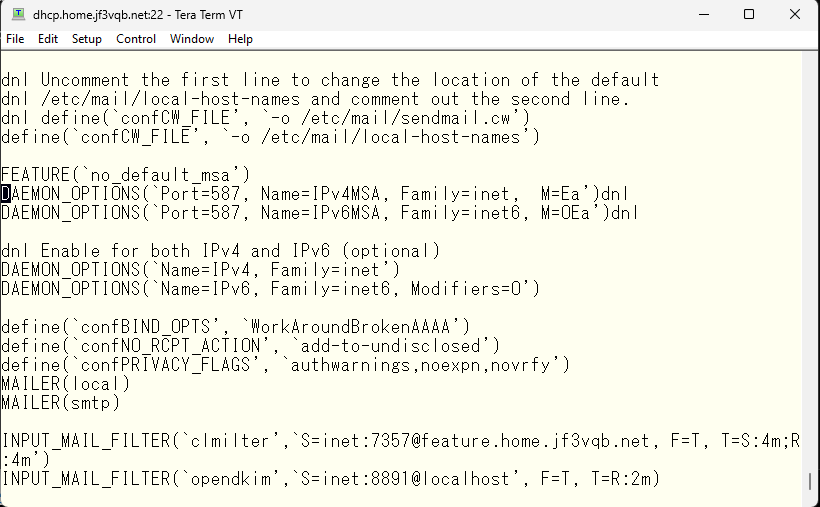
The option ‘O’ uses the same options as the smtp port. Option ‘E’ is necessary according to RFC2476. Option ‘a’ is the option that requires authentication. If you look at the sendmail source code, the possible options are listed around 69% in the sendmail/sendmail.h file. I have picked up the comments of the specified Modifiers option for this time.
- ‘E’: /* no ETRN (MSA) */
- ‘O’: /* optional socket */
- ‘a’: /* authentication required */
It is recommended to take a look at the other possible options if you have time. After making changes to the sendmail.cf file and restarting sendmail, we can see the result.
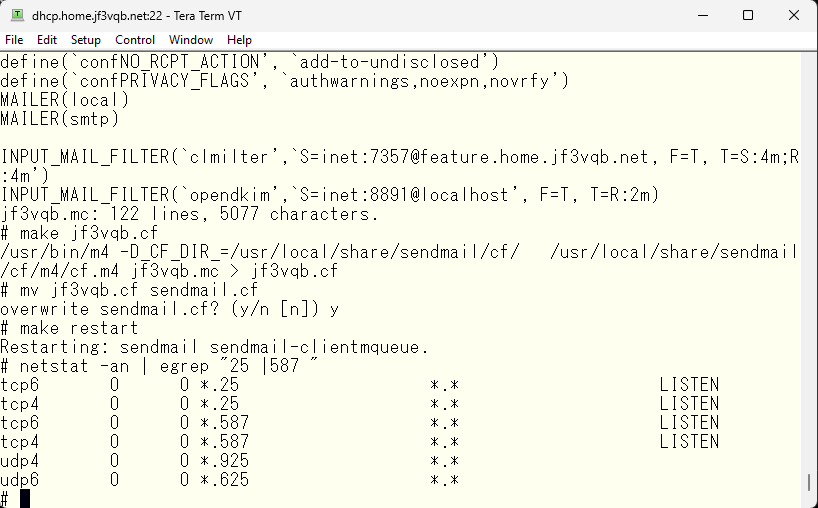
Looks like the smtp and submission ports are now open for both IPv4 and IPv6. Let’s try testing if authentication is now required.
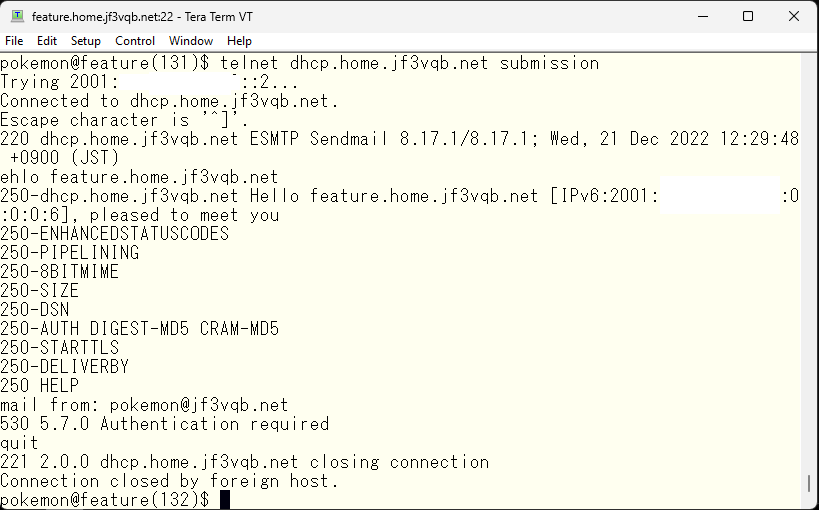
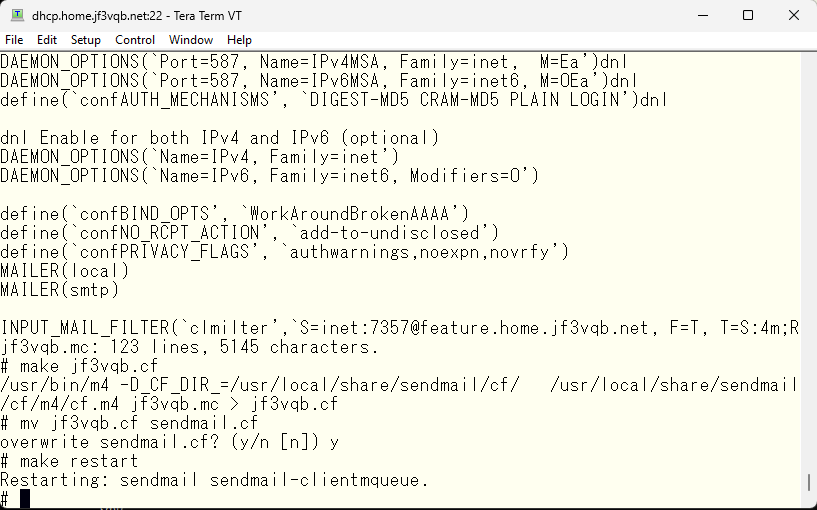
Looks good. I can’t do anything 🙂 Let’s see what I can do if I pass authentication. Before that, only DIGEST-MD5 and CRAM-MD5 can be used for authentication, I’d like to add simple LOGIN and PLAIN. It’s written around 89% of the README file. Define confAUTH_MECHANISMS.
Let’s check again if it is now usable.
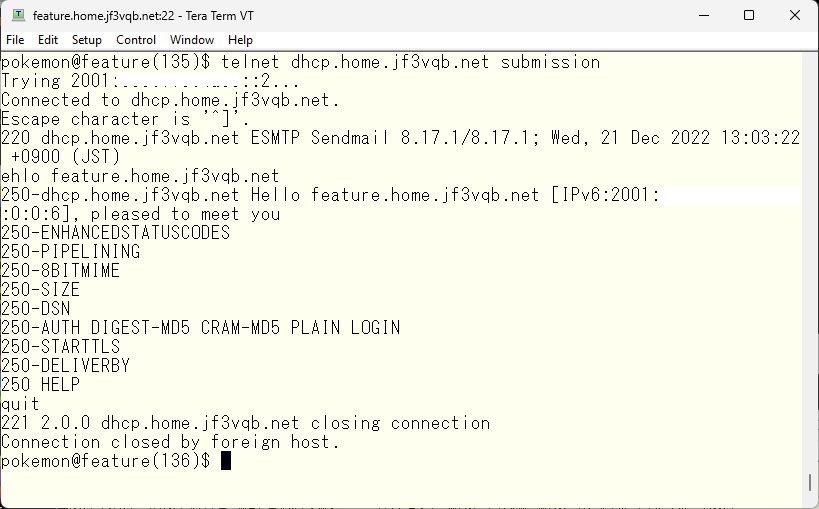
It looks good. Next, we’ll set up the authentication. If sendmail is made with the SASL option, saslauthd should be compiled and installed together.
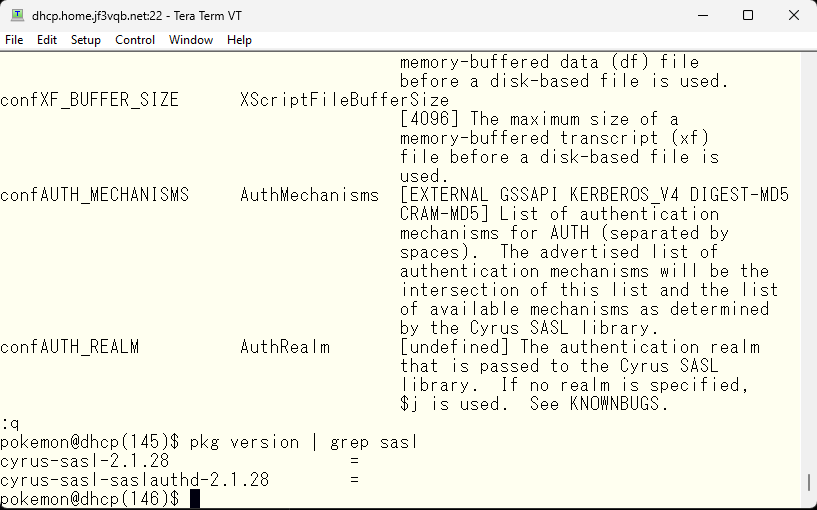
Let’s make this work. This should have been compiled as a prerequisite for sendmail. Whether sendmail uses saslauthd for authentication depends on whether the necessary information is recorded in the files installed by sendmail.
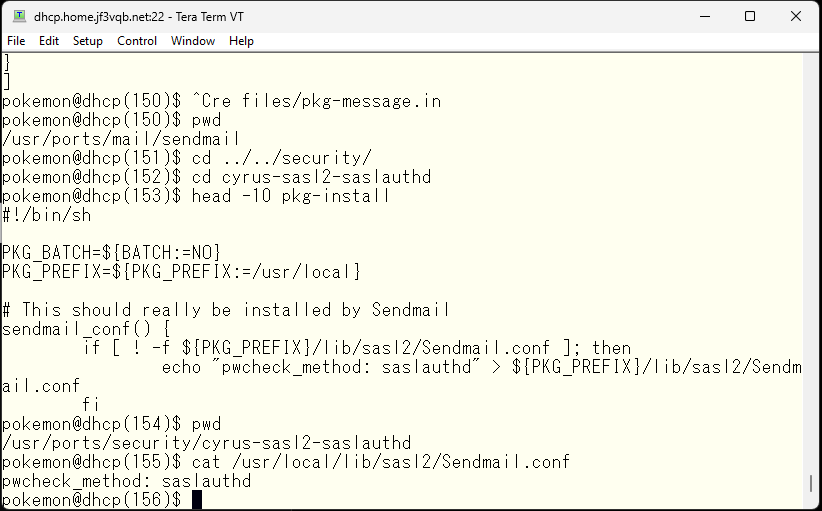
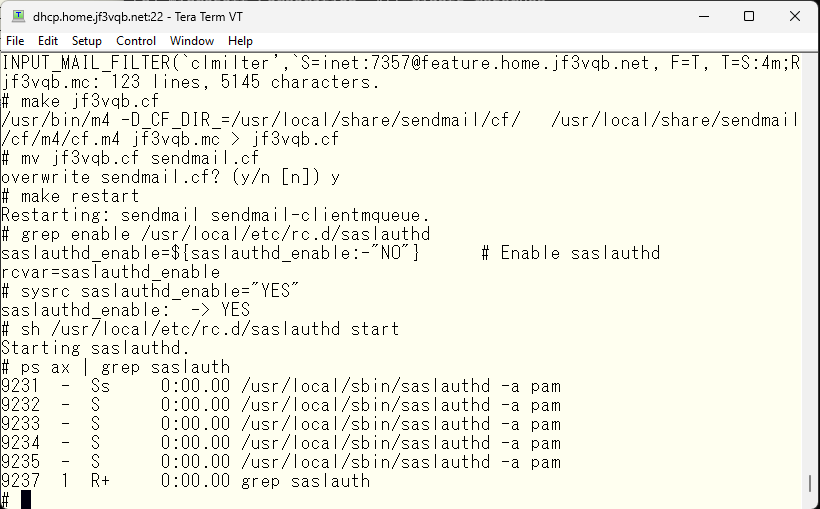
The necessary files have been created and the necessary information has been written. So, start saslauthd. Define the variables as indicated in the start file and run the start script
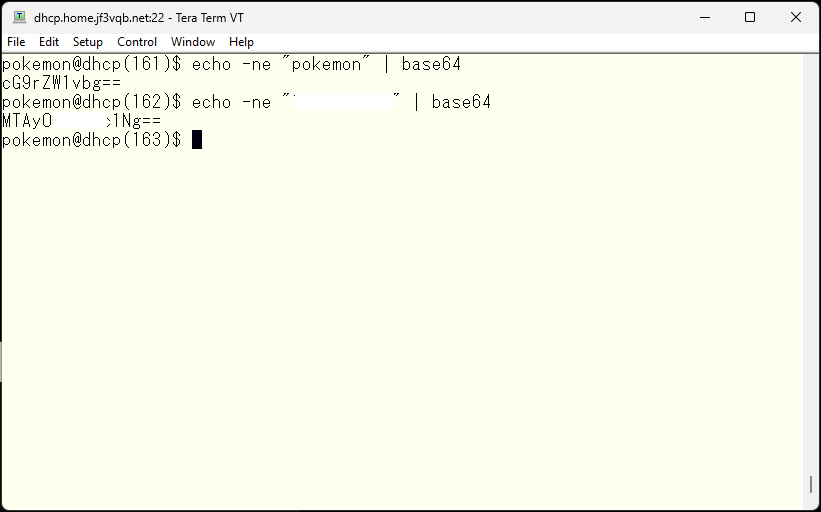
Next, let’s check the authentication through the connection to sendmail. First, we will create a base64 encoded username and password.
Next, I will connect to the submission port on the server dhcp using telnet.
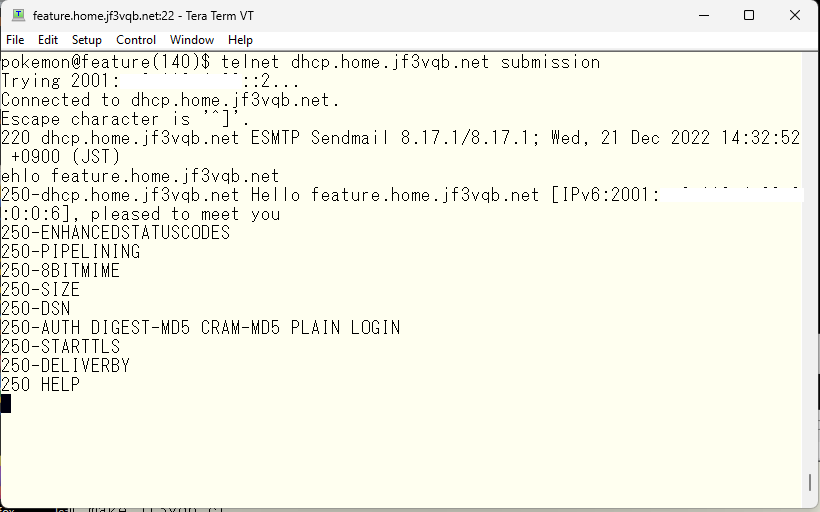
Next, let’s try to authenticate using the username and password we prepared earlier by connecting to the submission port on the server dhcp using telnet.
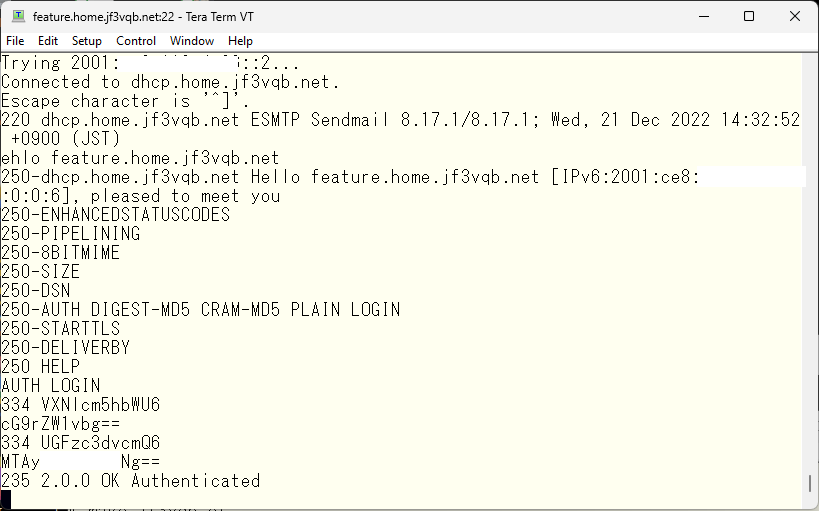
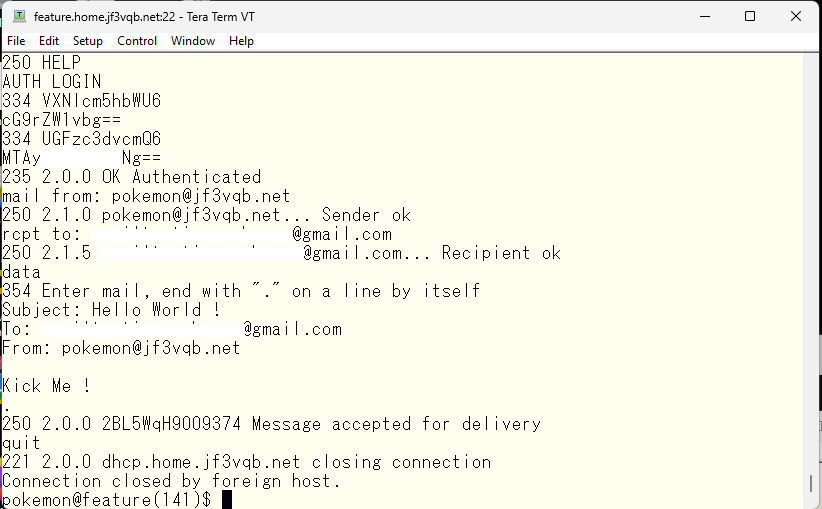
It looks like it passed 🙂 Now, SMTP commands such as mail from: and rcpt to: should be freely usable. As a test, I will send an email to my usual test account.
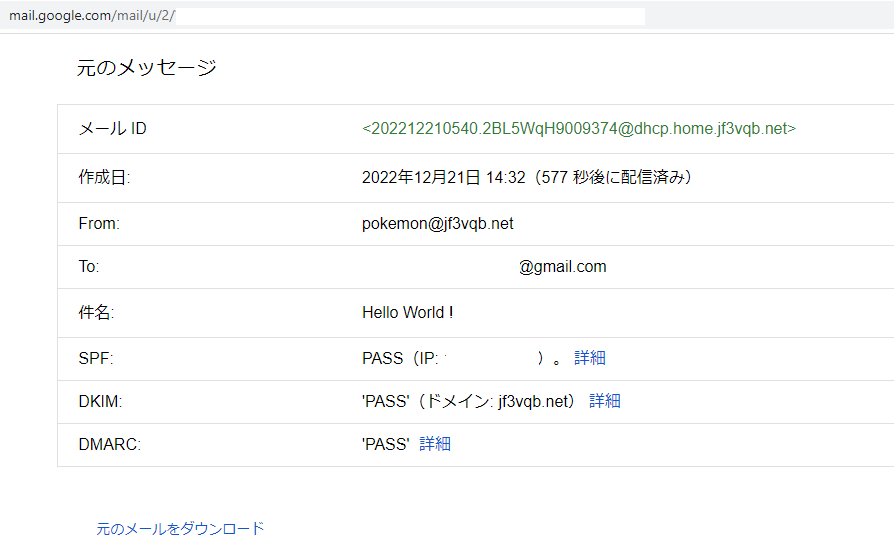
This is the information of the email received at gmail.com.
Now that the authentication is confirmed to be OK, I would like to also test if it works the same way when encrypted with SSL. Instead of telnet, I will use the openssl command. It looks like this.
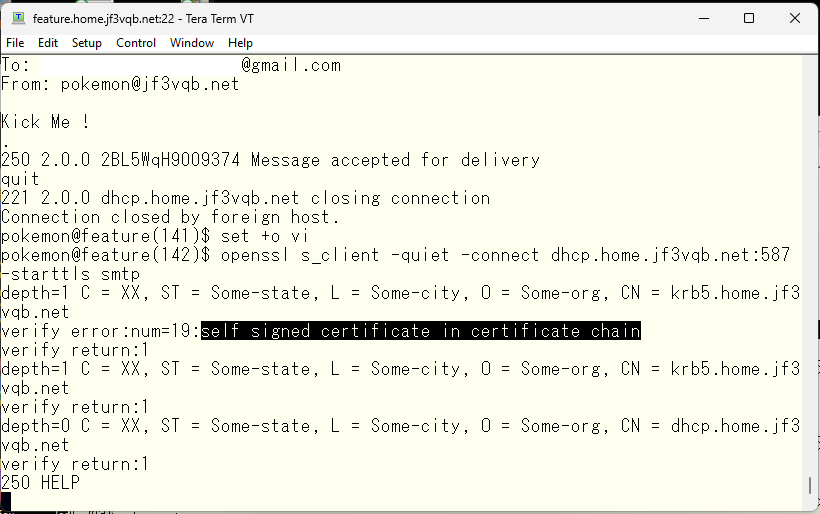
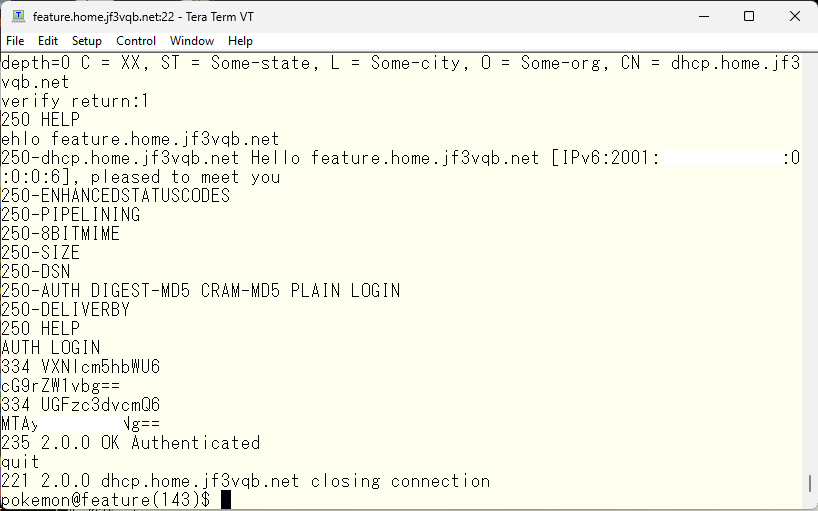
You can now test it the same way as you did with telnet.
Lastly, we will adjust the DNS. We will make sure that we can connect to dhcp from either inside or outside with smtpauth.jf3vqb.net. Inside, we will define the IPv4 and IPv6 addresses of smtpauth.jf3vqb.net in the jf3vqb.net zone created with response-policy. This is how it looks like.
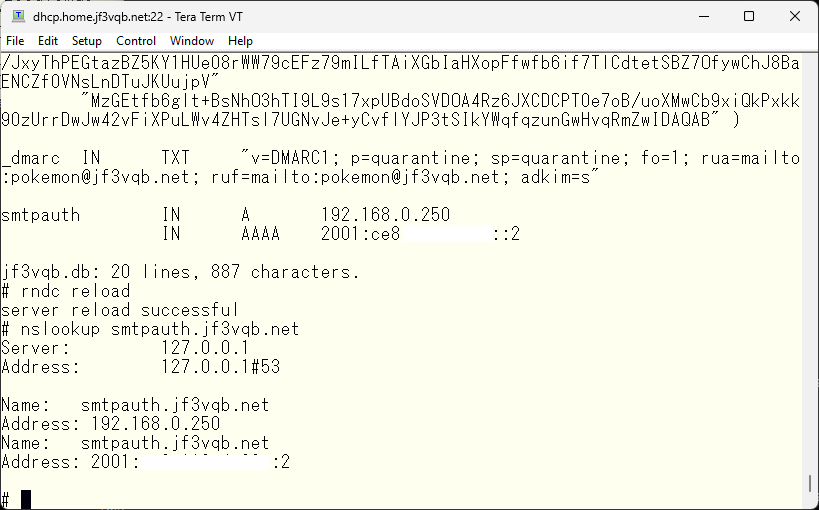
Internally, we will register dhcp’s IPv4 and IPv6 addresses in the home DNS. Externally, we will register the public address in the official DNS of the ISP. Here is where a trick is required. The 192.168.x.x/16 range is a private address and cannot be used outside your home network. Therefore, port forwarding needs to be set up on the home ISP router. Your home ISP router should have a public IPv4 address, so you need to ensure that port 25 and port 587 of this address are forwarded to port 25 and port 587 of private address 192.168.0.250 on the server dhcp respectively. As IPv6 is expected to use a public address even within the home network, the ISP router configuration needs to be changed so that the connection to port 25 and 587 of 2001:xxxxxx:2 is not blocked. The method will differ greatly depending on which ISP router you use, and it may not be possible. Please refer to the manual of your home ISP router and make the changes at your own risk. If you do not understand what you are doing, it is recommended not to touch it 🙂 At this stage, the external DNS change has not been made yet as receipt preparation is still not complete. However, with the configuration so far, it should be possible to send email using smtpauth.jf3vqb.net from Windows or iPhone connected within the home. However, as encryption uses the self-signed certificate, an error may occur. I don’t know what will happen as my environment hasn’t progressed that far yet, but I would like to write about it soon.
Advertisement below

