The original Japanese version is available here.
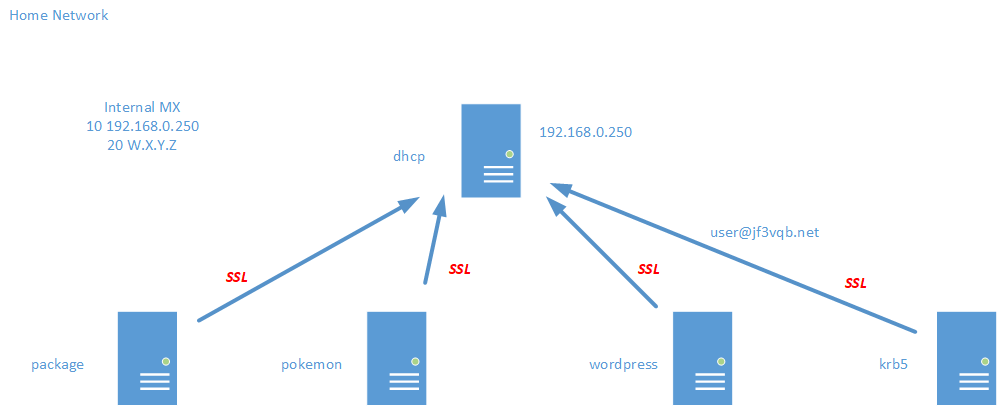
In the last session, we consolidated all the scattered emails to the server dhcp. Now, we’ll encrypt the emails flowing on the network to protect the data from eavesdropping. There are two main purposes for the certificate of a mail service: encryption of data and server identification. For encryption, just having the certificate enables us to encrypt the data. Identifying external servers requires a certificate issued by a legitimate authentication authority, but for use within an organization or home, a self-signed certificate is sufficient. So, let’s make a self-made authentication authority and use it to issue self-signed certificates to encrypt emails. Here is a diagram of the email flow again.

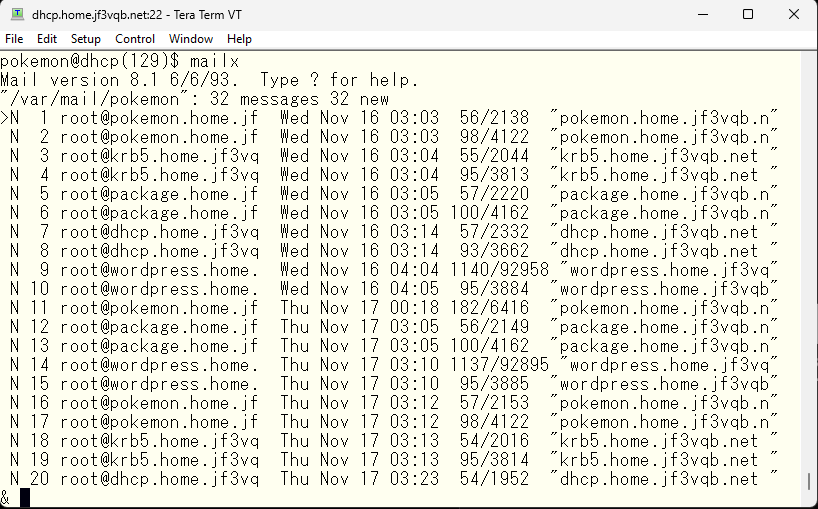
Now that we’ve consolidated the email to dhcp, we can check all the emails coming from FreeBSD in one place, so we don’t have to ssh here and there 🙂
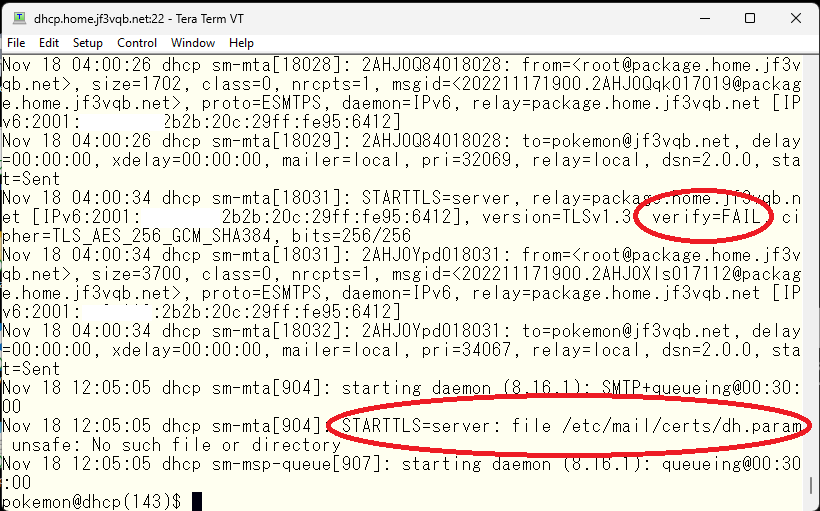
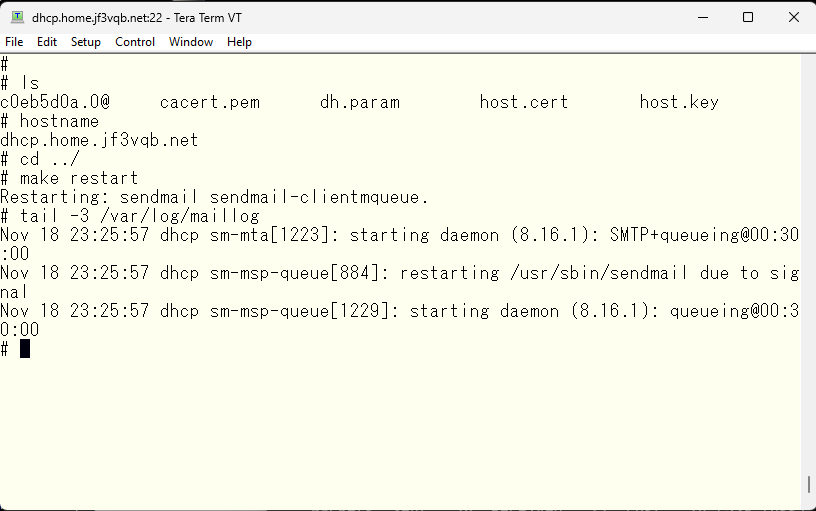
When looking at the mail logs, several errors can be seen. Firstly, it is complained that there is no dh.param file. This file is said to contain primes used in the Diffie-Helman key exchange algorithm. Although I am not a security expert, I will not delve into it deeply, but as it is complained that it is missing, let’s create it. Another error is that the server’s identification could not be established.
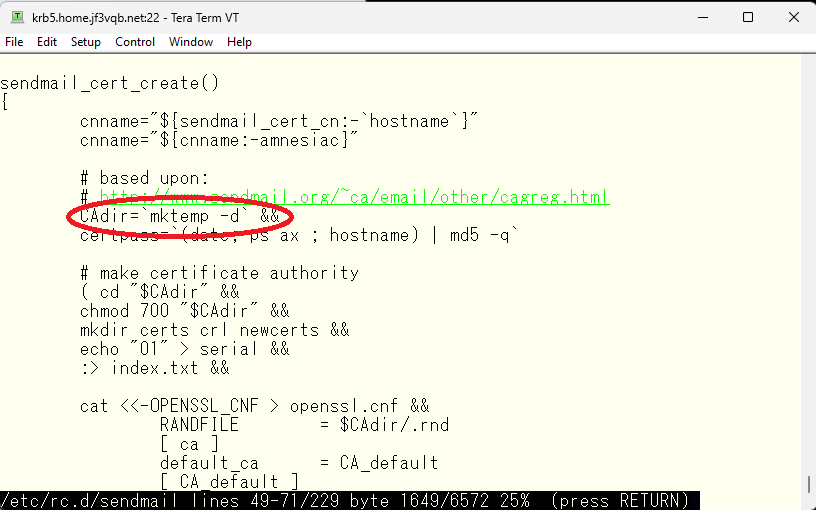
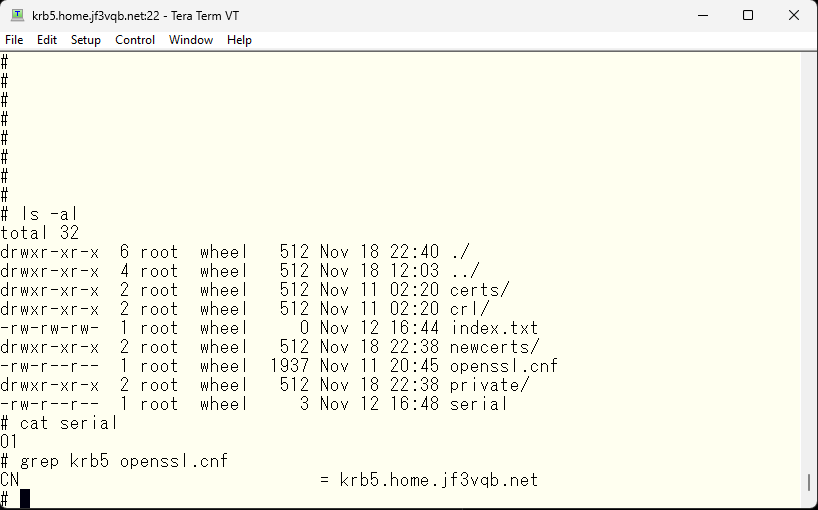
The directory where the email certificate related information is stored is /etc/mail/certs. The certificate is created when the OS is first started, using the script /etc/rc.d/sendmail. If the necessary files in /etc/mail/certs are not found, the script creates a temporary directory and uses the openssl command to create a self-signed certification authority and then creates the necessary files. You can either modify the script to not delete the temporary directory and restart the OS, or run the /etc/rc.d/sendmail script to see the contents of the temporary directory. Then, borrow the openssl.cnf file from the temporary directory to perform the work.
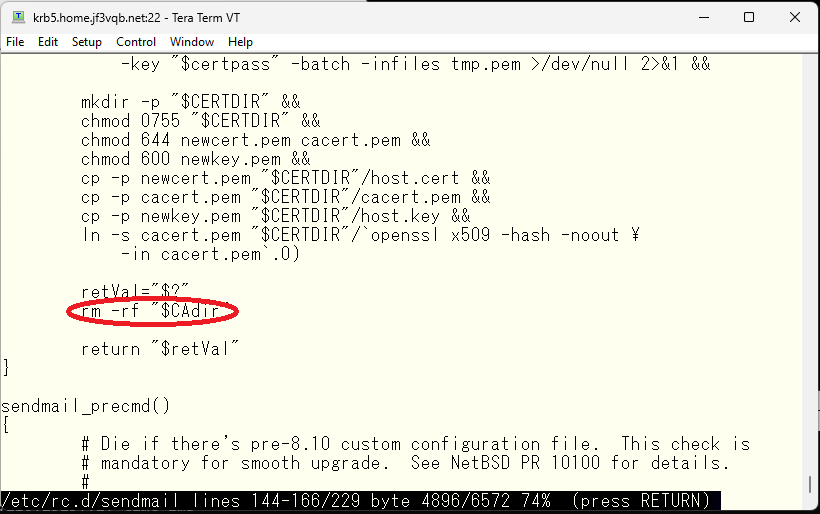
The temporary directory is determined by the mktemp command, which creates a directory with a name like tmp.xxxxx in the /tmp directory. The xxxxx part is different for each server or for each execution of the mktemp command. The directory should contain the openssl.cnf file, which can be used to work with the necessary certificates. The exact name of the directory may not be known until the modified script is run, but it is likely to be the only one present immediately after the server starts.
これで openssl.cnf ファイルは入手できました。次は各サーバー共通のなんちゃって認証局を作る準備を行います。ディレクトリはどこでも構わないのですが、メール関係なので /etc/mail/CA を使用したいと思います。ディレクトリ構造はこのようにします。
Now that you have acquired the openssl.cnf file, the next step is to prepare to create a common pseudo-certification authority for each server. The directory doesn’t matter, but since it is related to email, I would like to use /etc/mail/CA. The directory structure will be like this.
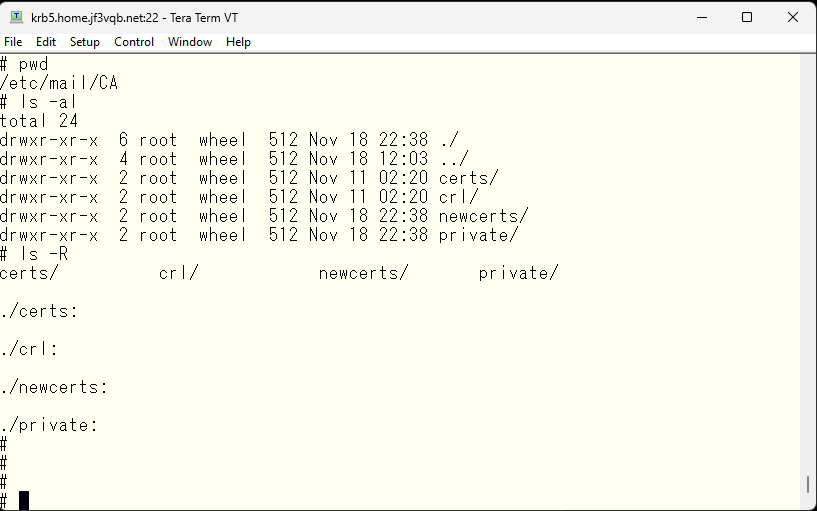
Create three files in this directory.
- serial: The serial number of the certificate is stored. The initial value should be set to 01.
- index.txt: The contents of the certificate are recorded. The initial value can be empty.
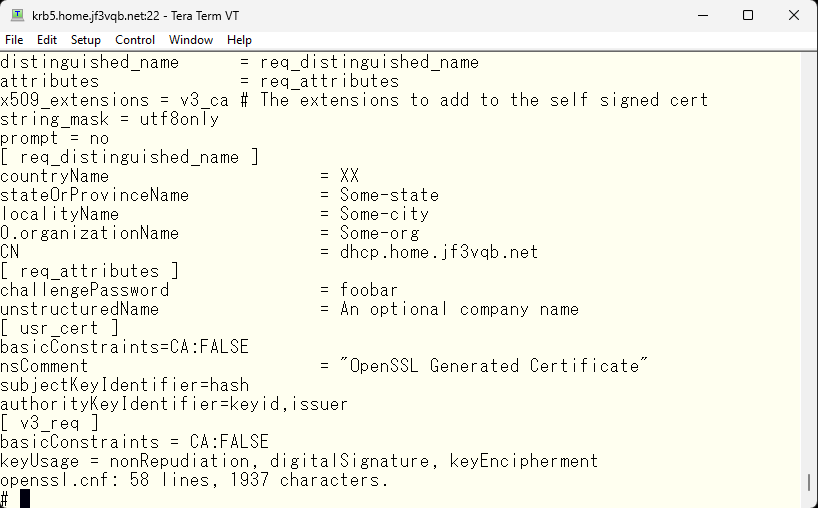
- openssl.cnf: Execute the modified /etc/rc.d/sendmail file and copy from the temporary directory obtained. The contents will be exactly the same regardless of which FreeBSD it was created on, with only the CN part that specifies the machine name being different.
Now, let’s create a self-signed certification authority using these files. This command line can also be created from the /etc/rc.d/sendmail file. This command will finish in a moment.
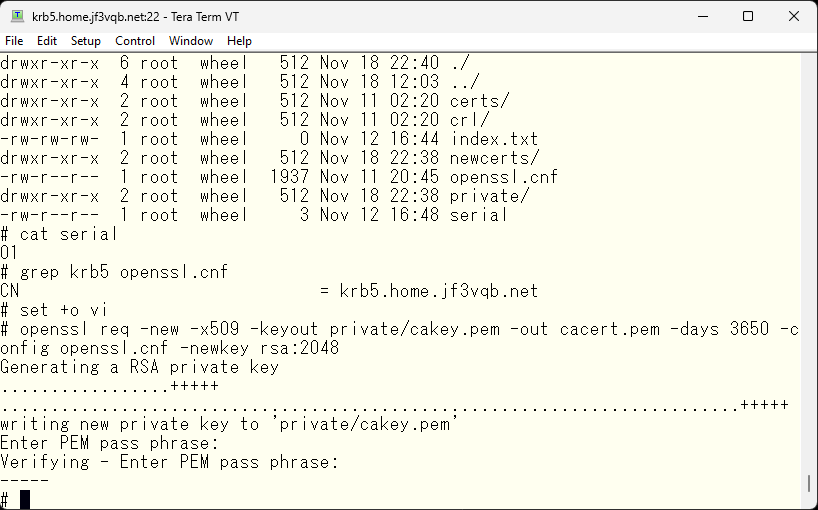
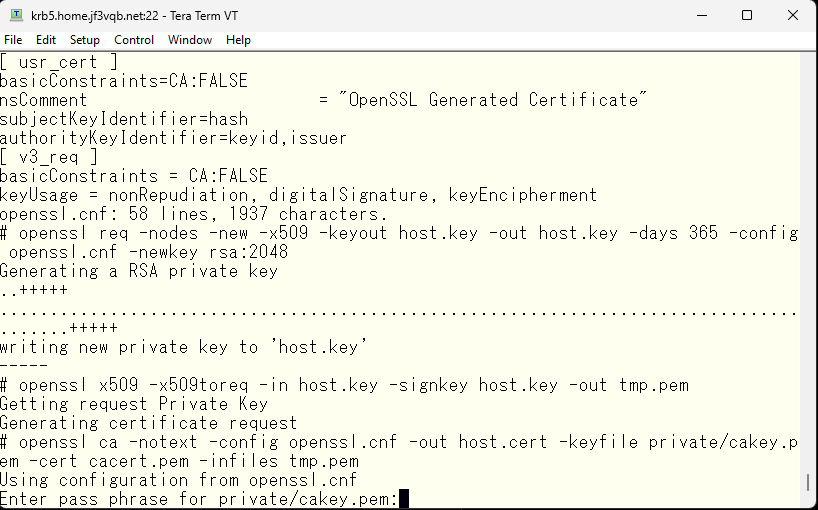
Next, create a certificate for use on server krb5. This also finishes quickly. The CN in the openssl.cnf file specifies krb5.home.jf3vqb.net, so it becomes the certificate for server krb5.
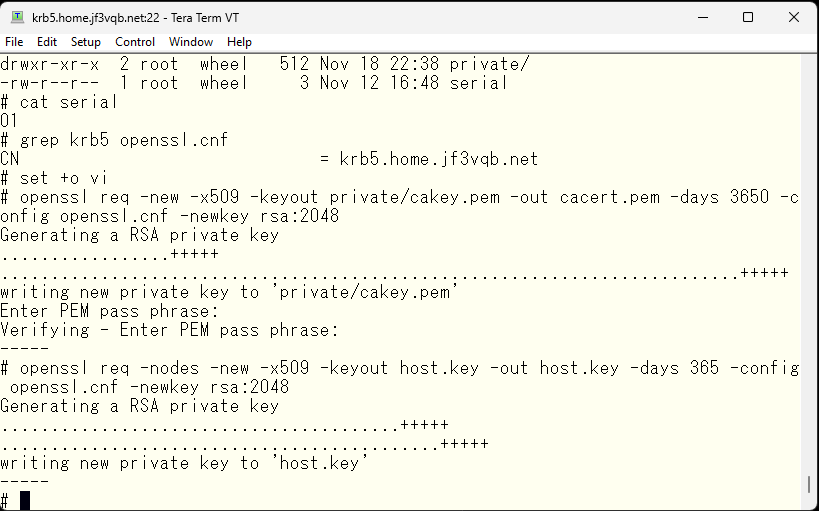
Next, sign the newly created certificate with the previously created self-signed certification authority. This requires input of the password registered when creating the certification authority.
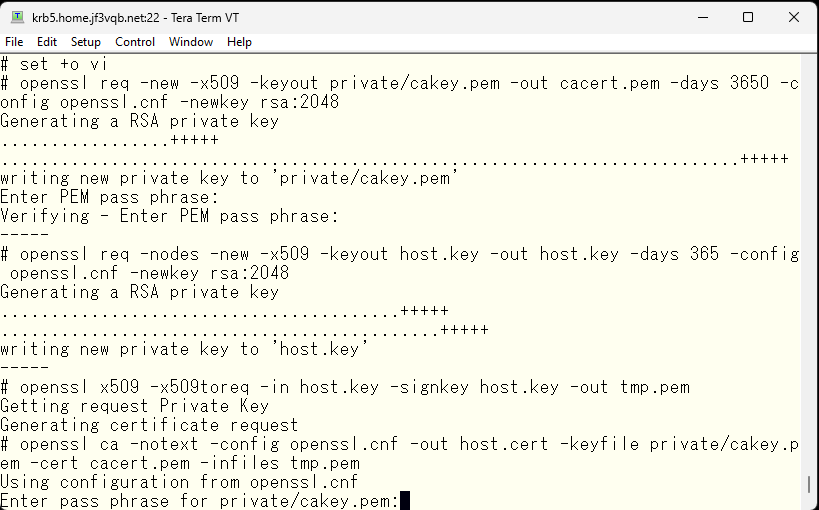
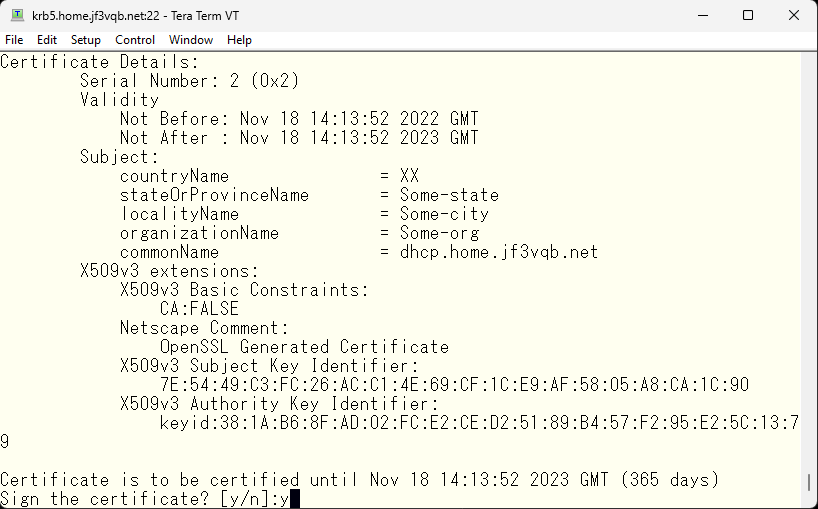
Next, sign the newly created certificate with the self-signed certification authority created earlier. This requires inputting the password registered during the creation of the certification authority. If the password is correct, you will be prompted to confirm that you want to create this data. If there are no problems, enter ‘y’ to continue. As you can see, with the country code being XX and the organization name being Some-org, it’s really a fake certification authority, so it might be better to rewrite more reasonable values in the openssl.cnf file.
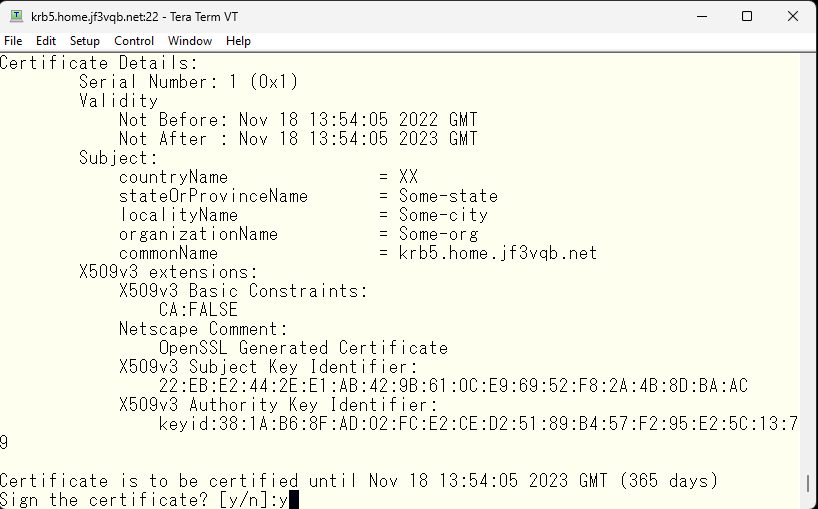
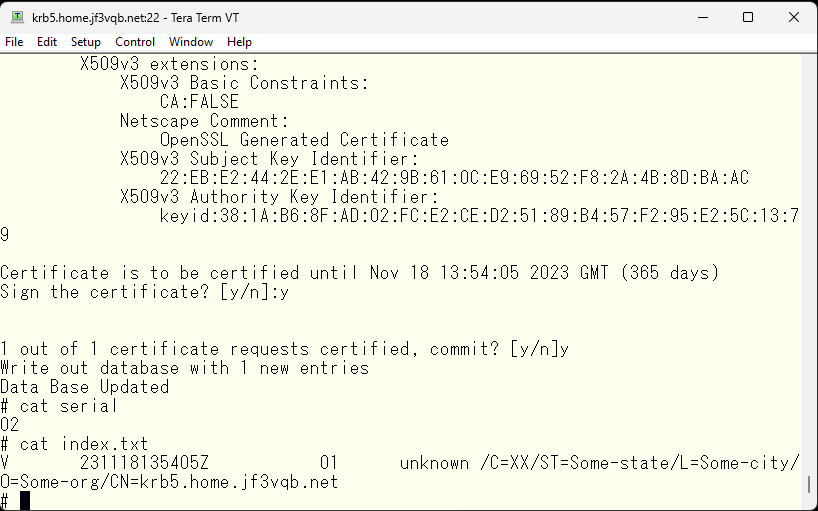
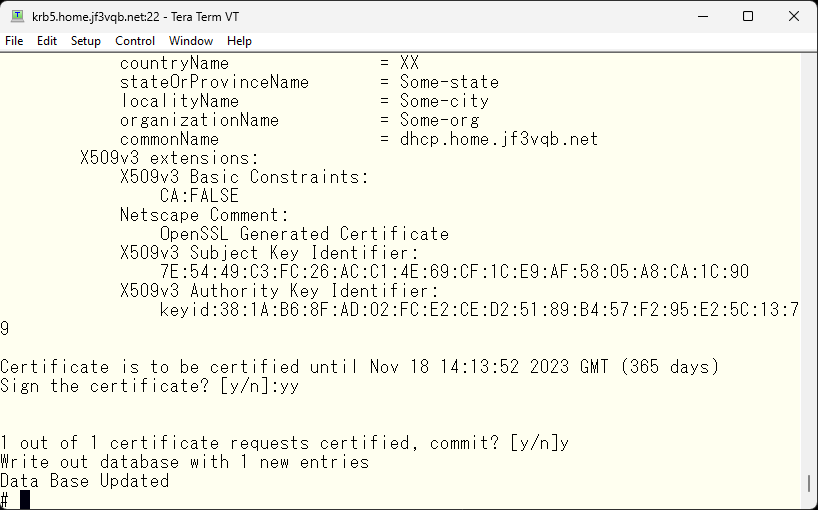
This records the signing of the certificate. The serial number will be updated to 02 for the next signature, and the contents of the signed certificate will be recorded in the index.txt. If you try to create the same certificate, you will be warned that it is a duplicate.
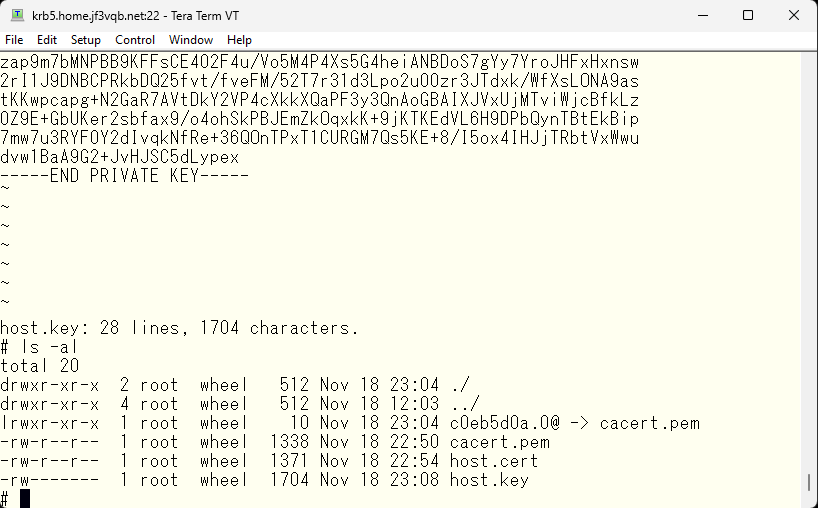
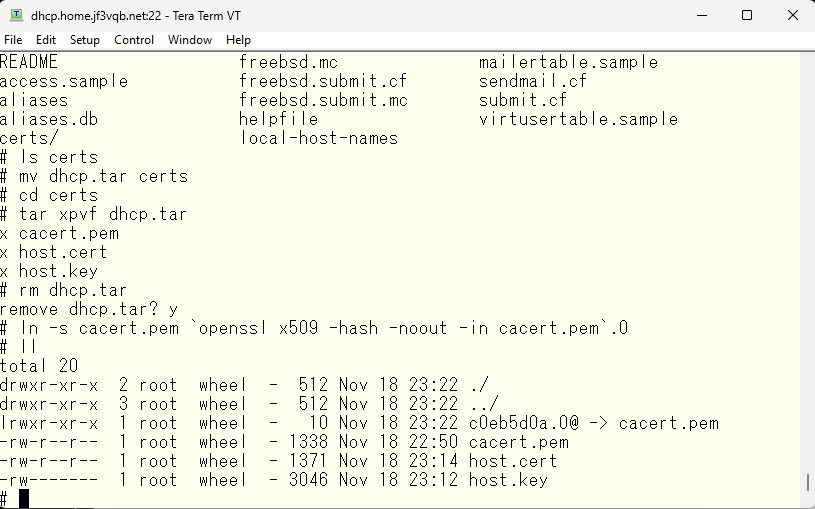
Next, copy the newly created host.key, host.cert, and the root certificate of the authentication authority cacert.pem to /etc/mail/certs. Then, create a symbolic link with the hash value of the root certificate as the file name. Finally, delete the old link files.
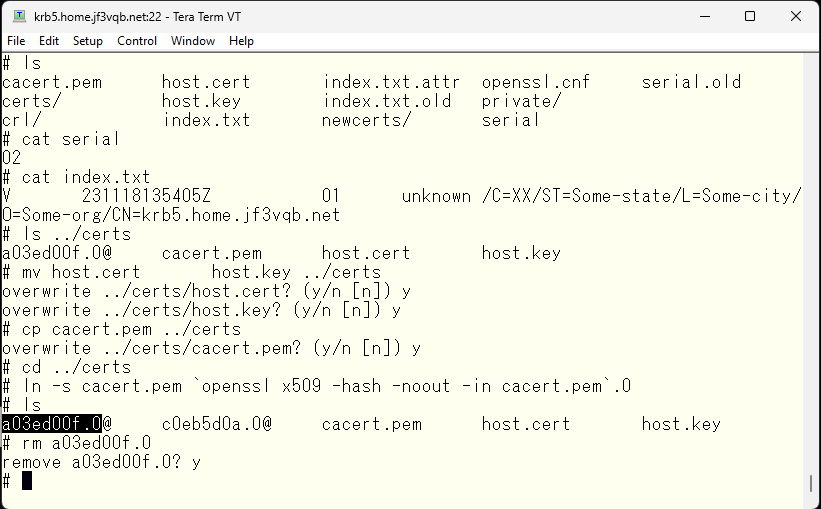
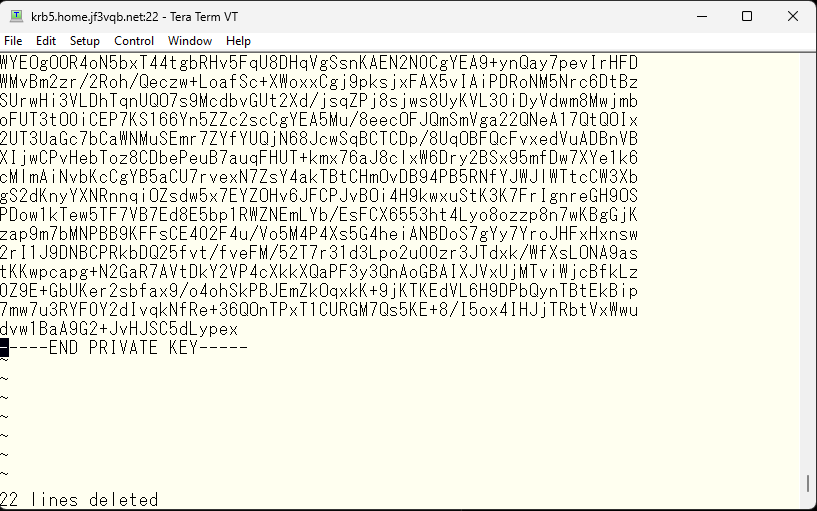
Next, check the file permissions. The host.key file contains the private key, so make sure that only root can’t read it. Finally, edit the host.key file.
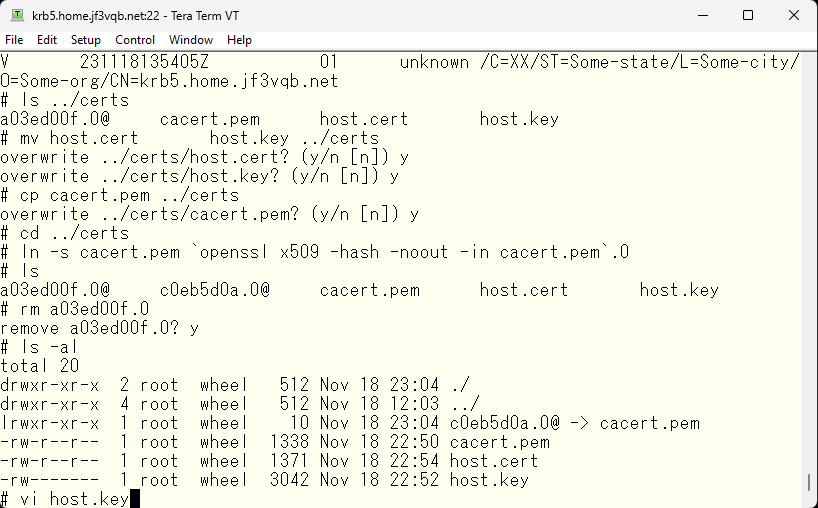
This file contains not only the private key, but also the certificate.
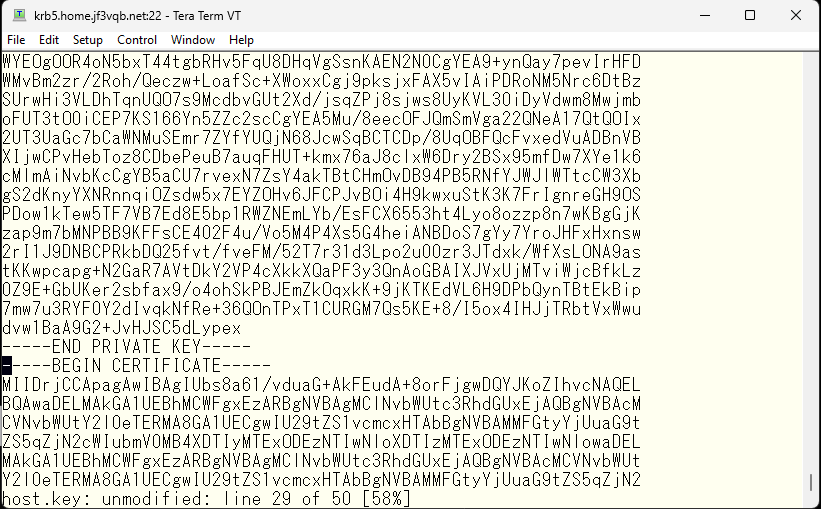
Next, we need to remove the certificate part of the file, as it is not needed.

If there are no mistakes, save it.
The contents of the /etc/mail/certs directory should look something like this.
Next, create and sign the certificate for the server dhcp using the self-signed certification authority.

Next, edit the openssl.cnf file to change the CN.
krb5 さんと同様に証明書を作成して、なんちゃって認証局で署名します。
Next, create self-signed certificate for the server dhcp and sign it with the self-signed authentication authority in the same way as we did for the server krb5.
After verifying that the CN is correct, continue by inputting ‘y’.
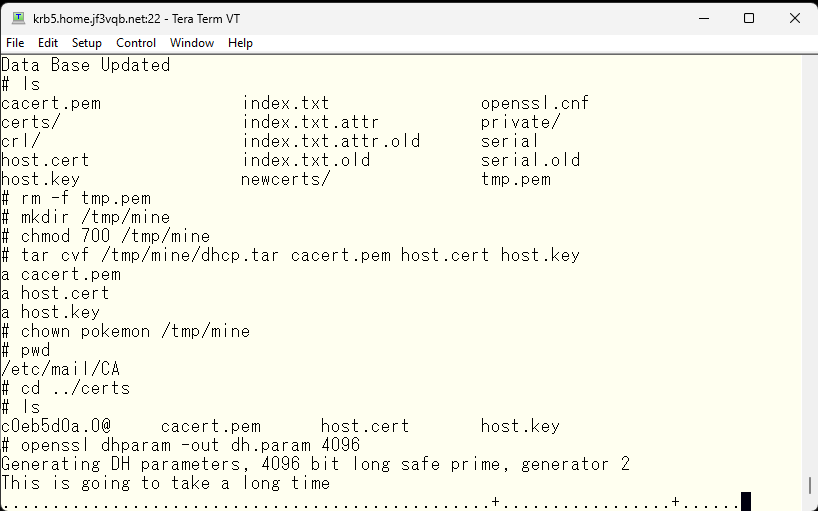
Delete the temporary file tmp.pem as it is no longer needed.

This is a remote host certificate, so it should be moved in a secure manner.
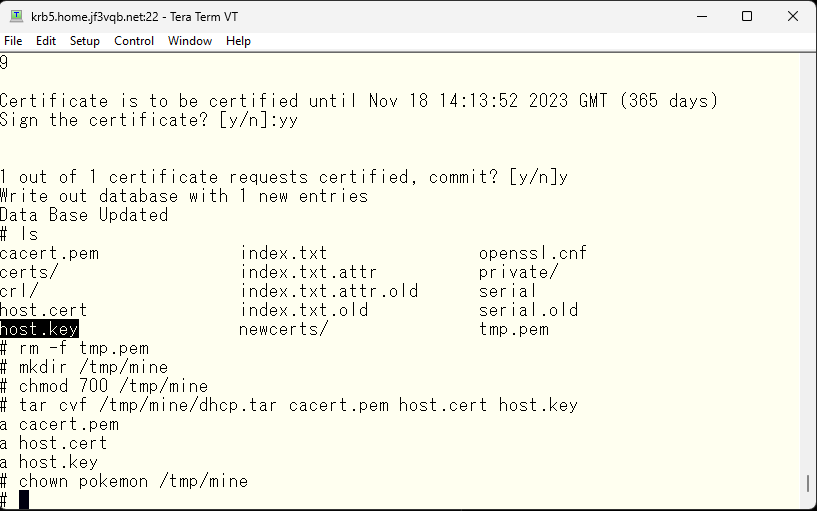
To securely copy the remote host certificate, you can use SFTP (Secure File Transfer Protocol), which transfers files over an encrypted connection.
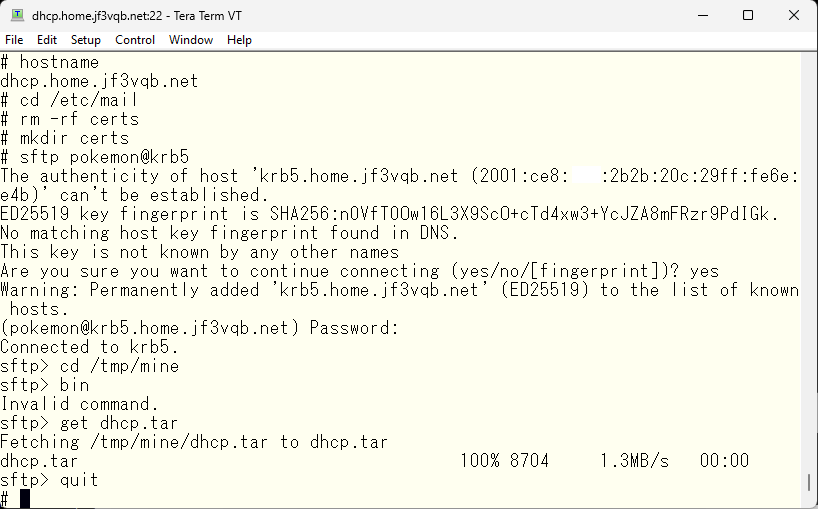
The steps from here are exactly the same as for the server krb5.
Finally, create the dh.param file. It takes a lot of computation to find a prime number, so it takes a lot of time. I think it took about 2-3 minutes on server krb5 running on a relatively new Windows PC, but it took several hours on an old 32-bit machine dhcp :).
Finally, the /etc/mail/certs directory should look like this.
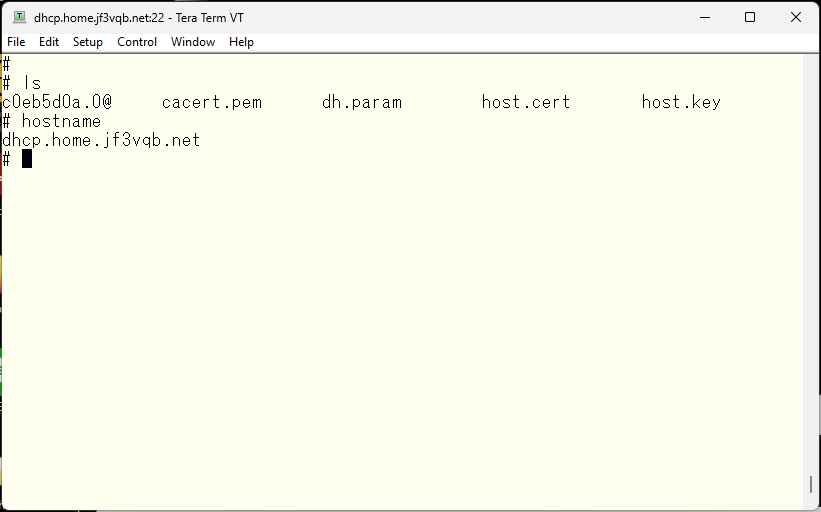
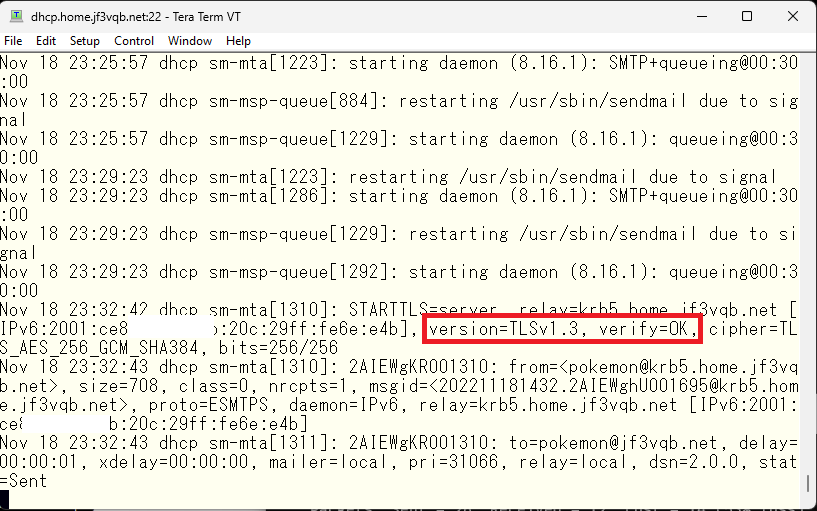
Finally, restart sendmail to complete the process. Check the logs to make sure there are no errors.
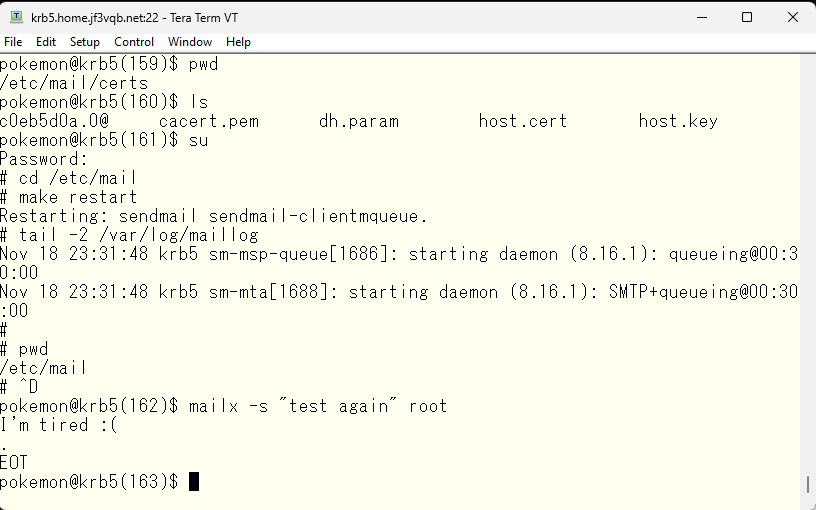
Finally, try sending an email to root from krb5. With the previous settings, it should arrive for user pokemon on the server dhcp.
We can see from the logs that the previous setting of verify=FAIL has changed to OK. This means that we can confirm each other’s identification with a self-signed certificate.
With this, the certificates of the server dhcp and krb5 have been signed by the same certification authority. By doing the same for others like the server pokemon or the server package, etc., it is now possible to use self-signed certificates for encryption and authentication.
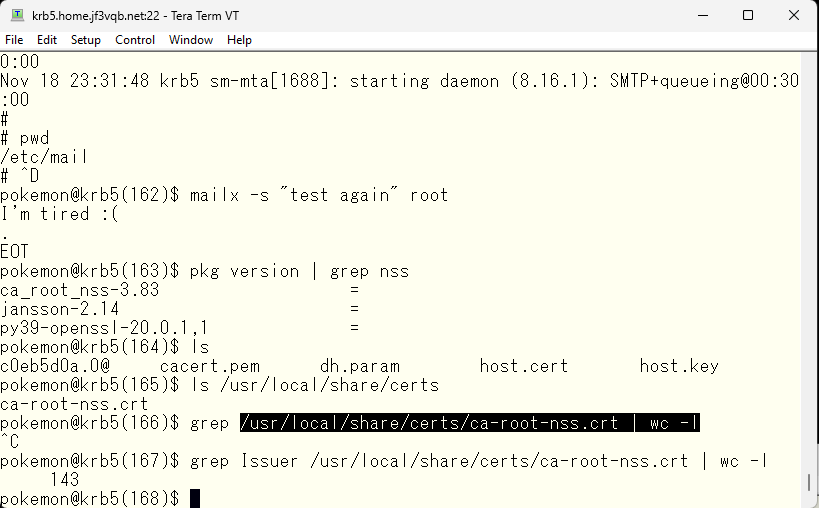
What do you do if you purchase a real certificate? Check the installed packages. Is the ca_root_nss package installed? Well-known root certificates are included, so use them instead of cacert.pem.
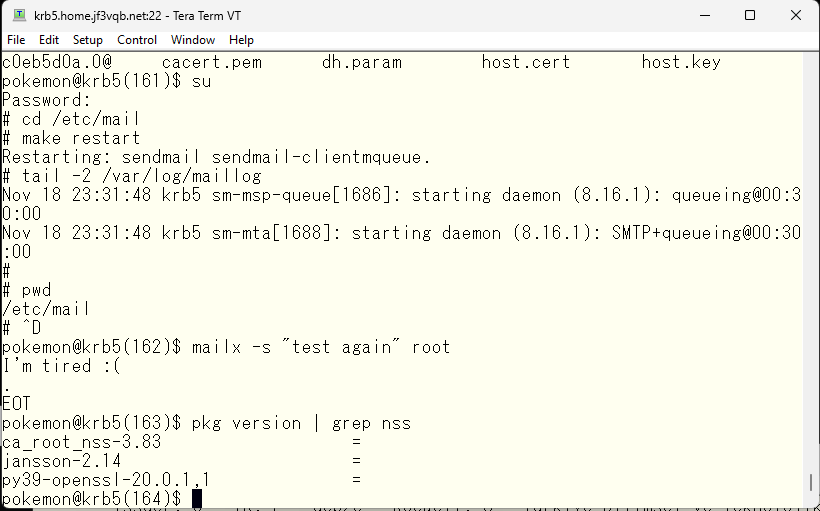
As of now, 143 regular certification authorities are registered in the certificate file. By creating a symbolic link from the cacert.pem file to the certificate file and creating a file name with the recalculated hash value, it’s all set.
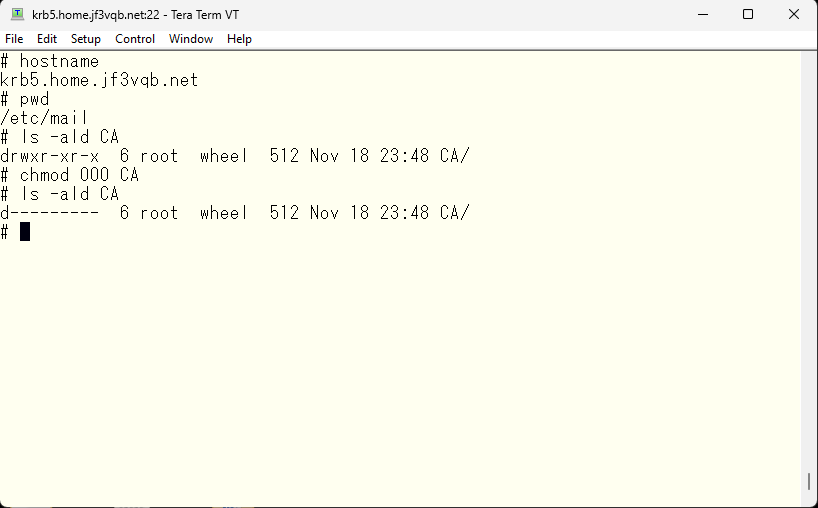
Finally, the /etc/mail/CA directory contains files that are best not to be publicly disclosed. Make sure no one can access them.
By the way, this mail server will be completed so that it can send and receive emails for now, but since it is just an experimental system, the certificate related information will be discarded after completion. Next time, we will try adding a DKIM signature to the emails.
Advertisement below