The original Japanese version is available here.
I have previously written an article on setting up WordPress using a database powered by MariaDB. This time, I would like to introduce monitoring tools for servers and networks based on SNMP. As most of these systems operate with a database system in the background (though I will only be discussing Cacti and Zabbix only), I will abandon using a local individual instance that eats up disk space and instead set up a shared database server. For the first part, I will introduce setting up a database server and transferring the WordPress database currently used for testing purposes from the server wordpress locally to the newly launched server database.
First, I installed a basic server with the hostname ‘database.home.jf3vqb.net’ and set it to receive a semi-static IP address through DHCP. The only applications installed were the my favorite pdksh, open-vm-tools-nox11, and samba416. Then, I installed the latest version of the mariadb server with a single make command.

During the compilation, we create a certificate for sendmail, set up a Kerberos client, drink coffee, and wait for it to complete.

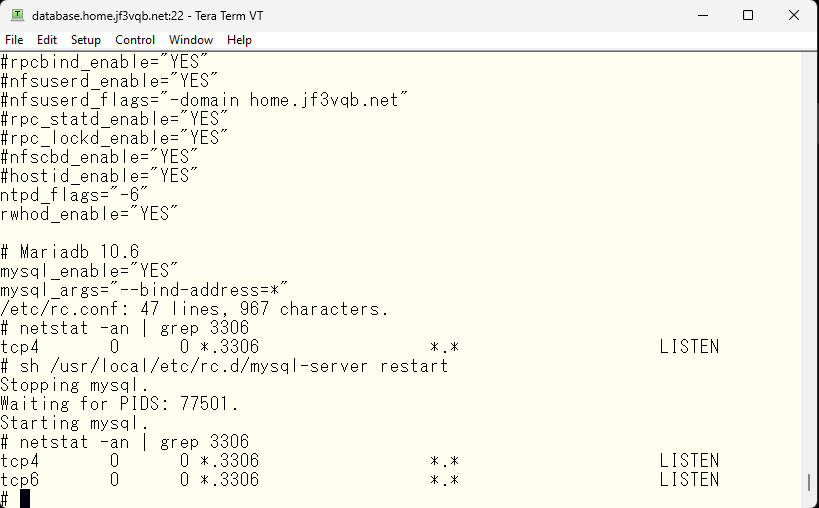
Check the startup script and set the variables in /etc/rc.conf to enable automatic startup.
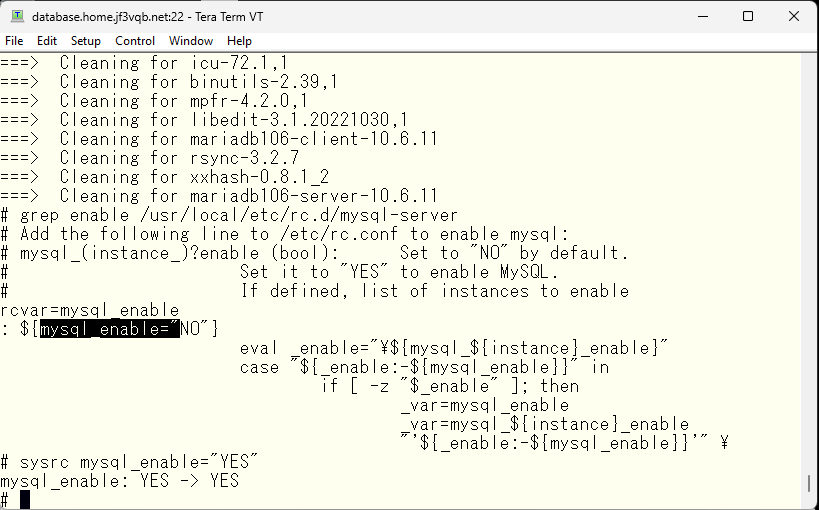
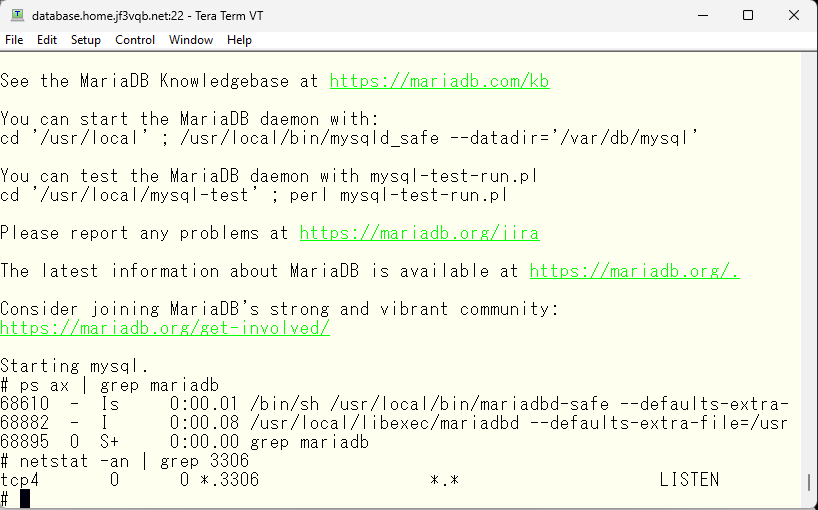
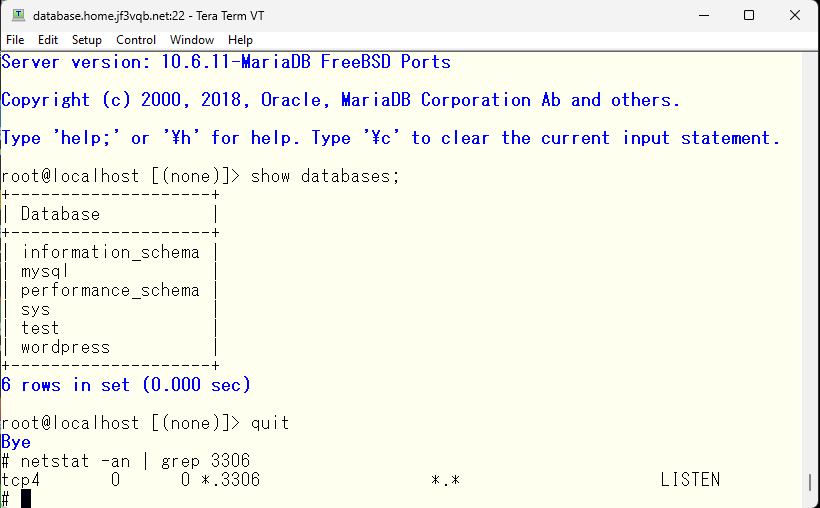
Confirm that the startup script is executed and the server starts up. At this time, make sure that TCP port 3306 is open. It is defined as the MySQL port in the /etc/services file. If this port is not available, the database cannot be used over the network.
Before moving data from the server wordpress, create a user. This user will access from wordpress.home.jf3vqb.net over the network, and allow access to all tables in the wordpress database. We can remove the database ‘wordpress’ here as it will be loaded afterwards.

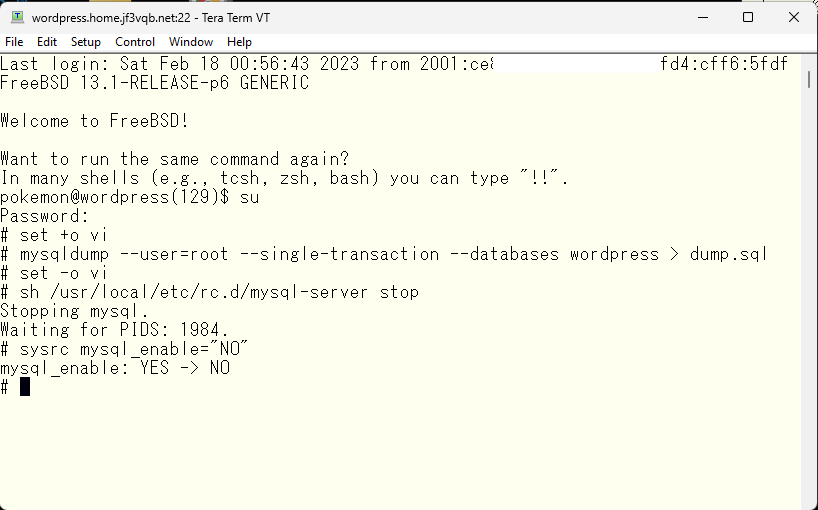
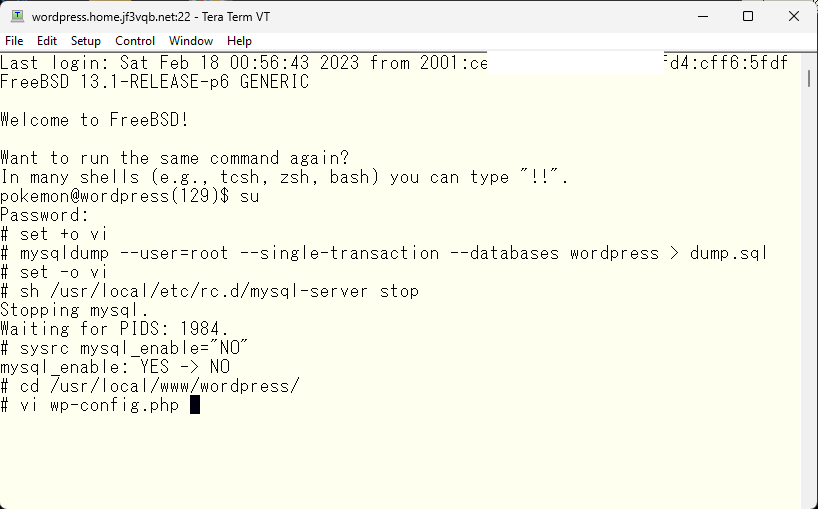
Now, let’s move on to the work on the server wordpress. First, dump the current database ‘wordpress’ using the ‘mysqldump’ command. Then, stop the database and make sure it doesn’t start automatically.
そして、wordpress のデータベースの接続先を変更します。
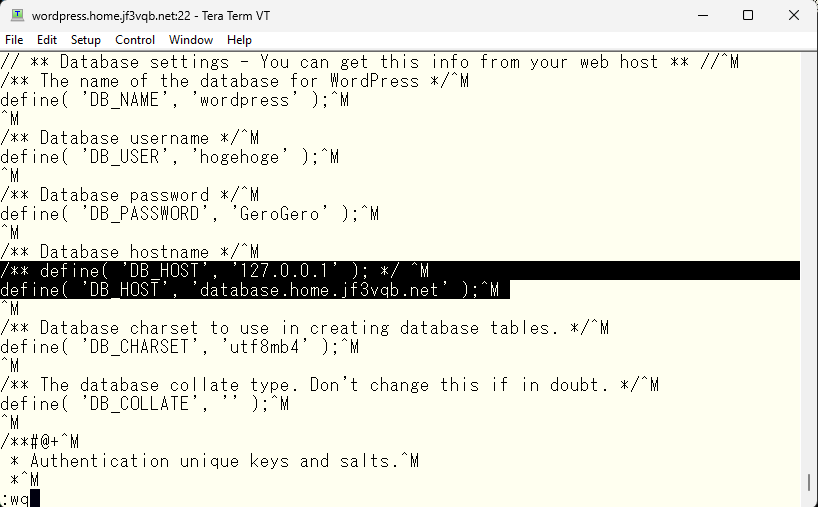
And then, change the connection destination of the database ‘wordpress’.
The connection to the database ‘wordpress’ is currently set to connect to the localhost at 127.0.0.1, but since this database is no longer available as it has been stopped, we need to change it to connect to the same data provided over the network from database.home.jf3vqb.net.
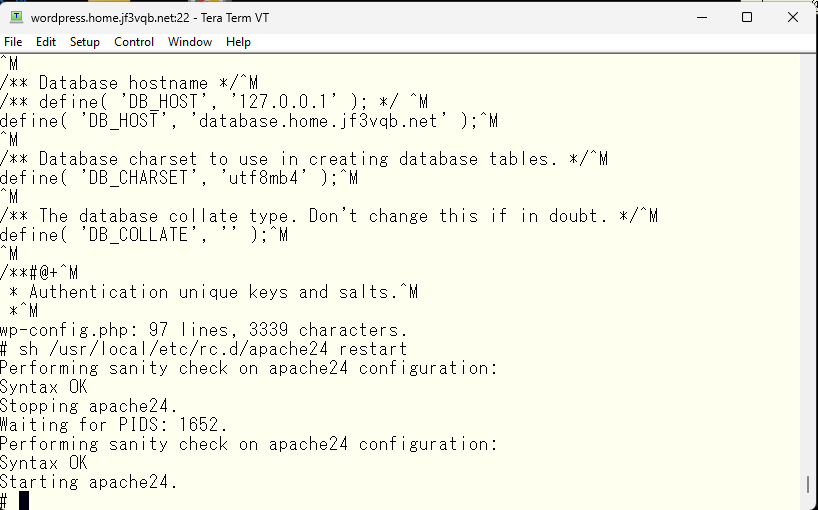
To activate this change, let’s restart Apache.
Next, let’s move to the database server. Import the file that was dumped on the server wordpress using the ‘mysql’ command. Since /home is shared via NFS, there is no need to move the file 🙂 After importing, confirm that a database named “wordpress” has been created.

I looked into why the server with dual stack has IPv4 only, and it doesn’t quite make sense to me, so I will do some research and will make some adjustments later accordingly.
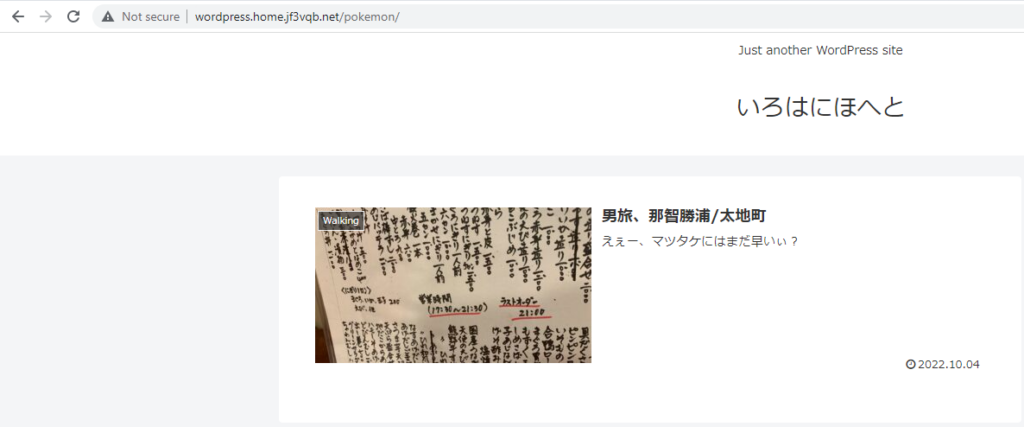
Well, the mariadb on the server wordpress has been stopped. If you try to open the test page in this state, does it look the same as before?
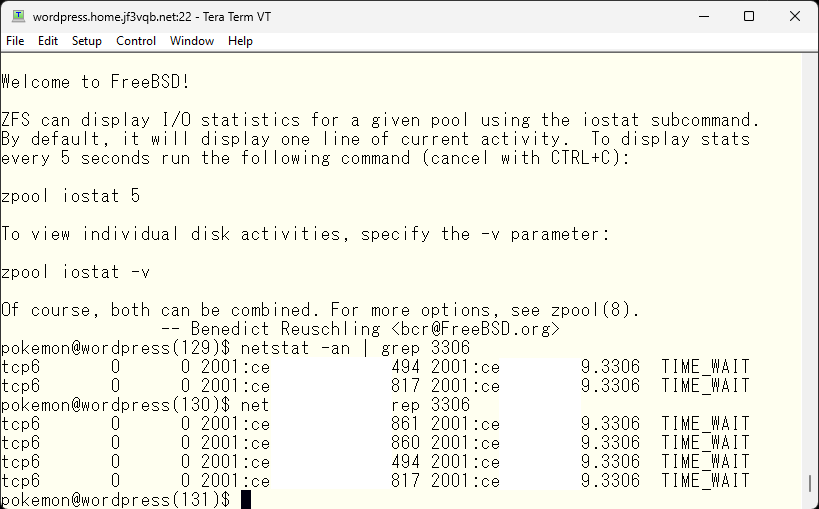
Is there any indication that port 3306 was connected to over the network?
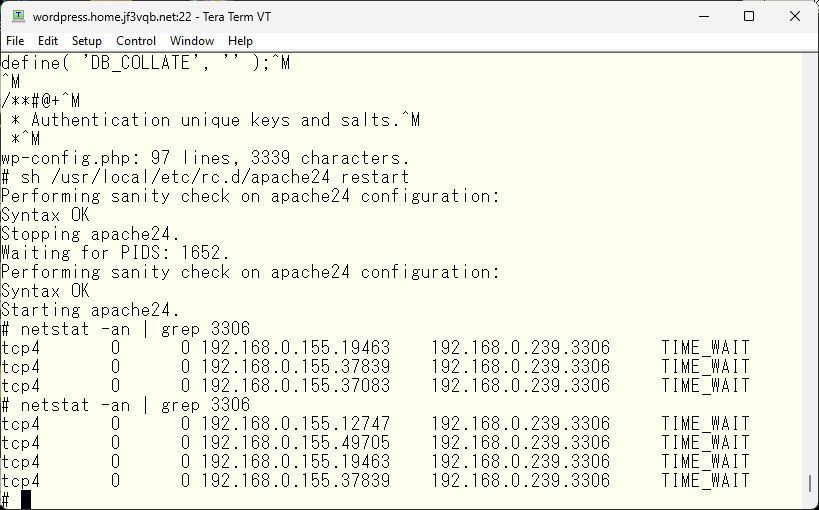
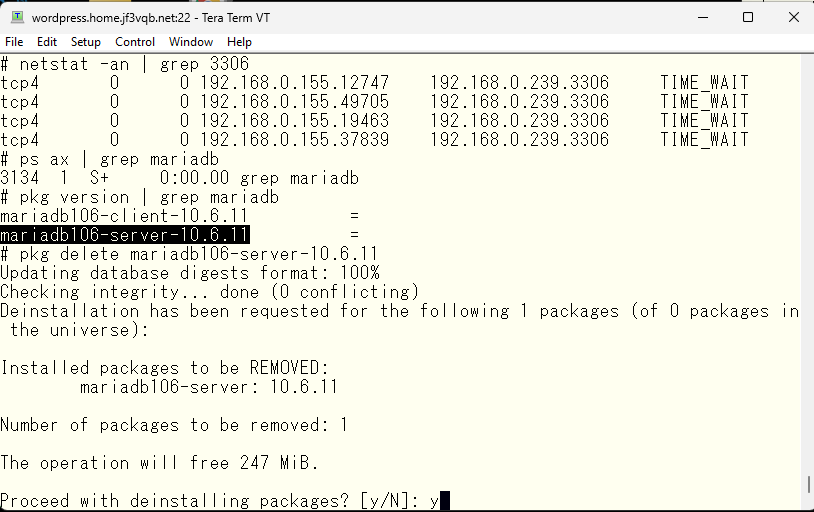
If there are no issues, the mariadb server on the server wordpress can be uninstalled and database files can be deleted as well, since they are no longer needed.
I wanted to use IPv6 on this dual-stack server, so I tried to read the manuals in the internet. However, before doing that, I did search in google anyway. I found mysql manual instead of mariadb, since they have similar basic usage. According to the manual, I need to specify the address to bind to with an option, so I looked for usable options in the startup script.

“mysql_args” seems usable, so let’s specify the options in accordance with the manual.
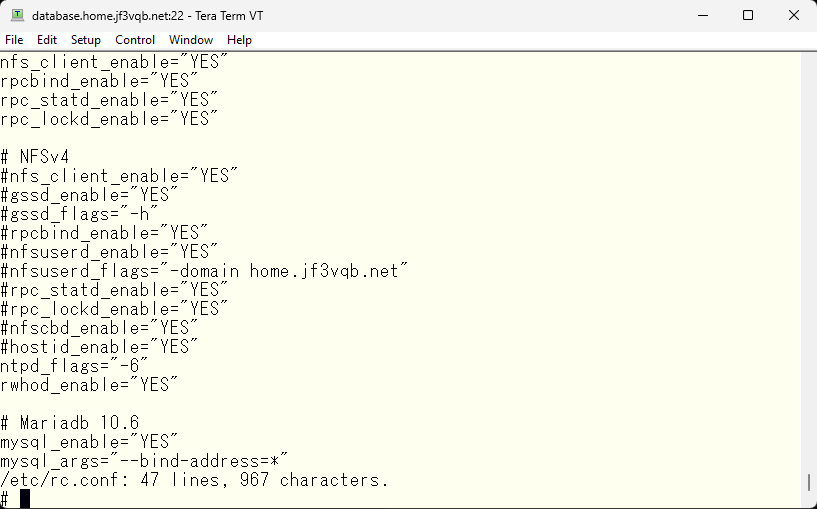
And then, let’s try restarting the database. Looks good 🙂
I will also confirm whether IPv6 is being used on the client side. This looks good too.
We are now ready to share the database. In the next session, we can introduce Cacti or Zabbix.
Advertisement below